mostly foodstuffs

Fall Preserving: Grape Jellies and Other Tales of Grapeness

You may remember that this year I've been so inspired by Linda Ziedrich and her book The Joys of Jams, Jellies, and Other Sweet Preserves that I've made nearly all of my jams and jellies this year without commercial pectin. I love the textures of these preserves so much more than their boxed pectin counterparts, and because they usually have less sugar, the flavor of the fruit really seems to shine through in an exotic way.


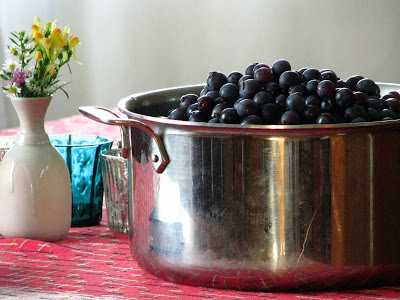
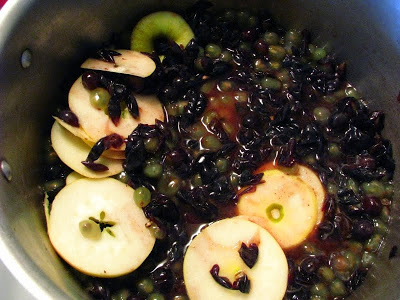
I have loved her book so much, that all season I felt like I first procured the fruit, and then turned to the section discussing the fruit to decide what to do with it. When I got a half bushel of Concord grapes from my Parents, I had already earmarked enough grapes for one batch of boxed pectin-free jelly, an amount for drinking vinegar, and some for grape molasses.

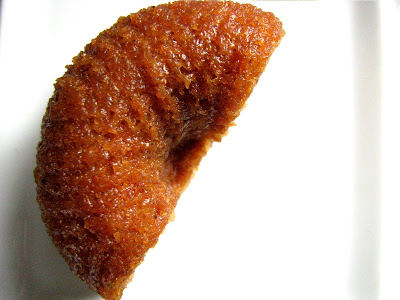
I have never really heard of grape molasses, never have I tasted it or do I have any idea what the finished texture should be like. In fact, my finished product is still in a bowl in my fridge (about a week now), since I am still unsure what to do with it. It's riddled with tartaric acid crystals, but it is also thickened, almost "pulpy", and painfully grapey. There is no added sugar, so the grapeness of the grapes is just really intensified and luxurious. Just lifting the lid makes the air feel purple.

I may take it out later today and boil it down a little more, I may can some of it into small jars for gifts - or I may just keep it all in the fridge and commit to eating it over the next 6 months myself. Yesterday, I cooked down a grocery bag full of Cortland apples and turned them into sauce, I'm waiting until tomorrow to can it all. If I can find a definitive authority on the acidity of the Concord grape, I may add some to my pints of applesauce. The idea of purple applesauce is very exciting to me!


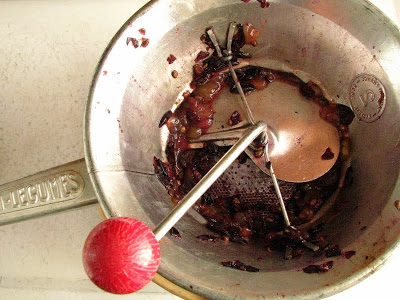
an old French food mill that my Mom gave me: how I derived my grape must for the grape molasses, since I have no fruit press.

With several fruits I've worked with this Summer, I've made a drinking vinegar that I have been in love with. So far the cherry vinegar is my favorite, but I have a feeling this grape vinegar will take a close second after I strain and sweeten it. I have used the same method for each fruit or berry, one outlined in the River Cottage Preserves Handbook. I don't cook down it into a more syrupy vinegar, instead I barely heat it - just enough to fully dissolve the sugar. Since I use raw apple cider vinegar, I am able to keep it raw this way. It's great on salad, but I have to admit, I really have just been drinking it 2 tablespoons at a time in sparkling water. (The elderberry version, I save for when I feel a cold coming on. I'm convinced that it shortens the duration of a cold or prevents it from fully forming altogether. When I took it 2 times a day after my first cold of the season was underway, my cold was gone completely after 2 days. I'm not making it up... and I hope it wasn't a fluke!)

To make it, soak 2 1/4 lbs. of fruit or berry in 2 1/2 c. of raw cider vinegar for 5-7 days. Strain out the fruit (I press it to get all the juices). For every cup of vinegar, add 1 c. of sugar and heat just enough to dissolve the sugar. Yes, it is sweet, but you don't need much to flavor a drink or a vegetable, and you can comfort yourself with the idea of consuming raw, healthful vinegar.

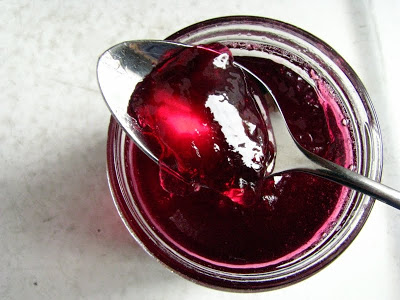
With the molasses and vinegars done, I turned to the natural pectin of green apple to make a spectacular small batch of grape jelly. The flavor is so clean and it's so gently sweet that I can't help but be smitten. I have a precious 3 jar batch, plus just a tad shy of a 4th full jar of runover. The set can only be described as lovely and old fashioned. I'll have to grab more grapes next year, since I prefer this tenfold over conventional high-sugar box-pectin grape jelly.


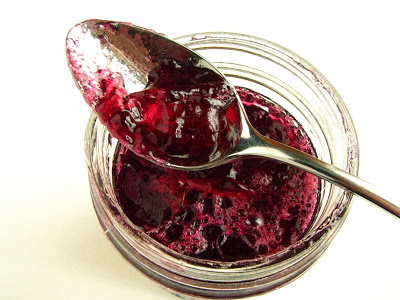
natural pectin grape jelly.

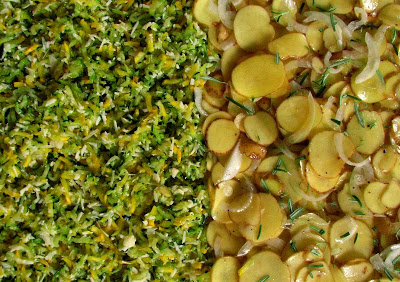
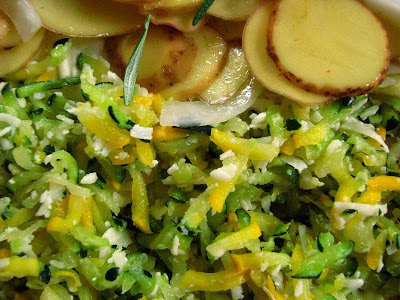
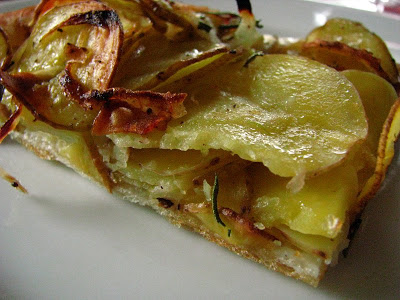
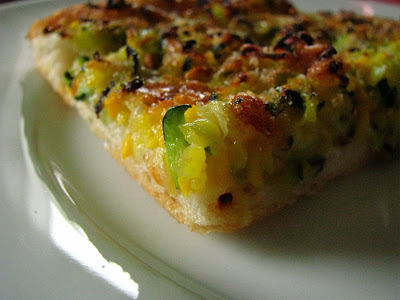
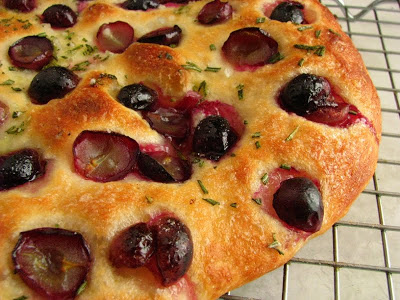
With just a few pounds of grapes remaining, I made this grape focaccia from Mostly Foodstuffs. I had been looking forward to it, and I wasn't disappointed. It's better than any focaccia I've ever eaten; I was addicted to the sweet/salty/grapey combination, and how it all pulled together so well because of the rosemary. It was also the fastest yeast dough I've ever made. It may require your lazy attention for the first 30-40 minutes of it's life, but it is so self-sufficient it practically makes itself. If you can get your hands on a cup of Concords, make it while you can!


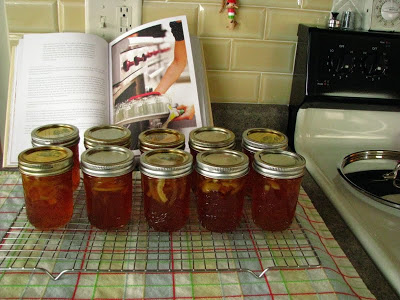
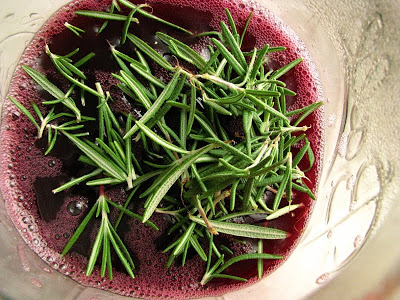
The combination of rosemary and Concord grape was such a revelation to me that I immediately soaked the last of the grape concentrate I had already made in the fridge with 3-4 large sprigs of rosemary needles. I let it sit another 24 hours before making it into a conventional, high sugar jelly. I wasn't sure I'd like it as well after having such a spectacular luck with the boxed pectin-free jelly, but I did. It was very sweet and the texture was different, but it did taste like rosemary in that resinous, "what is that flavor" kind of way. I got 8 jars, too... perfect for gift giving (with some aged Wisconsin cheddar, I think).


Concord Grape and Rosemary Jelly (adapted from the Certo liquid pectin insert)
7 half pints, plus runover
  • 4 c. Concord grape concentrate (made from 3-4 lbs grapes, steamed and strained through a jelly bag)
  • 3-4 large sprigs of rosemary, needles removed
  • 1 pouch liquid pectin
  • 7 c. granulated sugar (1341 g.)
Stir rosemary needles into the grape concentrate, and let sit for 24 hours to infuse. Strain out the needles.

Sterilize jars (I used 8 half pints). I like using the oven for sterilization now - I put the clean jars on a baking sheet and slip it into the cold oven. Heat the oven to 250 and hold for at least a half an hour. Then, I grab the jars a couple at a time as I'm filling with a potholder.

Put the grape concentrate and sugar into a preserving pot. Heat and stir over medium high heat until the mixture comes to a rolling boil. Add pectin, and return to a boil for exactly one minute. (Refer to insert instructions.) Quickly ladle into sterilized jars, add lids and rings, and process in a hot water bath for 5 minutes. Remove to a resting towel, and do not disturb for at least 24 hours.


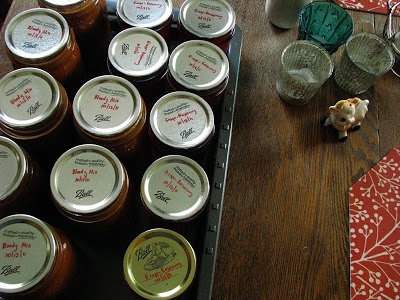
Interspersed with all the grapeness, I also managed to work my way through a bushel of tomatoes last week. I didn't need to worry about quarts of whole tomatoes or pints of spaghetti sauce, since my Mom did both of those for me. I felt like I had those tomatoes to really do whatever I wanted with, and since they were canner's seconds, I was just a little at the mercy of the big, watery, tomatoes. I settled on well-cooked-down things like another batch of my favorite Tomato Jam, a 3/4 batch of Classic Tomato Ketchup (a first for me, and I loved it!), and I made the last 8 lbs. or so into a mildly spicy vegetable "Bloody Mary Mix" which worked well with the consistency of my tomato variety. It seemed like a busy preserving week, but I was happy with everything, and my shelves feel considerably more full.

What continues to stand out to me is that Concord Grape and Rosemary Jelly, and I think in the depths of Winter I can probably make a plain focaccia bread and slather it with the jelly to reminisce the flavor of this Fall's flavor epiphany.

Lemon (Daydream) Marmalade

I'd feel funny saying that I worked for 3 days on this lemon marmalade only because it didn't seem at all like work. My house has been transformed into a lemony clean paradise as the skies above are overcast and sun is scarce. In the world of preserves, marmalades are a bit famous for being fussy and time consuming. They are also a paradox of flavor, being sweet, sour, and bitter most of the time. That could be why they are some of my favorites to eat. I've read lately of some people dipping their spoons again and again into their various nut butters and homemade versions of "Nutella", but I'm certain that my future sneaky spoonfuls will contain fat dollops of this lemon marmalade instead.


I actually didn't plan on making any marmalade this year, since I have one jar left over from my canning party with Lo and a fully stocked preserves shelf in the basement. When my hold on the Blue Chair Jam Cookbook by Rachel Saunders came in at the library (and I was as impressed both with the weight and size of it as I was the photography), I set out scheming to make this lemon version shortly after reading about it. One particularly interesting thing about Rachel's method is that she uses the oven both to sterilize the jars and lids and to can the finished product. I wasn't sure about that, but decided (after a brief consultation with Julia) to give it a shot.

I'm pretty sure I had two different kinds of lemons, some were thinner skinned and smooth, and some thicker and dimply. I can't claim to know much about lemon varietals, since they don't grow in Wisconsin, unfortunately. I love reading things like this where lucky people have things that I can only imagine growing myself dropped in their laps. It's curious that I recall such instances as if they happened to me. I know I had *wished* that I could make Deena's lemon thyme marmalade last summer when I read about it. But like most things, I forgot about it when "lemon season" has hit me here, right now, in the broadest part of the Winter.

How do I know it's lemon season? I make an assumption based on when my co-op has specials on citrus; I got my 6 lbs of fruit for around $8.50, which works out to about 65 cents per jar for organic marmalade (if you don't include the sugar price).


Rachel's method is easy. The work is shared with three days, but each day's work is rather light. Day 1: soak cut half of the lemons overnight, Day 2: boil soaked lemons to make lemon juice and strain overnight and cut more lemons into thinly sliced eighths and let them soak overnight, then Day 3: add sugar and a touch of fresh lemon juice to the past 2 day's labors and boil until you reach marmalade.

I will say that I admire canners who develop recipes. It seems to be a highly specialized art. I can follow instructions (and in the event of canning, follow them without addition or subtraction which is usually hard for me), but I'm not sure I would be cut from the cloth of precision as canning writers are. This recipe delivers what she says it will, it is very pretty and hard to improve upon. I'll say that it is a miraculous balance of flavor that stems from the patience in 2 days worth of various soaking periods. There is bitter, there is sour, and there is sweetness. And, when you catch a piece of peel and bite into it, it is pure summertime even in the depths of snowy winter.


perfectly gelled.


I've actually only made marmalade one other time, with the aforementioned Lo. While the flavor was really good, the set was not. We did not, however, employ the method of spoons. Prior to making the marmalade, stick 5 spoons in the freezer to get good and cold. When the time comes to test for the gelling, you can pour a little onto the spoon and put it back into the freezer for 2-3 minutes. If properly set, it should not run off the spoon. I liked this step immensely, especially since I got to eat the spoonful after the check. It took me 3 spoonfuls to determine the set, and a full hour and (almost) a half to get to that step.


the method of the spoons.

Cooking down marmalade when the snow was falling was especially enjoyable. I made my coffee and pulled up a stool to lazily keep an eye on it, stirring every so often. I thought about the Italian tradition of serving espresso with lemon peel on the side of the cup. I took hipstamatics using my new free film in the app upgrade I downloaded this morning. I took apart and cut hearts out of an Alterra coffee bag, that I intend to string up and hang somewhere. I in general gave thanks that I am a stay-at-home mami that can do what she pleases, so long as the house is clean and so forth. And, I daydreamed of Summer and it's business of growing and walking and playing: those things I love that prevent me from sitting down at the counter for a couple of hours and tinkering with a jam that I don't even know will work.


thankful for cameras.

The recipe as written did not give an exact amount of lemon juice liquid that should have been extracted from the fruit during the process leading up to the boil. I think that the water just needs to evaporate to the proper stage, and so no exact amount is probably needed. My liquid level decreased by a good 3 inches in my stockpot. Because I kept testing with the spoon method, and because I had pulled up a chair to properly observe, I could actually tell when the boil changed from aggressive bubbling to more subdued activity.

All the while, I had my 10 clean jars with lids in a 250 degree oven. This technique of sterilization and canning I have never done. It actually seemed like something that was too good to be true. No boiling water turning my fan-less kitchen (and the rest of my smallish house) into a sauna? I love this method! I had only one that didn't seal, and I added it to the extra three I had, so I have some to devour straight away. Obviously, I have a couple unsealed to give away as well. This is the time I break out my favorite strange canning jars that I can't really use to preserve in - one triangular jam jar that Sasa gave me is my favorite:


It originally contained a Croatian fig and chocolate jam. Next time I see her, I'll give her this unsealed jar of lemon marmalade knowing I'll get it back again to fill with more surplus jams or jellies. I'm telling you, it's the simple things in life that give me the most joy.


peels seemed to rise to the top, but the gel is set so no matter.

I confess, that so far I've only read through the beginning and "Winter Through Early Spring" sections of the Blue Chair Jam Cookbook. I was smitten, my heart at first purchased with luxe paper and pictures, but now also with a sound recipe written very well. Now, I busily page through the rest of the book and drop it into my bottomless Amazon cart. I daydream of warm weather, thankful for California and it's bounty that provides me lemons in January.

I pause, and suddenly shutter at my thoughts: at the end of this summer, I will have officially hit my mid-thirties and I daydream some more that I'm still 23. But then I lighten at the hope that my first ever knit sweater should be complete by that time (I cast on yesterday!). This is what happens to me in the winter. Roller coasters of retrospect and expectation move in when I have time on my hands. I try to remember not to dream it all away and be thankful for each second.

Cortido: My First Experiment with Lacto-Fermentation

I actually intended to make a vegan (even raw vegan) version of this recipe this morning to continue on in my Vegan Monday postings, but that's just not what ended up happening. I was finally able to catch up on a little bit of reading yesterday afternoon, and read this post by Mostly Foodstuffs. Deena is so right in her observations that her dog has abandoned toys that go untouched until another animal decides it's play-worthy. I don't currently have a dog, but I know it sure works the same with children, and also with me in the realms of bookmarked recipes.


I've had this raw vegan recipe earmarked for awhile now, after I first saw it on the website Finding Vegan. I love vinegar, I love cabbage, I love things that can be eaten on everything... I then knew I would love this recipe. Healthy Green Kitchen added apple, kale and vinegar to Sally Fallon's original version that was published in Nourishing Traditions. This book kind of has the "dog toy" effect for me. I have the book, I've paged through a great deal of it (though haven't read it cover to cover), but until I actually see the end result made by someone else, or taste it, like I did at Annie's class, it is a book that wrongfully often slips my mind.

Sally's version includes whey, which isn't necessary but does kick-start the process. Since I've been having a steady harvest of whey, in the end I opted to let the whey do the inoculating rather than make the vegan vinegar version.

According to Fallon, cortido is originally an El Salvadorian ferment made with just a few ingredients, traditionally including pineapple vinegar. While I certainly want to try making pineapple vinegar sometime soon, I opted for the "quick" approach that didn't use any vinegar. Just a 1/4 cup of whey and a tablespoon of salt, and all the liquid needed to keep the cabbage completely submerged was naturally produced.

My favorite part of the whole process was beating the mixture with a spoon for a full 10 minutes. I rather like when kitchen work starts to feel aerobic, it makes me feel like I'm being extra healthy.


Before I added the red jalapeno...

My version of this ferment is different from both the Fallon and Healthy Green Kitchen versions in that I had to add more heat. I am positively addicted to spiciness, and tend not to be happy unless at least part of my day's meals causes my tongue to burn, or preferably, my eyes to sweat. I used the leftover half of a hot, green wax pepper that was in the CSA box last week and a whole, overgrown red jalapeno, in addition to adding the full recommended amount of red chile flake. I wanted to add garlic, really bad. But, I decided that I add garlic to everything, so maybe I should lay off in this instance. It's good, my friends, and it's only been fermenting for the morning. I can't wait until it ages in the fridge...

Fallon's recipe yields 2 quarts, but I got slightly less. Just pack tightly into clean, glass jars, to within about an inch of the top.

Cortido (adapted from Sally Fallon and Healthy Green Kitchen)
  • 1 large cabbage, cored and shredded
  • 4 smallish carrots, sliced
  • 1 large onion, sliced thinly
  • 1 T. Mexican oregano
  • 1/2 t. red chile flakes
  • 1 T. sea salt (I used Celtic Grey Salt)
  • 1/2 of a hot wax pepper, sliced
  • 1 large, red jalapeno, sliced
  • 1/4 c. whey (Fallon says to use an additional 1 T. salt if whey is not available, HGK uses cider vinegar instead.)
Combine all ingredients in a large bowl or bucket. Pound with a wooden spoon or a meat mallet for about 10 minutes to release juices.

Pack firmly into glass jars (canning jars are best), and press down tightly to release liquid that fully covers all the veg. Leave about an inch of space on top, and screw lids on tightly.

Let ferment at room temperature (about 72 degrees f.) for 3 days, then transfer to the refrigerator. It will keep for a long time.

As Fallon says,
"Lactic-acid fermented vegetables and fruit chutneys are not meant to be eaten in large quantities but as condiments... Some lacto-fermented products may get bubbly, particularly the chutneys. This is natural and no cause for concern. And do not be dismayed if a little spots of white foam appear at the top of the pickling liquid. They are completely harmless and can be lifted off with a spoon. The occasional batch that goes bad presents no danger - the smell will be so awful that nothing could persuade you to eat it. The sign of successful lacto-fermentation is that the vegetables and fruits remained preserved over several weeks or months of cold storage."


Of course, I couldn't help but have a tostada for lunch, topped with newly made cortido! It was made even better with a bit of strained homemade yogurt on top. The Boy-O and I had just got back from the pool, which sadly seems to have closed for the season. Just like that. No warning. Summer is as good as over. Fortunately with such fresh preservation methods as lacto-fermentation, I'll be able to extend my enjoyment of the summer harvest at least for a while. If I go through this version as fast as I think I will, I'll try the Healthy Green Kitchen version next time, though I'll still likely add some more heat. I just can't help myself.


The Lahey Project: Pizzas Potato and Zucchini.

Friday evening was a good occasion to knock out two more Lahey pizzas: Pizza Patate and Pizza Zucchine. I made two Lahey pizzas in one pan, a half and half pizza, since I have to carefully schedule the Lahey recipes I know won't be immediate hit with my Husband around the times when I have friends or family visiting. It works out splendidly, since I can be generous with the servings and not too gluttonous in my own consumption. Fortunately for me, Lahey pizzas are well designed to be both a bit unorthodox and extremely delicious - both happy mediums for casual dinner parties. And, I know that had he felt adventurous enough to try it, both sides of the pizza would have been a hit with my Husband, too.

(It is also a benefit that since the pizzas are all vegetable, lazy salad makers such as myself do not even feel guilty for only serving pizza and nothing else - well, except for the Mostly Foodstuffs Rhubarb Liqueur and Rhubarb Custard Tart! I have to get my rhubarb servings in when I have company as well...)

This week's CSA box had a pound of new Yukon Gold potatoes and zucchini, last week's box had a yellow squash and a sweet onion, so proudly all the ingredients (save the flour) are native to Wisconsin!

The potato side begins with a salt water soak. I have never soaked potatoes in salt water before, but it actually draws out some of the moisture, making the potatoes both crisp and creamy when they bake. Since the pizza bakes at a blistering 500 degrees, wafer thin slices of potato (tossed with olive oil, salt and pepper) turn golden and parched on top and stay creamy underneath - a combination that is satisfyingly hearty. A carnivorous eater would gladly add bacon, pancetta or prosciutto and never again order out for pizza. I'll save that trick for another day.


I soaked my mandolined potatoes for about 90 minutes, and meanwhile shredded 20 ounces of zucchini/squash, tossed it with salt and let it drain over a colander. I have a number of clean muslin bags in my kitchen drawer that I made from unbleached cotton muslin. I find that I use them for everything: from straining grapes for jelly to this tried and true technique of pressing the excess moisture out of the zucchini. I actually am able to get incredibly dry zucchini by loading it into the bag, then twisting and pressing it until it is virtually dehydrated. Coincidentally, I think the first time I employed this technique was to make the Mostly Foodstuffs Chocolate Zucchini Cake, which is also a winner!

I recently read this post by Otehlia at World of Flavors, where she explains how most recipes that contain zucchini make a large amount, since to make a dent in a zucchini supply, you have to be able to use a lot in one recipe. It is true (and her bread recipe at the link above does look like it will have to be tried sometime soon), and I found myself noticing that many of the zucchini recipes I have do contain rather large amounts of this prolific vegetable. A pound and a quarter on half of the pizza may seem like a lot, but it was not too much, and it was probably the best slice of pizza I've had in a long time. If it is one thing I can't recommend highly enough, it is the proportions in this book. They are spot on - and I am not someone who goes about measuring everything when I'm in the kitchen. I do swear firmly upon weight measurements in My Bread. They have not failed me yet!


The zucchini is supposed to be tossed with Gruyere cheese, but I had some Wisconsin Parmesan on hand from Country Connection, and I used an equal amount of it: 75 grams for the half amount. The pure genius moment of this half of the pizza is that it is sprinkled with bread crumbs over the top before baking. At the high oven temperature, this created gorgeous blackened crunchy bits. This little addition alone endears Pizza Zucchine to me forever, but indeed the flavors of the entire concoction are really inspired. They are simple, but perfectly balanced.


I added just a bit of grated nutmeg... I couldn't resist!

The only thing I could be more excited about than Lahey Pizza lately is rhubarb. I recently crowned Deena my Rhubarby Guru, and it is the truth. She posted a recipe back in May for a liqueur that I finally made, bottled and am trying patiently to let it mellow, but it is so delicious that I keep sampling it. She says it needs time to mellow, but it is already so good, that I can't imagine it getting much better. It is smooth, and tart, and sweet. It is Rhubarb Liqueur, and you need to make some now, if you can still get some fresh rhubarb.

My own rhubarb masterpiece, the family recipe that I almost can not make for fears of devouring all of it's buttery greatness, took a back seat to another of Deena's recipes that I had wanted to try: Rhubarb Custard Tart. I had to use frozen rhubarb here, and I decided to bake it frozen instead of letting it drain - just a little bit of a mistake. It looks fine and tasted delicious, but got just a tad watery as it sat. Overnight in the refrigerator took care of most of the problem, but I would imagine that it would be stellar with fresh, unfrozen rhubarb. The tart crust was particularly nice, and since I had only an 8 inch tart pan, I made a dozen little tarts out of the remains. We ate some, and I gave some away, but still have some left and let me tell you it is hard not to keep swiping spoonfuls on my way past. Rhubarb is like that: A love it or hate it thing, but once it gets in your blood you are hard pressed to not crave it.


So, I'm moving right along, Mr. Lahey! Looking forward to my next My Bread adventure, whatever it may be... the greatness of these pizzas makes me think it just may be the Pizza Cavolifiore: Cauliflower Pizza.

Recent Carbohydrate Consumption

I am one of those people who gets very easily inspired. Looking even briefly at new websites is compellingly dangerous, since I immediately mentally catalogue what I have to make and in which order. (I totally identify with msmeanie who mentioned in her post today about mentally ranking recipes...) Of course, new websites turn into ones I follow, and a vicious cycle of too many carbohydrates inevitably ensue. But sometimes, a girl just needs some cake.


Fortunately, or unfortunately depending on the point of view, when I was cakeless on Sunday night, I plucked a Mostly Foodstuffs Majestic and Moist Honey Cake from the deep freeze. When I made these, I froze 2 petite bundts, and figured I'd eat them in the future. At the time I didn't know that future meant 5 months later. It was every bit as majestic and moist as the day it ventured into the freezer, and not a bit affected by such a long slumber. A half bundt per day, is all one really needs in life, methinks.

I have run into a number of new blogs that I really enjoy lately; one that is thankfully recipe-less is Horno Magico. I'm hooked, partly because this list of foods eaten is making me aspire to be virtuous, partly because I'm reminded of how I should be drinking more tea and less coffee, and mostly because it is peppered with amazing and simple photographs of eaten journeys.

Another is Chocolate Chip Trips, in which I saw these muffins, which I have patiently had in the back of my mind since I first saw them, and in which a reward was finally had after I remembered to pick up some white chocolate chips...


Unfortunately, msmeanie posts amazing recipes, which could only be a bad thing for someone who can easily be addicted to making more than can be consumed. On a positive note, she does tend to have healthier recipes, like this cauliflower, which is going to be made sometime very soon, since I also remembered to buy a cauliflower when I got the white chocolate chips...

These banana muffins with walnuts, dried cranberries and white chocolate are really amazing - especially just out of the oven. I did use quite a bit less sugar, and think that I could reduce it further when I make them again, since believe it or not, I'm getting used to eating less sugar. I will say that when you have to wonder if you are eating a cupcake or a muffin, you know you have hit a happy conundrum.


I had planned to make a couple different types of cupcakes today to equal the 3 dozen I needed, and unfortunately, only got to make one type: these amazing Chocolate Cinnamon Devil's Food cupcakes with Vanilla Bean Buttercream. As if the name doesn't say it all, these cupcakes posted by La Spicy Vita are going to be a new staple here at Casa Rcakewalk. They are so dense and almost brownielike in texture, they will make you weak at the knees. The only downside, is that the recipe was true to its original yield and I got 37 cupcakes... That's right, one blessed leftover cupcake all for yours truly.


going, going, gone...

The only downside I could see, was that they prevented me from making these lemon beauties from Chocolate and Whine. I have to find an excuse to make them soon, because "ugly yellow sprinkles" or not, I think they look fantastic.

Thanks to Talia's suggestion, I downloaded Feedly for all my blog browsing organizational needs... and I'm glad I did, since it shaves many, many minutes off fumbling about looking for new posts. I feel a bit more liberated to bookmark a few new blogs and keep tabs on more amazing people in their amazing kitchens. Next, I'll have to reexamine my own blog's links lists and update.

Meanwhile, I have some carbohydrates to keep me company, and a slew of recipes to try before bookmarking more. It's the double edged knife, this blogging world... never a moment's rest between finding that next thing that MUST be made. But at least it is all a quite friendly competition in the battle of raging foodies, and one I'm not likely to give up on anytime soon.


UPDATE: April 11th, 2010

I made the Devil's Food Cupcakes R1's housewarming party yesterday and added chiles to the frosting. I considered adding some spice right to the batter, but couldn't quite commit to a level of spiciness. But, adding chiles to the butter-heavy frosting proved to be the right move, and has the added bonus of better control over the final level of heat. The fat of the butter also tempers the raw heat of the cayenne. I aimed for the middle of the road, and added (and I'm guessing here) about a tablespoon of Aleppo pepper and maybe a scant teaspoon of cayenne to the buttercream recipe that La Spicy Vita posted above. The resulting cupcake was addicting, and many in the small party indulged in more than one (or several, as was also the case). Another benefit is that the recipe makes 3 dozen. I know R1 ate one for her breakfast this morning, and I confess that one was also mine.

It is also worth noting that the original recipe from Epicurious uses an almond extract spiked frosting. Chocolate with almond extract is one of my favorite combinations, and no doubt it is worth the 6 (yes, 6!) sticks of butter. Maybe next time, I'll give this one a shot.