Jim Lahey

On The Continuing Quest for Great Pizza.

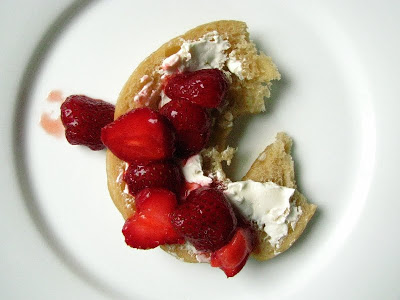
I think at some point in his or her life, most people who enjoy baking naturally become obsessed with making the perfect pizza. Pizza, born of Italy and Greece, seems purely American to me, and every American I know has a pizza preference whether it be thin, thick, sparse or dense with ingredients. Pizza is one of the first things I ever made without help, and one of the things that grows with me as I change little by little in my kitchen life. This newest incarnation would satisfy just about any pizza eater regardless of pizza preference, and it comes from the guy who unknowingly started me on my path to real bread making.

<span class=

A continual learning process had dropped me off on the corner of sparse toppings (as a general rule, I use no more than three ingredients) and medium weight, sourdough or sourdough-esque crusts. That is a very happy corner to wait around on! I snatched up Jim Lahey's new book, My Pizza, at my library recently and near instantly applied his maverick electric oven hack to a different pizza dough and was thoroughly impressed.

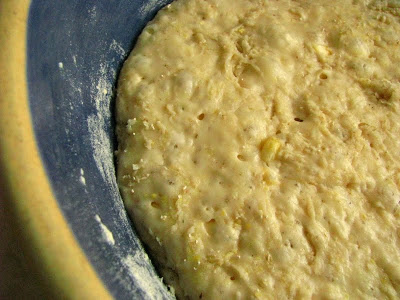
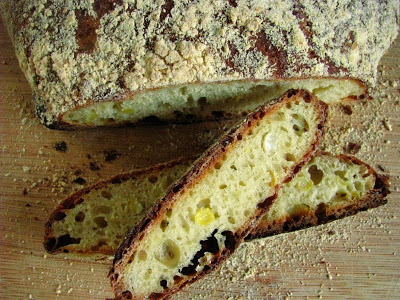
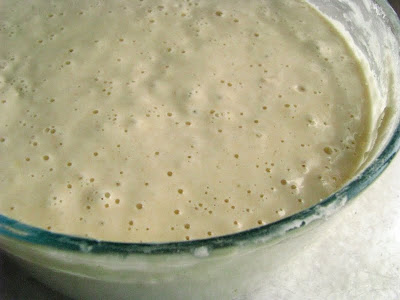
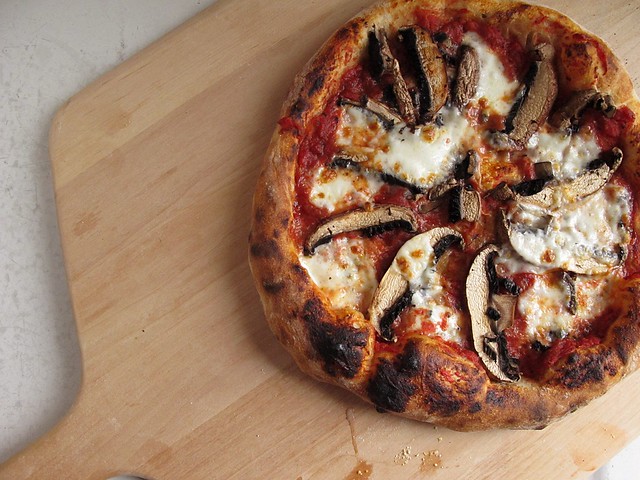
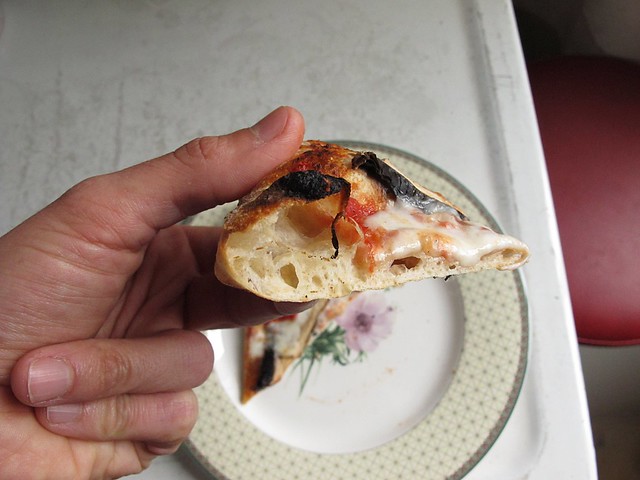
I'm even more impressed now that I've made his conventional yeast dough. The dough is a no-knead type, made quickly and then left with an 18-hour or so relax time. When it comes time to bake it, it bakes up fluffy, soft and with a thin brittle bottom crust. It has just the perfect amount of deep, near black scorchings, and a perfect blend of crispiness and chewiness. Baking a pizza by broiling it also puts a hot pie on the table in about 3 minutes, which is pretty amazing too. A quick bake time allows to eat them nearly on demand, immediately after they emerge - which is always when pizza tastes best - and then easy repetition to bake off another one in short order.

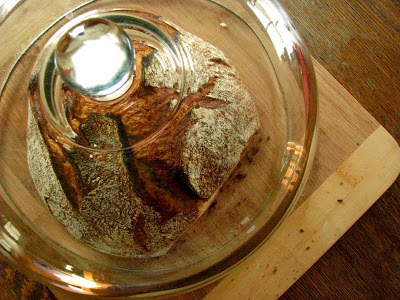
(Food52 has the new Lahey method pizza recipe back up on their website, the only tweaking I did was to use Kosher salt and a handful (50 g.) of high protein whole wheat flour in place of 50 g. of the white stuff. I detailed the electric oven hack in the caption of this flickr photo if you are curious... For the pizzas I made last night, I just used several 1/4 inch thick slices of portobello mushrooms, some fresh mozzarella, and some red sauce as a base layer.)

new <span class=

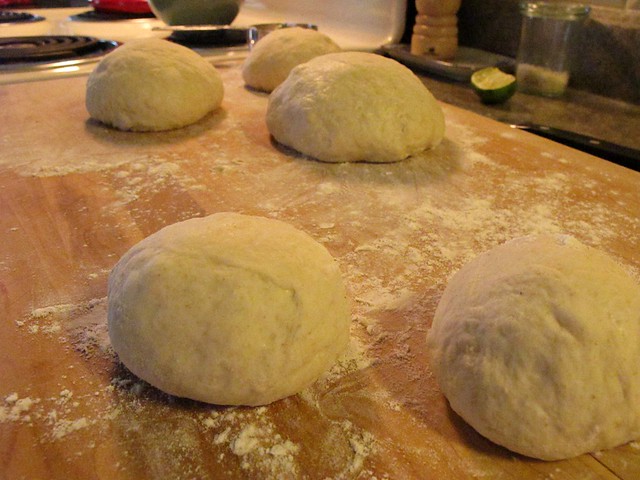
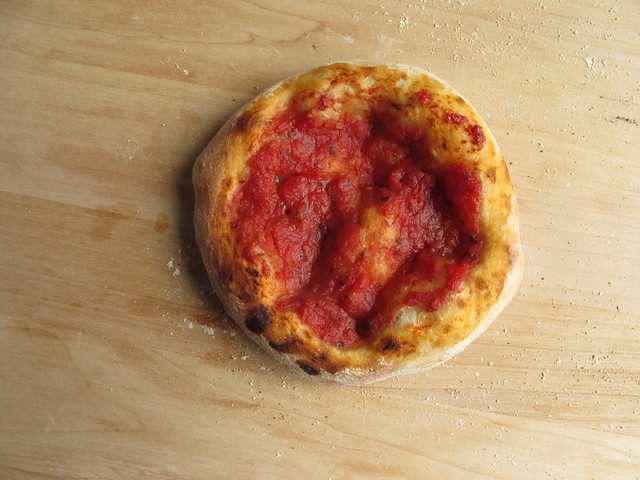
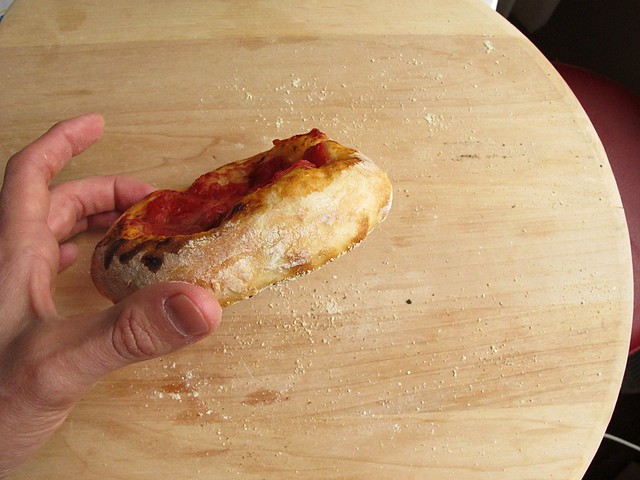
A full recipe of Lahey's new dough makes 4 pizzas, but I cut one of the quarters in half to please my Kiddo who only eats sauce pizza. I make my pizza sauce with drained quarts of homecanned tomatoes augmented with garlic, spices and maybe some tomato paste if it seems too thin. Baking the smaller pizzas under the broiler seemed to make them too dark too fast, so I experimented by baking it at a solid 500 degrees and omitting the broiler altogether. It worked well, but make a thicker crust all around - an even, airy crust that maybe would have been weighted down a little more if there were more toppings (any toppings) involved.

baked at solid 500
baked at solid 500, side

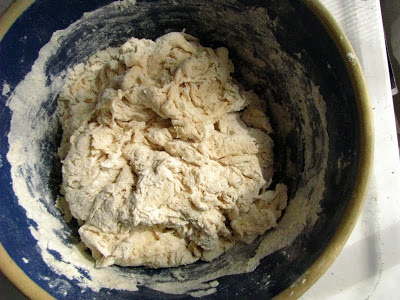
I stretched the other three portions into 12 inch or so rounds, the dough soft and stretchy, a remarkably easy dough to work with when floured and handled gently but firmly. I really think this pizza is going to hang around for most of the Summer, it was so easy and so good. Since my stand mixer has died a third time, I'm thinking that less work and less hand kneading may be on my agenda for awhile whether I like it or not, but recipes like this one are a solace to my machine angst, reminding me that I don't need machines to produce great food.

<span class=

While there were many good pizza combinations in the good book, I was disappointed with petty things like the font, the book size and feel, and the hastiness of the author voice. I loved the first (My Bread) book so much - and I haven't forgotten that there is a Lahey Project tab at the top of my page here regarding it, I may just resume work on the recipes from that book soon - that this one couldn't compare. Though certainly I will soon be making vegan pizzas with pureed walnuts in lieu of sauce, and the simple pork sausage recipe I already made was a definite keeper... perhaps even worth the cover price alone for ease and taste.

Brave New <span class=

The road to great pizza winds on, and this approach is definitely worth the time to experiment on. Whenever I get all excited about a new pizza, I forget that before it came a pretty great pizza, and that is what baking life is all about. I hope I never tire of finding new doughs, new techniques, new toppings to inspire me never to eat pizza outside my home ever again. As of this writing, I'm feeling pretty close.


This post has been Yeastspotted.

Preservation by Any Means Possible (and... a Lahey Bread, if you are still keeping track)

I like to think of words in the English language, and how they look or "feel" like their spellings... my favorite examples: laugh, quiet, grumpy. When I see the word 'August' in type it evokes this feeling of exhaustion, of exhaling with a sigh, of brevity. In the Midwest, our most prolific season is August and the aforementioned descriptions sum it up well. Pretty much any vegetable that grows in our zone is on and ripe for the preservation, and while I don't preserve as much as some, I still feel that pang of tiredness. I wonder if I am doing as much as I can do, wondering if I am doing too much for the food-eating conundrum I find myself in (a.k.a. my picky boys).

Last weekend, the Kiddo and I spent time at my Parents' farm. My only food goal was finding a peck of jalapeno peppers. Last year's peppers were excruciatingly hot, so hot that I actually still have a number of jars leftover despite the near 3 pints of candied jalapenos I ingested myself. When considering my preserving tactics this Summer, I thought of an uncle - since I could justify doing more if I had someone with the fortitude to eat the last of the super hot peppers. And he must have a stomach of steel. Last Summer, I traded some canning for some upholstery work, and when my Mom gave him the peppers he ate almost half a jar immediately.

Finding jalapenos this year was more difficult, and after some hunting, we found a farm with them. I helped an Amish man pick a gallon pail full of mixed peppers. This was after a misunderstanding at a different farm that landed me a peck of crisp green bell peppers. Monday morning before leaving, 4 dozen corn appeared tidily bundled in a green mesh sack, the result of tasting some bi-color corn we got from another Amish neighbor on Saturday during our quest. It was the sweetest corn I've had this year, and now 10 1/2 lbs. are resting in the deep freeze.


As if I didn't have enough on my plate, I decided before I left that I needed to make proper lacto-ferment crock pickles this year. This beautiful photo from Chiot's Run was what did it; after reading the post, I went down to the basement and brought up the crock my Mom gave me a year ago that belonged to my Gram. I re-washed it and sterilized it for fear of mold spores (my poisoned vinegar was in the basement) and then left it on my kitchen counter open to the air for the weekend. Tuesday, I picked up some pickling cucumbers from the farmer's market, exactly 5 lbs. when I weighed them.

I decided not to can vinegar pickles this year, but couldn't bear the thought that I wouldn't have any until next year so these traditional pickles are a welcome addition. So is the handsome crock on the floor of my kitchen.

hitchhiking caterpillar on the dill.

The recipe that Suzy at Chiot's Run used was from Linda Ziedrich's pickle book, which I do not have but intend to pick up soon. I followed the recipe, but I had no allspice. I may pick some up and add it after a trip to the co-op tomorrow... if I remember, that is. I also added just a few more hot chiles de arbol. I felt proud that my coriander seed was saved from my garden last year, I measured it out of an origami packet I made to conceal it.


my salad plate was exactly the right size to keep everything submerged.

Pickles done, I turned my attention to this gem of a recipe: lacto-fermented peppers from the Woodwife's Journal. At the farmer's market I also picked up some other green peppers of varying heats, poblanos, serranos, Aneheims, a few extra jalapenos since I was feeling a bit on the shy side with them. These are so delicious straight away, and I can only imagine they will get better with time. I had a few more alterations with this recipe since I was almost out of live cider vinegar (Bragg's, and I ordered another gallon today).


I eyeballed a half peck each of hot (green) mixed peppers and sweet bell peppers, but used only 1 1/3 c. of the cider vinegar and topped it off with plain white vinegar. I also used part olive oil and part grapeseed oil, and a few grinds of black pepper. Try to find Mexican oregano if you can, because that really makes these I think. They are the perfect kind of mild heat, slightly oily and herby, and just plain addicting. I had a half gallon jar and two quart jars, and already I'm wondering if I shouldn't do a second batch because I want everyone I know to try these. And unlike last year, the jalapenos are approachable.


The two larger projects out of the way, I turned my attention to these crazy, bright peppers. When I stood along this long row of mixed hot peppers of various types with an Amish man and picked these, he told me he planted them for the produce auction since their family doesn't much care for the super hot peppers. The auction draws both retailers and individual buyers, and many of the local Amish have gotten rather diverse in the things they grow to sell there. The most fascinating variety I thought were the tiny purple "ornamental" ones, which he assured me were edible, though he didn't remember the name. I bit into one and let my tongue discover the Scoville Heat Units. It was hot.


Last year, I remembered seeing this lacto-fermented hot sauce recipe and cataloged it. I grew a single plant of cayenne peppers and another of habanero, planning to make a smaller batch after they ripen. I may still do that, but meanwhile I used the whole lot that we picked for my bucket, 11 oz., to make a trial batch. It's fairly thick, bordering more on a salsa consistency and I'm actually not sure that I'll strain it. I have a week to think about it.


This isn't just hot. It's mind-numbingly hot. But it's fruity, and the heat doesn't last long which is kind of strange for something with all the visual warning of a traffic cone.


I saved all of the jalapenos, which worked out to exactly 3 lbs. (enough for one batch of candied jalapenos) for tomorrow and moved on to the corn. According to an old preserving book my Mom has, when blanching corn for freezing, you should boil for just as long as you soak in an ice bath - 4 minutes in the case of sweet corn. I filled up my sink with icy water and boiled 6 ears at a time. My rhythm was so efficient that before the next batch was done in the boiling pot, I had 6 of the drained ears sheared clean of kernels - in part to the bundt pan corn removal method I've been seeing around the Internet.


I crafted a "knife protector" out of a plastic lid, however. and it worked really well!

With all of the aroma of sweet corn in the air, no bread in the house, and a starter that had just recently emerged from refrigerated weekend slumber, I decided to tackle the long-lost and maybe somewhat forgotten task of making all of Jim Lahey's bread for what I affectionately coined The Lahey Project. I saved out 4 ears of corn, stripped them, and blended them smooth. Then I used my new favorite purchase, a nut milk bag, to drain out corn juice that was used for the liquid in the bread.


It rose, sweet and earthy and super sticky and I formed it, messily, into a ball. It rose for a couple more hours surrounded by large amounts of cornmeal to ward off some of the inevitable stickiness and when the time came to drop it into my pot, I of course slipped and mostly deflated it. It's been so long since I have done a no-knead bread, and forgot about the somewhat delicate nature of the risen dough. I baked it anyway. It was delicious. It may not be the most picturesque loaf, but I certainly got the gist of what flavors bread can take on when the liquid is replaced with juice.


So, August. It was midnight before I slipped into bed, finally finished my book, and then had trouble winding down into sleep mode. I love working this way, until I'm so tired I'm not really tired any more. It's all self-imposed now, which makes it feel so much more rewarding than when I made an hourly amount which never seemed to measure enough for the precious time I gave to others. (I'm not talking about you though, GOP...) The hot water bath will bubble with more hot peppers tomorrow and I'll continue to take stock and see what else I should be doing to ready myself for the days when things aren't growing and thriving. When August leaves us as quickly as the sigh that it feels like, and Fall stands proud and cold and begs you to turn on the oven.

Sourdough Bagels.

I was having kind of an off baking day today. It really began yesterday, when I figured I should reduce my starters to one. Did you know that since I've been obsessed with Peter Reinhart, I have been maintaining two strains of my starter? One remains on the counter at 100% hydration, eating a daily breakfast of half it's weight of water and flour. The other became "firm" starter: a refrigerated firm-feeling refreshed dough ball that eats about every 3 days 1 c. of flour and 1/3 c. water. I was starting to feel silly having two starters, but at the same time, couldn't bear just throwing that darling little dough ball from the fridge into the garbage. What better solution that to just use it all up?


With so much success and adoration for the multigrain bread, and the excuse to share a loaf with a friend that had a layover here in Milwaukee this afternoon, I knew that 8 oz. of the firm starter could be used up in it. If I were to go on making nothing but Reinhart loaves, many of which call for starters that are either "firm" or "mild" (which really just means at different hydrations than the starter I keep on my countertop), I would perpetuate only the dough ball in the fridge. It's kind of nice to only worry about feeding once every few days... Since I had just a little bit of firm starter left, I figured I may as well whip up a batch of sourdough bagels when I was at it. A half batch took exactly the amount I had left, 4 oz.

This was my first experience with natural leaven bagels. I'd have to say, this dough was much nicer to work with than the super dry and elastic commercial yeast version I've made. While the yeasted version was very tasty, it couldn't hold a candle to the naturally leavened version, and really the workload is about the same.


There are really two ways to shape bagels. Reinhard recommends pinching a hole through the middle and gently expanding until the bagels look like bagels. I prefer the "snake" method, probably because it's just more fun to roll out snakes. This dough was sticky enough to hold together too.

Now, you may remember that I said I was having an off baking day. The multigrain bread that went through it's first fermentation when I was out of the house visiting my in-laws down the street, decided that it was going to work extra quickly. When I got back, I could tell it was close to the over-ferment mark; I chalked it up to the weather and tucked it into the fridge for the overnight rest. Then, I hoped for the best. This morning when I removed it an hour prior to baking, the dough was crested over the top of the brotform, a clear sign of over-proofing...

Oh well, I fired up the oven containing my cast iron pot and baked it off anyway. It isn't the prettiest loaf, but I think it should still be tasty. I sent it along with E., who should have it in Minneapolis by now. I'm kind of curious about it, the way I'm curious if my human child is behaving for others when I'm not around.

Towards the end of the bake time, I brought a large pot of water to a boil and boiled the bagels which also looked a bit suspicious:


Clearly, they had risen prior to their overnight proof, but they didn't seem to have the plump bellies they should have had, post proofing. After boiling them one minute per side, I had some hope that they would be okay once baked - but you can see how they were lumpy and uneven.


It was probably the best surprise ever that these were hands down the best tasting bagels I have ever eaten. And, I'm not just saying that as a proud parent. They were chewy-crusted, holey wonders, and slathered with cream cheese were the perfect early lunch. The Boy-O ate one after school with peanut butter and asked me why I made them. I said that I just felt like it and he said "well, thank you for making them, because I love them". There is all the encouragement I need to go on and make more!


Meanwhile, while obsessed with the genius of Peter Reinhart, I recall that long ago I pledged to make all of the breads in the My Bread book by Jim Lahey. I don't want to take back my vow of Lahey love, but I am considering altering the remaining loaves to use natural leaven. Wild yeasted Lahey bread may be just the push I need to go on and complete my personal challenge, while still remaining true to the ideals set down in My Bread.

When thinking back on my bread journeys, I really am glad I started off with Lahey bread. It was a perfect start for high-hydration doughs whether I knew it at the time or not. And, if even now I'm feeling a little lazy, mixing up his ratio of 300 g. water (50 g. of it starter) with 400 g. flour yields a perfect loaf every time. I certainly am indebted to him, and certainly still have all of the drive to try out the loaves I've yet to make.

As for the sourdough bagel: I am smitten. I am no New Yorker and have limited expertise on the mysterious bagel, I have no vat of lye that I dip into, I have no hard and fast ideal that I expect when I bite into a fat dough ball with a hole in it's middle (save that it should, preferably, first be cloaked in cream cheese). But in my opinion to date, this is the bagel that I will compare all bagels to from now on. The only thing that will make it better is homemade cream cheese - and as soon as I can order some mesophilic culture, the perfect bagel and companion cheese both will be mine for the eating.

The Rcakewalk Guide To "Easy" Bread.

One of the things I like best about reading food blogs is reading the comments. Unlike cookbooks, the author of an online recipe is often graced with comments from readers who not only try the recipe, but include the nuances they add or subtract that make the recipe their own. I actually read through comments regularly, if not posting comments regularly myself. (I sometimes feel redundant in telling a person that a.) their photo(s) is(are) awesome b.) the recipe looks sound and delicious and that I have added it to my never-ending list of things to make or c.) I've attempted to be humorous, my sentence ending with an exclamation point. All three of which are wholeheartedly genuine by the way...)

I have learned a lot about bread from comments, and they reinforce that cooking and baking are living processes, not static and unchanging. They remind me constantly that people are unique, thought processes are different, and there is never just one way to look at something.

I've had to take some time to think before writing about my process for making "beautiful bread". I feel in no way qualified as a baker or as a baking authority, other than that I've baked a LOT and have learned something with virtually every loaf I've shoveled to and from my oven. Baking bread, specifically sourdough bread, is never a static process. Small environmental changes alter fermenting times, little changes in moisture, everything seems to make a huge difference as bread meets heat in the oven. It's a living process that takes patience, tenacity and curiosity to do well. I'll start at the beginning, and clue you in on what works for me at this time in my bread-baking life. As much as I feel I have learned, I still feel as if I have volumes to know.

This is my baby:


I feel like a proud parent to have grown a sourdough starter from scratch. It took a couple of weeks, and when I think back, I was completely uncertain about it the whole time. (I can't help but draw on the similarities I felt of becoming a new parent of a human being.) Before growing a starter, I had never baked a single loaf of sourdough bread- and now that's pretty much the only bread I bake. Starter never fails to amaze me. Feeding on so little, it thrives and really is a living thing - bubbling proof that life, no matter how small, is really precious.

If you are interested in making sourdough bread, but uninterested in growing a starter completely from scratch, there are many sources for purchasing a starter culture. Two of my favorite sellers are King Arthur Flour and Cultures for Health. King Arthur offers a fresh starter, which means you can start feeding your starter the day you get it and be off and running in a day or two with a bread culture that is American since the 1700's. Cultures for Health offers many different varieties of dried sourdough from different locations throughout the world. It will take a bit of time to rehydrate the culture and establish a feeding regimen before beginning to bake.

If you are interested in starting a culture from scratch here are a few favorite links:
One of my biggest mistakes is that I thought I could make bread straight away after making a culture. It actually took me more than a month of steady feedings to get my culture strong enough to raise bread dough. Now that my starter is mature and fed regularly, I can have bread in just under 24 hours. It may seem like work, but really it's not. I like to think of my starter as a draft horse (I like to think of a draft horse as a giant cat): just a little bit of care, and it works hard for you while you are off doing something else.

Feeding a Starter

From what I have read in numerous sources (and now it's firmly cataloged in my mental warehouse, so no specific siting here...) you can approach feeding starter one of two ways. If you are a frequent baker, you can keep it out at room temp and feed it one to three times a day. If you are an infrequent baker, you can feed it once every two or three weeks (or sometimes longer) and store it in the fridge. I haven't yet stored my starter in the fridge, and since I do bake a lot, I do just fine keeping it in a glass quart-sized bowl on my counter. Cold storage is said to make a starter taste more "sour"; breads that have a proofing under refrigeration are said to have a more pronounced tang as well. I have noticed this with doughs that I have refrigerated prior to baking.

I feed my starter every morning around breakfast time, which not only is a good time for me to remember, but also is optimum for when I usually mix up bread. Starter is most active 4-6 hours after feeding, so if I feed at breakfast and mix up dough after lunch ,I can have new bread by the noon the next day (usually). Now, if I was feeding my starter more often, I think it may be a bit more active and work a bit faster - but for now I enjoy waiting on it.

I feed my starter equal portions by weight of plain all-purpose white flour and water. I am a geek, and I do weigh my starter's breakfast. Plenty of people do not have a scale, and do just fine eyeballing it. When a starter is equal parts water and flour by weight, it is considered 100% hydration starter, and it's about the consistency of pancake batter. Many sources will tell you never to touch the starter with metal utensils, but I have always used a stainless steel spoon to stir it up, and I have never contaminated it. (I wouldn't use copper or any other base metals, however.)

Technically, I should feed my starter half of it's weight. For example, if I start the morning with 200 g. of starter, I should be feeding it 50 g. each flour and water. I don't do this. (However, I may soon start being a bit more official to see if I have better activity.) I usually feed either 50 g. each or 100 g. each flour and water depending on the volume of the starter in my bowl. Since my starter is well-established, it seems to be active and bubbly on this schedule - and if I ever feel it is a bit sluggish, I slip it some rye flour since that contains a bit more naturally occurring wild yeast. I have also been known to feed it a little before bedtime if I want it to become more active. I always think of Nancy Silverton saying that humans could survive on 1 meal a day, but it's not advisable - neither is it advisable to feed a starter less than three times a day. But since I am not running a production bakery over here, despite what you have heard or may suspect, I have been having good luck so far.

If I was being official and dumping off all but 100 or 200 g. of starter every morning, I would have more starter to play around with, or wash down the drain. This elimination seems wasteful, but really, it's like any living thing... the body absorbs what it can use and discards the rest. And, luckily for experimental kitchen types like myself, discarded starter can be turned into wonderfully delicious things. I haven't actually ditched any starter in quite a while that hasn't been turned into something else - another reason I'm happy with my current feeding regimen.

Other than bread I've made English muffins, chocolate cakes, pretzels, pizza doughs/flatbreads, muffins, banana bread, pancakes, waffles, and probably a few other things I'm forgetting. All of the above I believe are healthier than their non-cultured counterparts, and even if they aren't, they are tastier to be sure. I've re-vamped the "Recipes" tab at the top of the page to include all the sourdough recipes I've posted about in one place. I'm sure that this will be a growing category.

If you are looking to experiment with using sourdough in a baked good recipe, a good proportion to remember is 1 cup of sourdough starter equals 1/4 c. flour and 1/2 c. liquid in the recipe. The cakes I've substituted in this way were amazingly moist, and in the case of chocolate cake, cleverly disguised.

Finally, The Bread Method

I have tried kneading sourdough bread by hand, and by machine. I have tried "folding" the dough at several points during it's first fermentation time to incorporate air. I have added commercial yeast along with starter in bread. Pretty much any source I've looked at, I've tried a little tweak here or there to see what would happen. I'm not sure I've had any bread that was downright inedible - sure some were more of a duty to eat, and some graciously became nothing more than breadcrumbs to make into something else, but by in large, sourdough bread baking is a frugal endeavor garnering little waste.

Since I do bake by weight, I've tried a number of recipes posted by weights, and I have never had as good luck as when I use the Lahey Bread Method. His proportion of 300 g. liquid to 400 g. flour seems to be perfect for what I consider to be the best bread I can produce. Since I bake it in a cast-iron pot, I don't have to fiddle with contraptions to get steam into my non-professional Hotpoint oven. Cast-iron is a marvel, and it produces bread with a crisp crust and perfect custardy interior. I may be limited to size and shape (round, or slightly oblong), but to me it's worth it. I purchased a Lodge 5 quart Dutch oven when I started making Lahey breads, and I'm so glad I did. It's a reasonable price, and I only use it for bread.

Lahey's method calls for a mere 1/4 t. of yeast, for which I substitute 50 g. (about 1/4 c.) sourdough starter. If I make a bread using 100% white bread flour, it rises the best and fastest, but I've also had good luck using part high-protein wheat flour (also called white wheat, or hard winter wheat), and even using up leftover cooked oatmeal or other breakfast porridges. Lahey's method is also considered no-knead, but I knead it in the bowl for several minutes until it's slightly sticky and well formed into a ball. I think it helps that I always use the same earthenware bowl, since I can judge it's rising progress at a quick glance.


I always use metric weights, and approximated the conventional measures below using Convert Me. I use that site frequently for conversions.

Rcakewalk "Easy" Sourdough Bread (via Jim Lahey and Breadtopia)
  • 50 g. sourdough starter (about 1/4 c.)
  • 250 g. room temperature water (filtered or spring - about 1 c.)
  • 400 g. flour (all bread flour or part whole wheat (high-protein preferably) - about 4 c.)
  • 1 1/4 t. salt
Measure starter and water in a large-ish glass or pottery mixing bowl. Mix well. (I use a dough whisk since I like the feel of it, but a wooden spoon works fine.)

Add flour and salt and mix with dough whisk or spoon until it it combined and too hard to move around. Then, with one hand (keep one hand free to "pet the dog or answer the telephone" as Silverton says, or in my case take pictures...), knead the dough into a cohesive ball. I lazily knead this way for 3-4 minutes.

Cover the bowl with a lid (I use a large lid from my stock pot) or plate, and set in a warmish room-temperature place to rise. The dough should more than double in size, and it usually takes about 18 hours or longer. It will take longer in cooler weather.

Find a lint-free kitchen towel (linen or cotton are best, and it's better if you never need to wash it since it will become seasoned as you use it repeatedly), and rub ample amounts of flour into it so that the sticky dough will not stick when you try to remove it. You can put the shaped loaf of bread right onto the cloth, carefully fold the edges around it and let it rise, or you can find a colander or brotform (something that lets the air circulate a little, and is roundish to keep the loaf from spreading out). I put the floured towel into a brotform, and sprinkle a little wheat bran and/or oat bran as additional insurance against sticking.

To form the loaf, first dust a work surface lightly with flour. Using a dough scraper or spatula, scrape all of the risen dough in one mass out of the bowl. Quickly and assuredly, fold each of four imaginary sides of the dough into the center, forming a rough ball shape. Place the formed loaf into the floured towel, seam side down. When you go to bake it, the seam side will face upward, causing natural and rustic breaks in the bread - I think it eliminates the need for slashing which is difficult when you are dropping a mass of dough into a super hot pot. Let the dough rise for about 2 1/2 - 3 hours depending on the room temperature. When the bread appears risen and you can poke a finger into the bread (gently) and the indent remains rather than coming back quickly, you are ready to bake it.

Towards the end of the 2nd rise, place a cast iron pot with it's lid on into a cold, empty oven on a rack placed at the lower middle position. Preheat the oven to 475. I like to let the oven heat for at least 30-40 minutes to be sure that it is consistently hot.

When ready to bake, carefully unwrap the risen dough. Carefully roll it over, using the towel to help you, to make sure it isn't sticking. Then return it to it's original position in the towel. Take the super hot pot out of the oven, take off the lid, and carefully flip the bread into the pot. Try not to be nervous that you'll burn yourself. You probably won't, and being nervous makes it harder to not drop the dough from a half-foot above the pot to safeguard against said burns.

(For what it's worth, since January of this year, I've burned myself 3 times, and all were related to using my oven inappropriately as a dehydrator and not blazing hot cast iron. I have never burnt myself on a bread pot - though now I probably will since I'm bragging...)

Put the lid on the pot, and return it to the oven. Set the timer for 30 minutes. When the timer goes off, take off the lid. Let the bread bake for another 10-15 minutes, until the crust is a deep golden brown. When the bread is done, take the pot out of the oven and remove the bread from the pot to a cooling rack and then wait patiently until it is fully cool before you slice it - usually at least 2 hours.


Storing Your Delicious Labors

When first I thought about baking breads that required my love and attention, I thought about Jeffrey Steingarten. I admire him for his amazing mastery of the English language, and for his explorative spirit that I feel I share to some extent. When I read his book The Man Who Ate Everything, he described his pursuits in the perfection of homemade sourdough. He also detailed how he stored bread, cut side down, open to the air. I remember catching an interview on Food Network once where (due to the wonders of DVR) I rewound over and over examining his kitchen. He had a half dozen loaves of different breads in there - all stored on end, open to the elements. I daydreamed about why in the world this man had all these different breads standing at attention - I was even more curious about where he gets his appetite.

Of course, I tried this right away when I had proper bread that I wouldn't dream of sliding into a plastic bag. I asked my friend E's French, bread-loving husband (who grew up on a dairy farm in rural France) about it. He said that they left bread out to the air or stored in cotton bags, and it just got harder as the week progressed, but they ate it that way. I tried it. It got hard. Really hard. I wanted badly to be European, but it just didn't work for me. What did work is storing my bread cut side down the day it is made, and then before bedtime, I tuck it underneath some glass.

I like to store my bread on a wooden (bamboo) cutting board, covered by a cloche of some sort. If I don't have a cake going, I use my cake dome, but if that's in use, I just use an overturned glass bowl. If I'm being honest, I only eat my bread non-toasted the day it is made. The texture is so perfect, I usually plan a meal around a few slices of cheese and a hunk of newly baked bliss. But as the days wear on, the texture (and flavor) change, and I just prefer it a bit on the toasty side. As of this writing, I have yet to have a loaf of sourdough go moldy, even after a week under the dome. Sourdough culture is an amazing preservative, and I suspect it also preserves me.


When I want a loaf of bread to turn out no matter what, this is the method I use. When I just have to satisfy myself, I certainly play around with ratios and methods, constantly trying to figure out how to make beautiful breads that could maybe be in shapes other than round. I love to knead by hand, and so far, have a problem with getting too much flour into loaves that are hand kneaded. There are so many sites that I love to check for bread, and lately, Wild Yeast tops the list. Every time I go over there, I learn so much and find tons of great recipes. Through the Yeastspotting weekly round-up, you can check in with bakers from all over. As I was writing this, I also found that GNOWFGLINS was releasing a comprehensive sourdough ebook! I have not purchased it yet, but I'm sure that it is filled with valuable information, and many great recipes. They also include information on gluten-free sourdough starters, of which I know nothing about.

It seems there are always a few topics I wish I knew more about - the Costanza Civil War Buff Syndrome as I like to call it. I wish I knew about wine, about chocolate, about cheese and about coffee and tea. I still feel like I wish I knew about bread, and that is the one area that I know the most about. It's a facet of my baking life that continues to grow with each loaf of bread made. I contemplate finding some courses I can take where I can learn hands-on and more in depth what is happening with wild yeasts as they mingle to form breads. I hope I can find something in my area that won't require me to keep baker's hours since I do have a family to attend to...

I wish I could remember where it was I read about a person who toured some bakeries in Europe, and specifically the Wonderbread factory in the US. In the European country, the man showing him around gently scooped up a loaf of just baked bread to illustrate a point, then returned it carefully to it's spot. At the Wonderbread factory, the man took the loaf of bread, illustrated his point, and tossed the whole thing into the trash. I actually think about that a lot. Bread is never something I take lightly, and that's probably why I absorb as much information about it's cultivation as I can. What a miracle that something so nourishing can be made with so little, and it is something that everyone should demand a better standard for.

Good bread, beautiful bread, easy bread can be attained at home for anyone curious enough. It's really a lifestyle choice, to choose to share your life with a culture. When well taken care of, it returns the favor, and feeds you well. It's a life that suits me well right now. I have no idea what the future will bring, and if my days will become more harried, but I hope they never become too harried to bake bread.

The Lahey Project:: Bacon (Pancetta) Bread.


I'm beginning to realize that these posts about the breads made from Jim Lahey's book could get pretty boring and old. After all, every one I've tried so far has been great - but not just great, tremendous, and even then I'm starting to run out of complementary adjectives. But each and every bread that I've tried has been so miraculous that I still really can't believe I'm pulling this stuff out of my oven.

This one was obviously no different. The crust was even better than normal, probably because there was a sly addition of bacon grease. Yes, you heard me, bacon fat. I feel kind of funny always walking the line between vegan and animalistic ways of cooking, but those of you who know me can attest that I do procure the best meats that I can. This bacon came from the same hog that the rest of my pork stores did, the same animal also feeding my Parents. While staunch vegan readers may audibly gasp at this, I personally do not have a problem with it. I'd probably prefer to go full vegetarian and/or vegan, but my carnivorous Husband would then most likely resolve to eating every meal somewhere else, and that does not a happy home make!

And besides, who am I kidding. Bacon? R1 suspects that even vegetarians crave bacon. Lahey's original called for pancetta, but used bacon as a substitute and if you think that adding bacon to bread could make a complete meal, you would be correct.


The bacon is first fried, then added to the dry ingredients. Here, with a healthy amount of crushed red peppers...

It's meaty and chewy, and could easily gentrify any plain old lunch into a eyebrow raising and sophisticated Brunch. I also made a half recipe, since after all, I for sure don't need the temptations of a 1 1/2 pound loaf of bacon bread siren calling me morning, noon and night.


A while back, Lo asked me if I ever would recommend Lahey's "bread in a pot" method using parchment to raise the dough in and I said not really. On the second olive bread that I made, some of the olives made their way to the outermost of the loaf and had direct contact with the cast iron pot for the duration of the cooking time. It wasn't terrible, either to the palate or to the dishwasher (a.k.a. Me...), but I thought burnt bacon may be a different story. So I decided to line my enamel colander with parchment, let the bacon bread dough rise in it, and then transfer the whole works to the pot to cook. No mess, much easier to transfer. So, Lo - I take it back. It works excellently, especially if you have need for less cleanup or are working with a sticky ingredient (or just lack confidence in the skill of handling a floppy-ish risen bread dough in close proximity to a blazing hot cast iron pot).


My bread was done before lunchtime, and I made another of my favorite recipes to enjoy it with, herby baked eggs. I made my Husband a grilled cheese, which I may have to do for myself tomorrow with some of the leftovers. A cashew pesto, provolone, tomato grilled cheese on bacon bread? I may finally have a submission for The Grilled Cheese Academy after all! You can be sure that I'll let you know how it turns out.


Meanwhile, I'm glad I opted to bake today, even in the extreme heat and humidity. We have air conditioning, but somehow a 475 degree oven manages to slice through it pretty well. The heat also wrecks havoc on my appetite: killing it off almost completely. But that is why I thank you, Jim Lahey, because there aren't many appetites that can't be piqued by the smell of bacon baking into bread. Just one more reason why he really is pure genius.