bagels

Bagels. Cream Cheese. Happiness.

I notice from time to time that I think I've written more often than I have. I do not keep a bank of written ideas, or a list of things I'd like to discuss. Rather, I keep a mental catalog of sentences I like and a list of things I'd like to make and then write about that reminds me of those never-ending cloth towel "dispensers" in some gas station bathrooms. Every time I use one of those, I wonder to myself if the towel just recycles around, my germs and bacterias congregating with every other freeway passenger who has ever visited... This is pertinent to my thoughts because I think about food much the same way, it's circular and possibly recycled, but necessary and probably sanitary.


It doesn't take much for me to want to make something. A mention, a season, the little food world buzzes that are created almost daily but sometimes that center around things that last several weeks. Currently, there are more things out there with rhubarb than I could shake a stick at, and that doesn't bode well for a girl who sometimes feels like I'm the only one in my neighborhood infatuated with rhubarb. (I'm still nursing the rhubarb curd I made two weeks ago, and it's still good, by the way.)

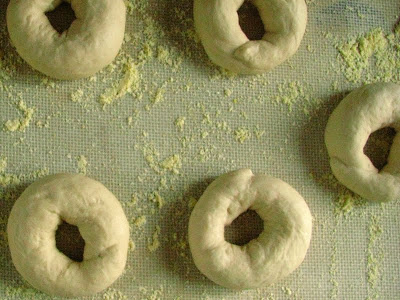
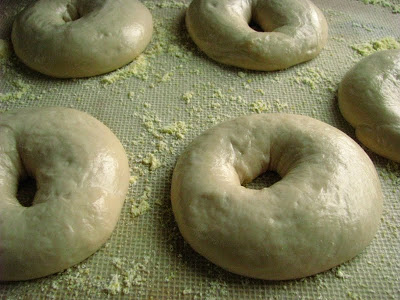
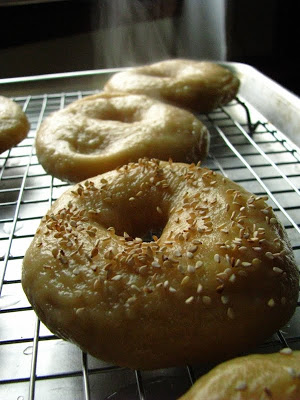
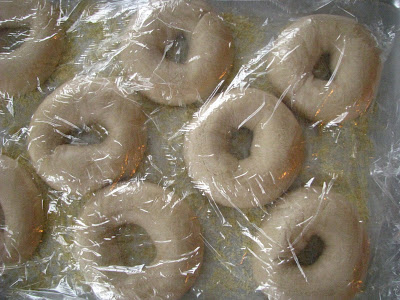
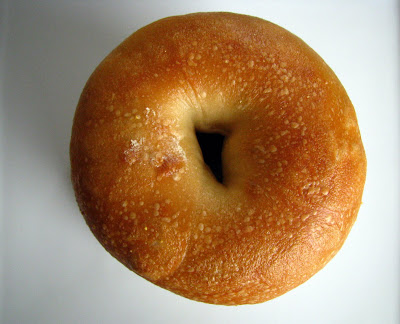
But, the baker in me seems to prevail throughout whatever nuance happens to enter my brain, and I firmly believe that once a person has entered the world of sourdough, her life is forever changed. The bagels that I made last week were great, but not perfect - the perfect excuse to make more. The second attempt at Peter Reinhart's ratio in Crust and Crumb was even better... and I'm not just saying that since I made them myself. I am not actually sure I have ever eaten a bagel with wild yeast until last week. I am sure that none can compare to the list of simple ingredients that are boiled in plain water and then baked in a hot oven, causing the surface to blister and bubble and resist chewing. I made a full batch and scaled my dough to equal 9 (roughly) 106 g. bagels.


I have had a deep yearning to make cheese for quite a long time. I really feel that if there was a cheese-maker's supply locally, I would have already been to my goal of waxing and aging cheddars, but since I think I'll have to order online I still am procrastinating. I asked my Amish friend, Lizzy, if the creamery near my Parents' farm sold rennet. She told me no, but that a cheese-making relation often went behind the building to the place where they stacked the plastic tubs that the rennet came in (a liquid), and that she could salvage enough to get by. Seeing as I have the Internet of Opportunities, I shouldn't need to result to scavenging. But seeing as I have been dreaming night and day of bagels, it was natural that I had to make cream cheese, mesophilic starter or no, and yogurt cheese seemed appropriate given what I had on hand.


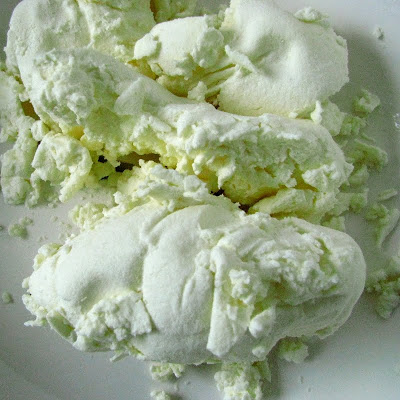
I have strained yogurt. I have strained yogurt for a whole day. But I never strained yogurt that was half heavy cream. This revelation! I tell you... I actually wanted to wait another 24 hours to try and get yogurt cheese to roll into balls and then baptize in olive oil, but after baking off the bagels, that idea was out the window. Creamy isn't an apt adjective. I have neither cow or raw milk sources, but I used the cream line milk and cream that I am every day so thankful for. The fat coats my mouth, the color is a rich, warm white: just a shade off from the palest yellow, a color my camera would never capture.

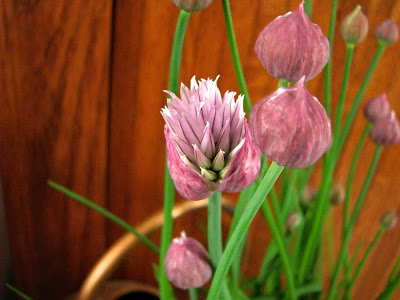
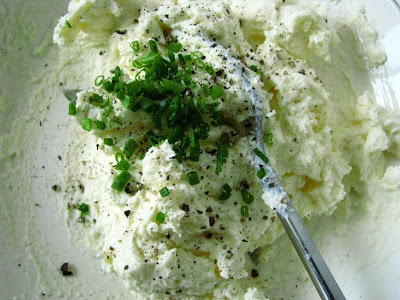
Ever since the dawn of Spring, and I use that term loosely since it has been unseasonably cool here but mysteriously marked with the odd day of spiked temps and humidity, I have eyed my tender chives. Chives are one Spring thing that I most love. They wake up before any other growing thing, a miracle shooting up from a Winter's worth of wreckage. I collect their purple hats as a cut flower, a pint glass of them on my counter where I can snatch at them, where I can remember to add them to what I'm cooking to see how they react. A single, hollow stalk chopped into tiny tubes can perfume a half dozen eggs it seems, and every single Spring I wonder what new dish I could make with them. I realize what I should be thinking about is what condiment should I be making with them, since condiments tend to get eaten most frequently lately. When considering cream cheese as the Ultimate Condiment, it seemed a natural fit to stir in some chives and black pepper.


I use a no-heat strain of yogurt called Viili that I can't recommend enough. I got it from Cultures for Health, and it is one of my favorite things ever. When strained, it yields a delicious tasting whey that isn't overly sour. Since I use non-homogenized milk, it does tend to be a little "lumpy", but it blends up fine, and the flavor more than makes up for any cosmetic shortcomings. I've used it to culture plain heavy cream and plain half and half, both were great versions of sour cream that even my Husband liked.

Yogurt Cream Cheese

Strain 4 c. yogurt through fine cheesecloth, or like me, through a homemade muslin bag. Hanging the bag (or cheesecloth tied into a bag) from some height will speed the process a bit, as gravity will be on your side. Time spent draining will depend on what type of milk you use (or what type of yogurt you used). The higher the fat content, the creamier it will be, and the less whey will drip out. I let mine drain for almost 24 hours, and had a perfect, soft-set consistency.

After draining, turn the mass of cheese out into a bowl, and mix with salt. I used about 1/4 t. for my yield, which was shy of 2 cups, but probably a bit more than 1 1/2 cups (like how I measure?) Mix in any other herbs or flavorings, and store in a covered container for up to a month? Maybe less? I've never stored any cultured milk product this long, since I eat it long before. This cream cheese will be lucky to last as long as that rhubarb curd mentioned above... but you never know.


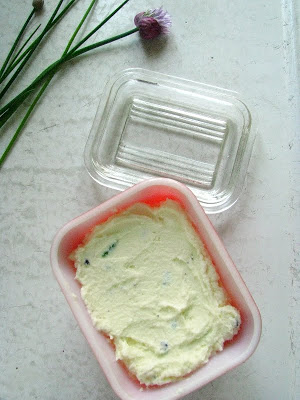
Even though it was soft-set, I couldn't resist rolling a few yogurt cheese balls. I watched this video from GNOWFGLINS a while back, and remembered Wardeh saying that you didn't need to refrigerate the yogurt cheese balls, but I think I'm going to keep mine in the fridge since they aren't as dry as they probably should be.

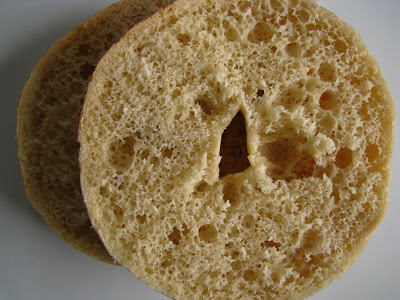
I ate one at dinner, spread on a piece of bread. I can't describe the joy I take in seeing something positively melt without heat applied - that is what this soft, oily cheese did. If I could die of something, please let it be soft, whole milk cheese I made myself.


At dinner as I sat thinking about diets, and cheese, and fats, and what the conventional doctors are still telling me is killing me even though I don't believe them anymore, I looked out the window at the last two things on the clothesline. These are my two bread cloths that I never wash, but hang out to dry in the sun and attract more yeasts. They aren't proper "couche", but they work good for me, and they are just part of the never ending circle of my food life.

I look at the work of others, the things made by friends and acquaintances, the jobs held by neighbors who are not home as I had time to mow my lawn and dry laundry outside, pontificate on chives, and check to see if my radishes had grown any more since the last 6 times I checked on them today. Sometimes I feel so overwhelmingly lucky to have good health, that my knees are still good enough for me to be on my feet all day. Today is one of those days. To be simply happy and enjoy every day is the greatest gift no matter what work you do, or what you make with your hands. Whether you ate amazing cream cheese and bagels or not. But, I have to say that a day with the bagels and cream cheese could be a big part of happiness.

Sourdough Bagels.

I was having kind of an off baking day today. It really began yesterday, when I figured I should reduce my starters to one. Did you know that since I've been obsessed with Peter Reinhart, I have been maintaining two strains of my starter? One remains on the counter at 100% hydration, eating a daily breakfast of half it's weight of water and flour. The other became "firm" starter: a refrigerated firm-feeling refreshed dough ball that eats about every 3 days 1 c. of flour and 1/3 c. water. I was starting to feel silly having two starters, but at the same time, couldn't bear just throwing that darling little dough ball from the fridge into the garbage. What better solution that to just use it all up?


With so much success and adoration for the multigrain bread, and the excuse to share a loaf with a friend that had a layover here in Milwaukee this afternoon, I knew that 8 oz. of the firm starter could be used up in it. If I were to go on making nothing but Reinhart loaves, many of which call for starters that are either "firm" or "mild" (which really just means at different hydrations than the starter I keep on my countertop), I would perpetuate only the dough ball in the fridge. It's kind of nice to only worry about feeding once every few days... Since I had just a little bit of firm starter left, I figured I may as well whip up a batch of sourdough bagels when I was at it. A half batch took exactly the amount I had left, 4 oz.

This was my first experience with natural leaven bagels. I'd have to say, this dough was much nicer to work with than the super dry and elastic commercial yeast version I've made. While the yeasted version was very tasty, it couldn't hold a candle to the naturally leavened version, and really the workload is about the same.


There are really two ways to shape bagels. Reinhard recommends pinching a hole through the middle and gently expanding until the bagels look like bagels. I prefer the "snake" method, probably because it's just more fun to roll out snakes. This dough was sticky enough to hold together too.

Now, you may remember that I said I was having an off baking day. The multigrain bread that went through it's first fermentation when I was out of the house visiting my in-laws down the street, decided that it was going to work extra quickly. When I got back, I could tell it was close to the over-ferment mark; I chalked it up to the weather and tucked it into the fridge for the overnight rest. Then, I hoped for the best. This morning when I removed it an hour prior to baking, the dough was crested over the top of the brotform, a clear sign of over-proofing...

Oh well, I fired up the oven containing my cast iron pot and baked it off anyway. It isn't the prettiest loaf, but I think it should still be tasty. I sent it along with E., who should have it in Minneapolis by now. I'm kind of curious about it, the way I'm curious if my human child is behaving for others when I'm not around.

Towards the end of the bake time, I brought a large pot of water to a boil and boiled the bagels which also looked a bit suspicious:


Clearly, they had risen prior to their overnight proof, but they didn't seem to have the plump bellies they should have had, post proofing. After boiling them one minute per side, I had some hope that they would be okay once baked - but you can see how they were lumpy and uneven.


It was probably the best surprise ever that these were hands down the best tasting bagels I have ever eaten. And, I'm not just saying that as a proud parent. They were chewy-crusted, holey wonders, and slathered with cream cheese were the perfect early lunch. The Boy-O ate one after school with peanut butter and asked me why I made them. I said that I just felt like it and he said "well, thank you for making them, because I love them". There is all the encouragement I need to go on and make more!


Meanwhile, while obsessed with the genius of Peter Reinhart, I recall that long ago I pledged to make all of the breads in the My Bread book by Jim Lahey. I don't want to take back my vow of Lahey love, but I am considering altering the remaining loaves to use natural leaven. Wild yeasted Lahey bread may be just the push I need to go on and complete my personal challenge, while still remaining true to the ideals set down in My Bread.

When thinking back on my bread journeys, I really am glad I started off with Lahey bread. It was a perfect start for high-hydration doughs whether I knew it at the time or not. And, if even now I'm feeling a little lazy, mixing up his ratio of 300 g. water (50 g. of it starter) with 400 g. flour yields a perfect loaf every time. I certainly am indebted to him, and certainly still have all of the drive to try out the loaves I've yet to make.

As for the sourdough bagel: I am smitten. I am no New Yorker and have limited expertise on the mysterious bagel, I have no vat of lye that I dip into, I have no hard and fast ideal that I expect when I bite into a fat dough ball with a hole in it's middle (save that it should, preferably, first be cloaked in cream cheese). But in my opinion to date, this is the bagel that I will compare all bagels to from now on. The only thing that will make it better is homemade cream cheese - and as soon as I can order some mesophilic culture, the perfect bagel and companion cheese both will be mine for the eating.

Beef and Bagels: More for the list of Things I'll Never Buy Again

One of my favorite quotes, though I don't know who said it, is "Anywhere is walking distance if you have the time". While this is certainly true for me, especially in Summer, Winter laughs at me for being so housebound and passionately in love with my kitchen, that I hardly walk around the block. Pathetic, I know. While kitchen love does last me most of the year, waning only slightly when it gets so hot that I don't even feel like eating, snowy and cold February days remind me that you can pretty much make anything in the kitchen if you have the time.

While Alton doesn't trust the Elves to make his crackers, I don't trust the dough conditioners, preservatives, and packaged meats laden with chemicals that have enable them to have expiration dates 2 or 3 years from now. All are hallmarks of the packaged foods industry, and the more of them I can keep out of my house the happier I'll be. My Husband enjoys beef jerky, and while I do not, a project in the kitchen is something I'm always up for. A happy one at that, since I know my tinkering will be well appreciated.

Being the cookbook junkie that I am, I am in the habit of combing the new release shelves at the library each week after story time. A few weeks back, I found Jam it, Pickle it, Cure it by Karen Solomon. Amid the amazing photography, and quippy writing, I found a recipe for beef jerky. It called for top sirloin or flank steak, but my extremely helpful Outpost butcher recommended rump roast. I called him in advance, and he had 2 pounds sliced and waiting for me on Sunday when I stopped to pick it up. He didn't steer me wrong, since as you can see, it was beautiful. The finished product was hitting the highest marks, too - I know when I hear the fridge door open and shut and an audible "just one more piece", that my work here is properly complete.

The recipe called for 1 pound of meat, but I figured to double everything, since I knew dried meat wouldn't last long around my house - even without me eating any... Be sure to start your project 24 hours before you intend to dehydrate it, since it begins it's life in the refrigerator.

Beef Jerky (adapted from Karen Solomon)

  • 1 lb. rump roast, sliced 1/8 - 1/4 inch thick
  • 1 T. Kosher salt
  • 1 T. tamari sauce (or soy sauce)
  • 2 t. dark brown sugar
  • 2 cloves garlic, minced
  • 1 t. dried chile flakes
  • 1 t. cracked black pepper

Slice the beef as thin as possible, or have your most helpful butcher do it for you! Remove as much fat as you can, since "meat can be cured but fat cannot" (Karen mentions that the fat can go rancid in storage, but I doubt ours will last long enough for that to be a problem).

Press out as much moisture from the meat as you can. (I actually forgot this step). If you don't have an amazing butcher, you can pound the meat between sheets of paper towel with a meat tenderizer or rolling pin (or a sturdy mug - which I don' t know why any cookbook would recommend! Pounding with glass in the kitchen just doesn't seem like a good thing to do in my opinion...)

In a bowl, combine all the marinade ingredients, and toss together with the beef. Place a rack over a sheet pan, and lay the meat on it in a single layer without touching. Refrigerate uncovered for 24 hours - this shortens the drying process.

Preheat the oven to 150, or 170 if that is the lowest you can go (at 170, pop a wooden spoon into the oven door to keep it ajar), and dry the meat for 3-5 hours. Start checking at the 3 hour mark. I found that mine was done in 3 hours. You want to see the meat is cooked throughout, and that it tears into strings. Let it cool completely, before refrigerating up to 6 weeks.

With very little effort, dried meat fans can have a nitrate-free and much healthier snacking experience.

The day I made George's Cheese (Ball) spread, I knew I had to make bagels. Since I've been relying so heavily on my freezers and not so heavily on markets, I've had a bit extra in the grocery funds - perfect, since I've never made bagels up to the proper specifications that Cook's Illustrated recommended. I dropped my $7 on a jar of Barley Malt Syrup when I picked up the meat on Sunday, since this elusive ingredient was omitted from every bagel making attempt of mine in the past. NO more! 1 T. of this made all the difference in the feel of the dough, and in the end product, and I'll never make them again without adding it. I also baked them on the stone, so the crust was better than any homemade bagel I've made to date as well.

I will make a mention that before I was graced with my Professional KitchenAid, this was the dough that caused my old under-powered KitchenAid to work its way from the back of the counter all the way down to our newly finished kitchen floor when I was out of the kitchen attending to a baby Boy-O. A nicely shaped, deep indentation in the floor was my reward for not attending my mixer for the 10 minute knead time. While the new model didn't budge an inch, I'd recommend watching your machine, so that this doesn't happen to you. Cook's Illustrated does not recommend making this dough by hand, or doubling the recipe, due to the stiffness of the dough. It is a force to be reckoned with.

Resting under refrigeration for 12-18 hours, under plastic wrap.

Bagels (Cook's Illustrated method from The Best Recipe)

  • 4 c. high gluten flour (after Googling, I used my King Arthur bread flour, which is higher in gluten than AP)
  • 2 t. salt
  • 1 T. barley malt syrup or powder
  • 1 1/2 t. active dry yeast
  • 1 1/4 c. lukewarm (80 degrees) water
  • cornmeal for dusting

Mix flour and salt in bowl of standing mixer.

Add yeast, water and malt syrup, and mix at lowest speed "until the dough looks scrappy", about 4 minutes. Increase speed to low, and continue mixing until the dough is smooth and stiff (but feels "pliable" almost like a play-dough), 8-10 minutes.

Turn the dough onto a work surface, and divide into 8 pieces, about 4 oz. each. (Yes, I weighed mine, since I'm crazy...) Roll them into smooth balls and let rest under a towel 5 minutes.

Form each dough ball into a rope about 11 inches long, and do not taper the ends. (I have marked the edge of one of my wooden boards that I use for doughs). If the dough is hard to get "traction" to roll, moisten your palms with a bit of water. Overlap the ends by about 1 1/2 inches and roll your hand through the center to seal the end. I actually dip the ends in water before doing this, and then pinch them together before rolling. Place them on a cornmeal dusted baking sheet (I lined mine with wax paper first). Cover well with plastic wrap, and refrigerate 12-18 hours.

20 minutes before baking, take them out of the fridge. Adjust rack to center position (with a baking stone if using), and preheat to 450. Fill a large pot with water and bring to a boil. Carefully lower bagels into water for about 35 seconds. You can try and keep them submerged, with a spoon or skimmer, or flip them after about 15 seconds like I do. You can fit 4 in your pot, if it's large enough, otherwise do 2 or 3 at time so they don't touch. Remove using a skimmer or slotted spoon to a rack, bottom side down.

Transfer to a parchment lined baking sheet or a baking stone, and bake for about 14 minutes until golden brown. Use a tongs to move them to a wire rack to cool.

You can put a topping right on them when they come out of the boiling pot, since they are rather sticky. Cook's Illustrated recommends sesame seeds, poppy or caraway seeds, dehydrated onion or garlic flakes, and/or sea salt. I left mine plain, and could not wait to have lunch today and test my theory of George's spread on a bagel.

I couldn't decide though, and opted for Economy Spread and Spicy Guinness Mustard on one half and George's Spread on the other. Let me tell you, George's Spread on a toasted bagel will make you banish traditional bagel toppings forever! Delicious! Like the best veggie cream cheese you've ever tasted.

I mentioned to Talia in a comment last week that I don't think I'll ever buy graham crackers again thanks to last month's Daring Baker's Challenge. I think that now I've found a couple more items to add to that list. If I have continue to have time on my side, I'll be willing to wager that I can keep that promise. I find myself wondering what else I can make in the remaining weeks until most of the mornings are spent outside...