Recent Preserving.

I use the term "recent" loosely.  It was Monday when I finally got the jars I had my imagination set on completing, and it was Monday when I made the decision to ditch the second little batch of delicious honey-sweetened strawberry-thyme jam (from Food in Jars' latest book, Preserving by the Pint)  that had been waiting for me in my covered red leCreuset pot for 4 days.  (It smelled fermented, and sadly the berries did not have a pleasant flavor.)  Time with two little boys and summer and birthdays got the better of me; I remind myself that it's okay to let things go back to the Earth when time slips like that.  That's my Mom's quote, and I think of her each time I forget about some precious leftovers, or get too ambitious and forget to mind my real-life timing.

red & whitecurrants

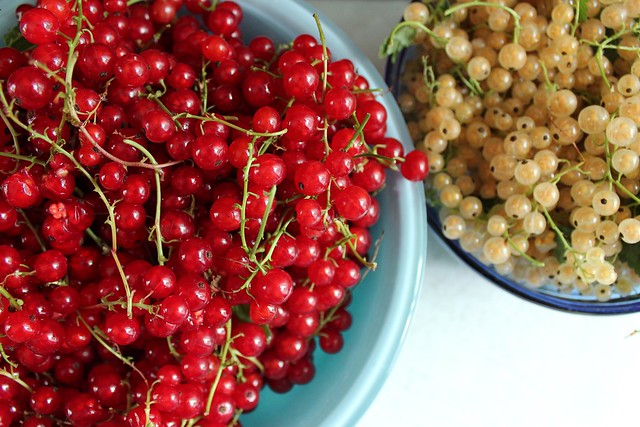
Last Saturday, we went to Klee's Out on a Limb.  I discovered them last year, and make no qualms about calling them my personal orchard now.  It's maybe a 20 minute drive, but feels more rural than that.  This was the second time I've gotten currants, and not being within days of giving birth as I was last year, I was able to pick them myself (with Candy's help).  I tried every variety and since the blackcurrants weren't quite ready, I got red and white.  White currants.  I think I mentioned 50 times how beautiful those things are, making up for the flavor I felt wasn't quite as good as the red seeing as they weren't as tart.  After 5 lbs. in my bucket, I tried some pink currants too - and those had quite a lovely flavor.  I have to rein myself in from a currant only preserving season.  I think I love them that much.

white currants
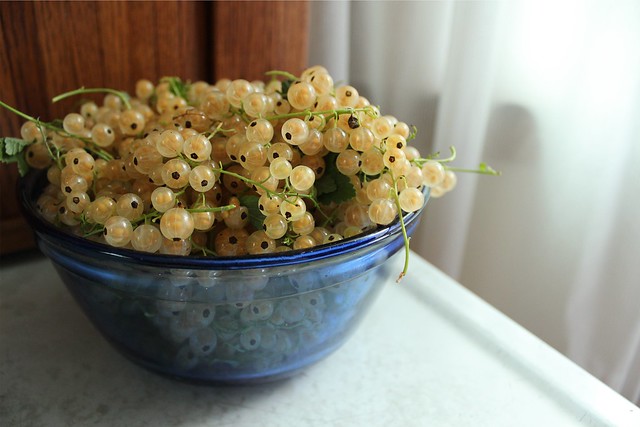
Transluscent, they look like pearls or fish eggs.  My eager baby-eater liked them very much.   

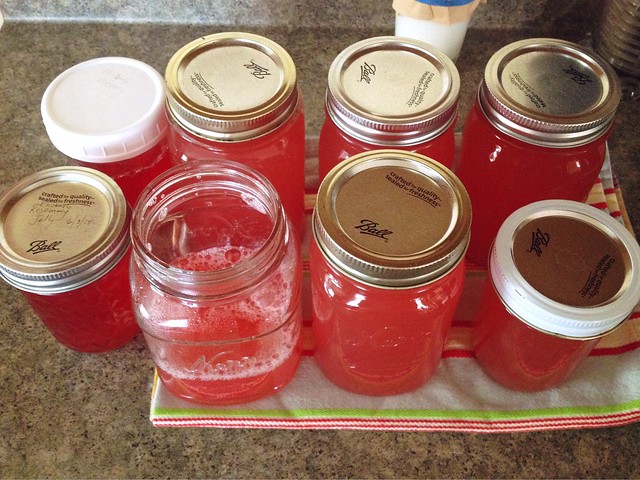
Last year, I made cordials out of them.  Both were great, though I probably preferred the shrub that turned viscous and thick, a mouth-coating thickness from all the pectin.  I actually just finished off the bottle, only tippling tiny cupfuls here and there because it was so sweet.  Aged a year, it was still wonderful.  I agonize over investing in good rum to make more, and as I do, the extracted red currant juice ages in my fridge.  I should decide to can it or freeze it before typing any more, so it doesn't succumb to going back to the Earth too.

I also have a small amount of non-juiced currants left which I need to get into vinegar.  Red currant drinking vinegar was my favorite flavored vinegar last year, it barely lasted me a month!  I might try it with the white currants and see how I like it.  (Note to self: must also invest in another SodaStream seltzer cartridge.)
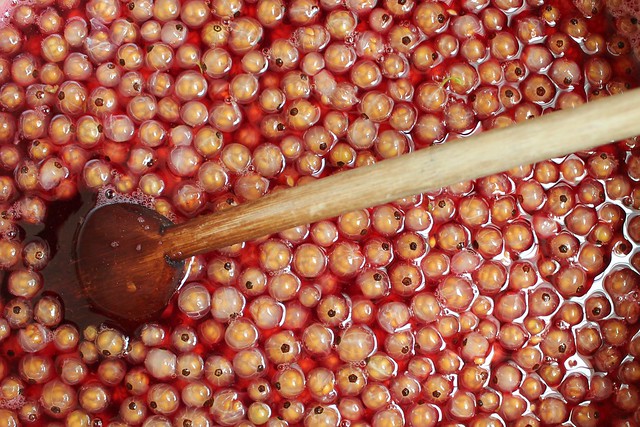
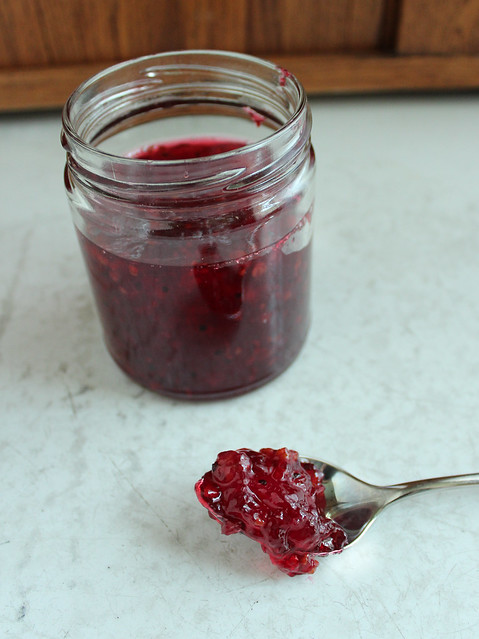
floating white currants

currant jam
Seedy currant jam.

Last year, I only made currant jelly - which is so easy I'm not sure there is an easier preserve to tackle.  Only slightly more work was currant jam, which uses mostly currant juice (I used red) and a pound of whole, stemmed currants.  For juice, you don't need to remove the stems so the process is truly efforless.  The 20 minutes spent gingerly plucking the white currants from their tiny green stems was worth it - and I thought the color contrast was beautiful even though I knew it would fade with the cooking.

The jam itself is nicely seedy, tasting tart like the currant jelly, but more interesting and maybe kind of nutty with the seeds.  I read that currant seeds are quite healthful too (especially in the blackcurrants, but I figure the other colors must be as well), so it seems like a worthy offset for a sugary preserve.

peach chutney

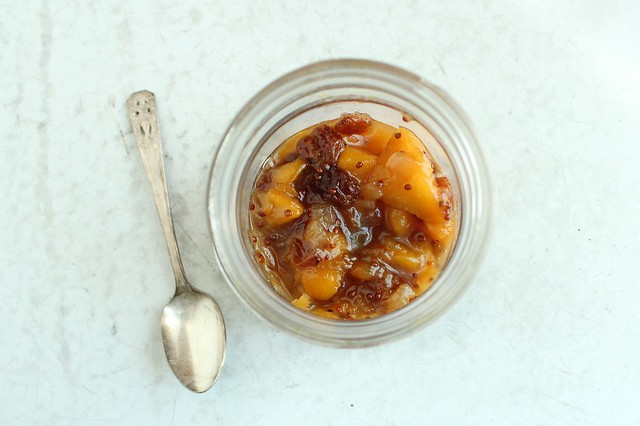
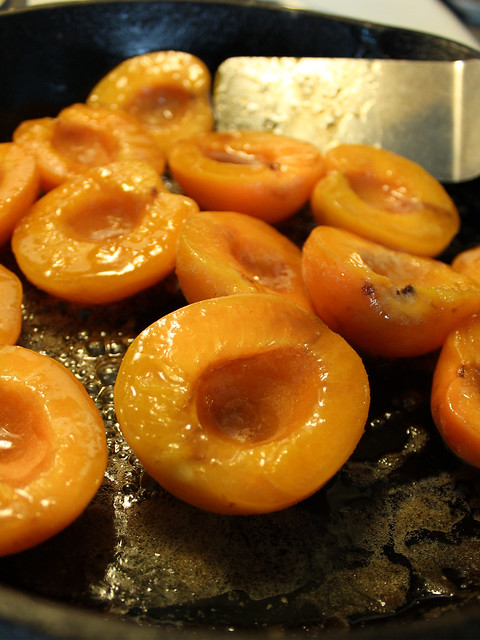
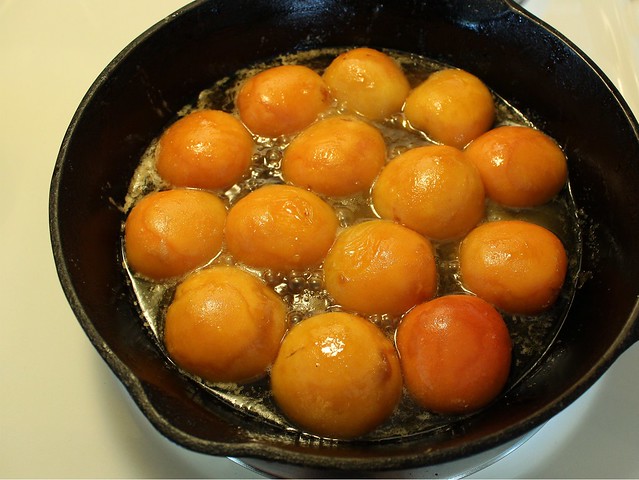
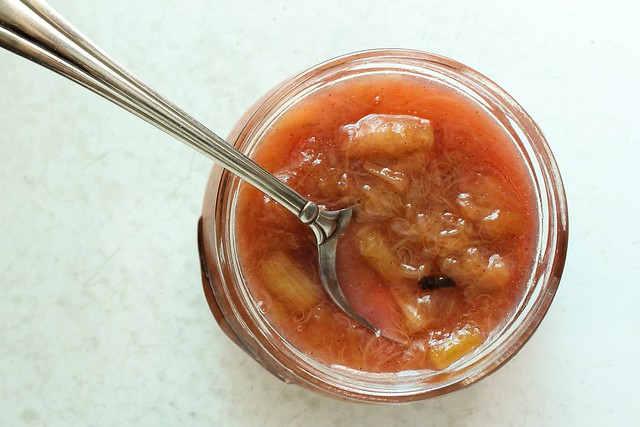
Nearly a week before the currants, I split a case of peaches with a neighbor.  It's the 3rd year I've had "peach truck" peaches, which come from Georgia and are dropped nearby at a number of locations locally.  (The service is Tree-Ripe.)  I feel like we hit the jackpot, since they harvested Berta peaches for the first trucks of the season.  They were some of the best peaches I've had in years, true "drip-down-your-wrist" fruits, with excellent flavor and color.  I made a half batch of Marisa's Honey Sweetened Peach Chutney, which I altered slightly to account for my extra spice addiction.  A friend gave me a jar of dried Piri Piri chiles last year, and I hadn't used too many of them.  I added 15 to the pot - which turned out to be pretty spicy.  I fished 4 of them out as I was tasting, but boy those have some good flavor.    I also added extra brown mustard seed, and probably more fresh ginger.

Another great thing about this recipe is Marisa's trick of removing peach skins.  Simply cut the peaches in quarters, remove the pit of course, and cover with boiling water for 3 minutes.  Drain, and the skins slip right off.  Amazing!  I used the same method to make some fresh peach salsa for our tacos last night, I don't think I'll ever blanch a peach traditionally ever again.

peach chutney, toast.
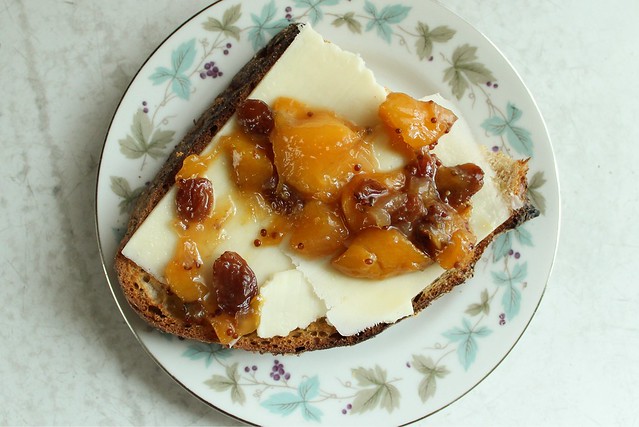
This stuff is so good that I might use the last of the peaches to make another batch - maybe less spicy for gift giving.  I'm definitely hoarding the 4 jars for myself.

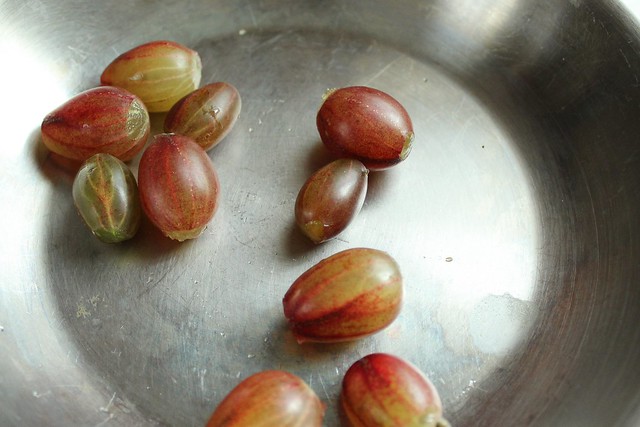
In with my currants from Klee's, I had a handful (literally, 58 g.) of gooseberry.  I have never tried gooseberry.  I can't describe how excited I get to try new things, and at the orchard, I nibbled a bunch of different varities.  (I need to remember to bring a notepad and pen there, I can only remember choice things: like that the Newtown Pippen apple was Thomas Jefferson's favorite, and which tree was the mammoth Wolf River variety...)  The gooseberries will be on more by this weekend, so I made the tiniest batch of jam ever to see what I could expect.

handful of gooseberry
I used a 6 inch stainless saucepan for this jam.

On some reading, I let them sit around until they were pretty soft and had turned from their bright green to a more rosy color.  Then I topped and tailed them (that's a Linda Ziedrich term that seems to really stick in my brain), and weighed them in at a mere 56 g.  I added a tablespoon or so of water and steamed them a minute or two to get them softened before adding the same amount of sugar and cooking them down.  It was such a small batch that the whole process took less than 10 minutes.  The color and flavor were incredible.  I'll have to make time to get down there for more!

gooseberry jam

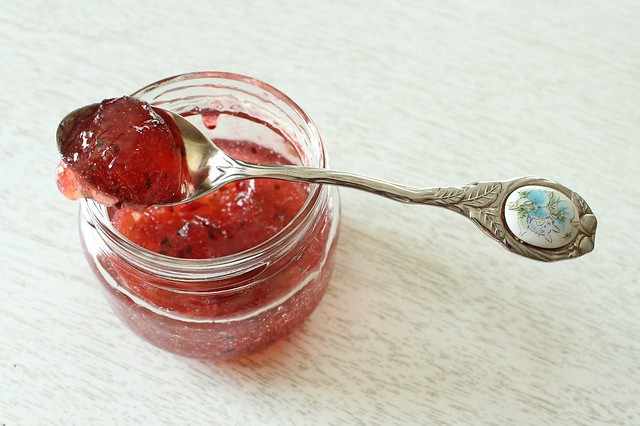
I really just couldn't get over the color, which I figured was about as close to watermelon-colored as I could describe.  The tiny seeds even look like melon seeds too - which I thought was interesting.  The flavor of gooseberry jam was different than I expected, though I'm not sure at all what I was expecting.  It has a tropical nuance to it, nicely tart but not as tart as the currant it seemed.  It feels pectin rich, and has a very firm set - I could have probably simmered it a little less.  My tiny batch filled half of a 4 oz. pimento jar, more than I expected, but definitely not enough to satisfy my new gooseberry obsession.

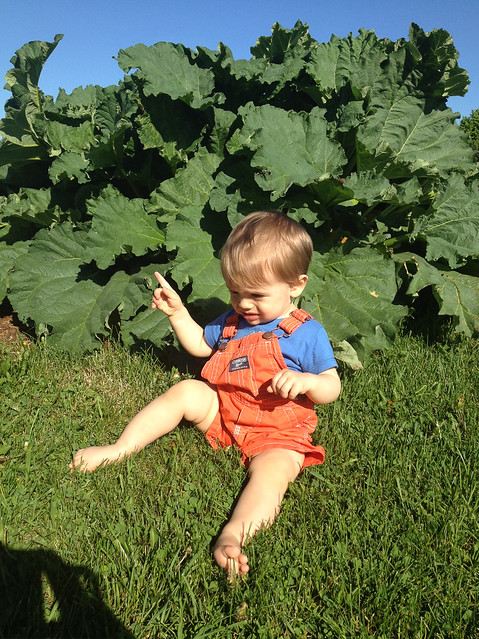
It's a good start to the season, which I have to remind myself is actually here.  It's a pleasantly cool summer,  with only a handful of 80 degree days so far.  It's filled with walks and bike rides (my older son just discovered how fun his first bike can be, and has developed an obsession of his own), fly-by-the-seat-of-my-pants meal planning, and yet another year of a struggling garden.  I remind myself that it's not important right now to be cataloging what I do.  But, still I love the photographing, and if I seem quiet here, there are still notable things going up on my Facebook page and Flickr.  If you have some gooseberry ideas for me, shoot them my way.  We'll see what comes of them!

Yeasted Apricot Upside Down Cake

Before I start, maybe I should say that this isn't the most amazing cake I've ever eaten.  True, I did  love it for the sum of its parts, for the deliberate act of assembling its components, for its subtle mix of simple flavors.  But I think it's possible to love a cake purely for the process of making a cake.  That is how I love this cake.  I love this cake with all of my old soul.

yeasted apricot cake.

Last year I found a copy of Debora Madison's Seasonal Fruit Desserts at the library.  It may no longer be in print, but I loved it so much I found a used copy online, and I'm so glad I did.  It's become a manual I consult whenever I have extra fruit on hand, and it's consistent in the new inspiration and techniques it teaches me.  

Ripe apricots in hand, I began my search online for what to make with them when I remembered she had a recipe for a yeasted pear cake, baked in a cast iron skillet upside down style.  Obsessed as I've been with mint lately, I was really looking for a way to combine some perfectly ripe apricots with fresh mint... and preferably in some type of cake since it has been awhile since I've made a cake.  Fortunately, I decided on this old-fashioned skillet cake.  I was happy for a few occasions to share it, since it is a good sized cake and not really a "good keeper", although I have been appreciating it gracefully staling cold from the fridge and with a scoop of vanilla ice cream.  I can't complain.

browning apricots.

With only 6 tablespoons of sugar, this is a decidedly unsweet confection.  The apricots turn soft and jamlike and make this the perfect thing to have with coffee or tea (or with the aforementioned ice cream, the ice cream adds a little extra sweetness and helps the dry crumb go down a little easier).  I played around with the spices a little and think I could have maybe been a little more aggressive, but in a way it works because the apricots are the stars of the show.

browned apricots

Make sure you take note of each part of the process, enjoying the steps as you go.  It's not a one-bowl cake; it requires some finesse, especially when working with a soft and somewhat sticky dough.  The texture of the cake is akin to a biscuit, and as Madison says, it is best warm.  I would store any leftovers in the refrigerator and try to eat them within a few days.  The texture changes, but it's still good.

I used Lonesome Stone Milling's organic all purpose flour which is wheatier than most, more like a "white wheat" available in the regular grocery.  The recipe is written for a 10 inch cast iron skillet (oddly enough, that's my number 8 skillet), you could use a well buttered 10 inch springform or cake pan and brown the fruit with the butter in a skillet first if you don't have cast iron that size.

Yeasted Apricot Upside Down Cake (adapted from Deborah Madison)
makes 1 10 inch cake
  •  6-7 ripe apricots, washed (but not peeled) and halved
  • 2 T. dark brown sugar
  • 8 T. (1 stick or 4 oz.) soft butter, divided
  • 1/4 c. warm water (100 degrees)
  • 1/2 c. warm whole milk (100 degrees)
  • 1/4 c. granulated sugar
  • 2 1/4 t. active dry yeast
  • 2 1/2 c. ap flour, divided 
  • 1 t. cinnamon
  • 1 green cardamom pod, seeds removed and crushed
  • 1 egg plus 2 egg yolks, at room temperature
  • 1/2 t. almond extract
  • 1/2 t. kosher salt
Melt 3 T. of the butter in the cast iron skillet over medium-high heat.  After it melts, brush it well up the sides of the pan and add the dark brown sugar and the apricot halves.  Toss the apricots in the bubbling mixture to coat, and then let them brown slightly on both sides, about 4 minutes total.  Turn them all cut side down and arrange them as you like and remove the skillet from the heat.

Put the warm water and milk in a small measuring cup and add the yeast and 1 t. of the sugar from the measured 1/4 c. of granulated sugar.  Set aside to proof, and meanwhile whisk together 2 c. of the ap flour with the cinnamon and cardamom.

In a bowl of a stand mixer (or in a large bowl if working with a hand mixer), add the egg and egg yolks, almond extract, remaining sugar, and salt.  Working with the paddle attachment, beat in the yeast mixture on low speed, then add the flour/spice mixture (also at low speed) 1/2 c. at a time until it is all incorporated.  Increase the speed to medium-high, and add the soft butter.  Beat for 2-3 minutes until the batter is smooth and glossy.  By hand, stir in the remaining 1/2 c. flour, and turn it out onto a lightly floured counter.  (It will still be sticky, use a bench scraper to help you maneuver it.)  Knead it gently a few times, then pat into circle the same size as the skillet holding the apricots.  Lay the disc over the fruit, and slide the whole pan into a plastic bag to rise for 30-40 minutes.

Preheat the oven to 350.  Once the oven is hot and the cake is noticeably risen, remove it from the plastic bag and bake until golden brown and a tester comes out clean, about 30 minutes.

After removing from the oven, immediately invert by placing a cake plate over the pan and flipping it carefully.  As Madison recommends, serve it warm with whipped cream (she also recommends sabayon) - I say go for the vanilla ice cream.

yeasted apricot cake
Just prior to baking.

Of all the many cakes I've made over the years, not many yeasted cakes come to mind (a noteable exception is the panettone), and this one seems to be versatile enough that with mindful spicing, you could use just about any fruit that comes to mind.  I'd imagine using a whiter flour would result in a slightly less dense cake, but I like this old-timey texture and depression-era sweetness.  It's satisfying.

apricot cake slice

This slice is 3 days old, and I took the picture tonight just as the sun was about to fall behind the trees.  It's not photogenic really, but it shows the texture of the cold cake pretty well.  I always think there are two types of people (well, 3 really if you count "pie" people) those who refrigerate cakes and those who don't.  I am one who doesn't.  I don't like cold cake, I like cake about to fall apart under the weigh of my fork - or better, under the weight of thinking about my fork.  But this is a sturdy cake that I love and I hope you'll love it too.  If you happen to try it with other seasonal fruits, let me know will you?

(P.S. A couple weeks ago when I was just starting to see apricots pop up at my food co-op, I made this apricot jam... it's a winner.  I'm eating it nearly every day (it's particularly good in vinaigrette with really good olive oil and Bragg's cider vinegar) and I am still not tired of apricot!)


Risen in Water.

Over breakfast this morning, I was paging through Maria Speck's Ancient Grains for Modern Meals.  Ordinarily I read cookbooks cover to cover, starting at the beginning and gradually making my way through each recipe, story, and picture in sequence as the author intended.  Maybe time is so short for me lately that I bucked my trend and just headed for the guts and the pictures, making a moment or two to think about my meals for the week between pureed mouthfuls fed to the baby bird.  How I happened to see the recipe for Floating Sesame Loaf is a mystery.  I wasn't perusing the book for bread to be sure, but the name alone conjured such an image that we endured the little baby bird squawking for a few minutes when I read the recipe twice through.

dough rising in water.

Could it be that this bread could work?  It seemed to be an impossibly wet loaf, spending some time rising in cold tap water before maneuvering into the oven.  Still shy of more sourdough since last weeks fail (I did start more loaves today however), we kind of needed some bread today, and I am not one to see a recipe like this without immediately stopping everything to give it a shot.

My first impressions were that this dough was beyond unruly; I tried hard not to add too much additional flour, using a bench scraper to work it into a rough round and transfer it quickly to a pot of cold water.  It stays there for 15-30 minutes, enough time for the dough to rise to the top of the water.  Maria Speck says the dough when plucked from the water and allowed to drain in your hands should feel like cold clay, and it did.  I fought my impulse to let it bench rest for a short time and followed the recipe to the letter: quickly and without much flour forming it into a round and plopping it down on some parchment to rise for another 20 minutes.  In retrospect, I could have easily added a little extra flour to make things easier on myself - but I can't complain with the lightness of the finished bread.

floating bread

I could tell that it wasn't going to be a tall loaf, but I wasn't sure what more I could expect.  I used Lonesome Stone Milling wheat bread flour (12% protein), I'd say it was kind of a "white whole wheat" if I were trying to explain the flour.  That flour has an excellent flavor, and a few tablespoons of toasted sesame, a teaspoon each of sugar and some commercial yeast were all the simple ingredients.  I baked it at 425 as directed, but I baked it in a cast iron pot since that is what I'm comfortable using.  I transferred the loaf parchment and all to the pot and baked it 20 minutes with the lid on and 10 without.

floating bread (2)

I was pretty good about letting it cool to room temperature.  It was soft, and smelled so sweet - despite the minuscule amount of sugar in it - and it was nearly impossible not to want to eat it warm with honey and butter.  The crumb was perfect sandwich style crumb, and really I couldn't believe a straight yeast bread could happen so quickly, without kneading, and with fairly little mess.  I think with a little practice, this technique could prove to be a good experiment with sourdough - but maybe I'll wait until I can carve out a little more devoted time to myself before embarking on that.


I won't forget about this bread, risen in water, relaxed (tricked?) into gluten formation by sheer science with no real help from me.  Tomorrow morning, we've already decided to turn it into french toast which I'm sure will be great with some extra sesame sprinkled on before griddling.

I've decided that I can't print the floating bread recipe here, I wasn't finding too much information about it on the Internet, and Maria's book is so lovely it's worth finding a copy and reading about it in her words.  If you have tried a similar type of bread that spends some time rising in water, please drop me a line and let me know!  I'm really curious why there isn't a whole lot of information online... I'm planning to scour the library for obscure German baking books and doing some more research 1980's style.


with radishes


Rhubarby.

Last Sunday evening we pulled back into town, four of us stuffed into the car that seemed to shrink fast with two boys in the backseat and so many plants and eggs and luggage and leftovers nestled in around us that it was hard to move.  The baby and I went out to the farm for a 4-day weekend, and my husband and a school-worn 2nd grader had come to pick us up.  Sunday morning, my Dad picked me some rhubarb.  That always seems to be tricky thing.  How much do you want?  Not too much?  Once you get to slicing through the stalks, you lose track of how much rhubarb is not too much.  I figure I had a paper sack with about 30 pounds, so much that he had to tie it up well with garden twine to contain it to the bag.  

Ash-rhubarb comparison.
With baby for scale.  This rhubarb patch is huge.

I remember the days when I practically lived behind the windshield.  Almost every weekend it would take me exactly 4 minutes to pack everything I'd need; I'd toss all of it into a green army duffel sack that I actually still have but is going unused in the basement.  Now, it takes me way too much time and planning to get out the door.  I have to tuck all the cultures in, I have to bake bread to bring along.  I have coolers in the summer to keep all the stuff I bring to and fro cool.  An extra son makes backseat real estate a premium, and I absolutely refuse to drive a minivan so these sardine days will be with us for the foreseeable future...

But the rhubarb was worth it.  I didn't bring any dessert with me this time because I knew my Mom would have something rhubarby baked, and she did.  It was great.  In fact on Saturday, I ate rhubarb dessert 3 separate times.  But when I lobbed the heavy bag into the basement fridge on Sunday night I wondered if I'd get through it without having to sacrifice any to the compost pile.  It took the week, but I did it.   I'm proud to admit I had zero waste, even though that rhubarb patch grows like crazy and when I can't reach it I'm blessed with neighbors who are happy to share.

rhubarby.

I got to meet Marisa McClellan (Food in Jars) in person when she was in the Chicago area in April, and was freshly inspired by her and her books.  I made a tiny batch of her Rhubarb-Rosemary jelly (a single canned jar, actually and a mostly full one to enjoy now) from her new Preserving by the Pint book after the rhubarb had been prepped and sitting in the pan with water for 24 hours.  It seems each day I feel I get nothing accomplished, and when I fall into bed exhausted at the end of the day, I realize that I actually accomplish tons.  Sometimes preserving might go on hold for a few hours but thankfully it's a forgiving process.

Encouraged by my Mom's bright pink rhubarb dessert, which when asked she told me she just baked with the pinkest parts, I set out making rhubarb juice concentrate using just the pinkest parts of the stalks.  Why didn't I ever think of that?  For years, my rhubarb endeavors were "industrial green" as I had taken to calling them.  Delicious, but utilitarian.  The concentrate was from the Ball Home Preserving book, and had lemon and orange zests and juice in it.  It's really very nice, and 4 1/2 pints are probably a perfect quantity for me as the sole rhubarb consumer.

Then with a glass of rhubarb juice in hand, I made myself a crisp.

rhubarb crisp

In the interest of time, I noted the process on flickr if you click the photo.  I still have some left - it's marvelously tart.

Thursday I made 2 9x13 pans of Rhubarb Kuchen and yesterday I delivered them to my friend Ginny who shared them.  And somehow in between line-dried batches of laundry I also managed to get a batch of Marisa's Rhubarb Vanilla Jam with Earl Grey done yesterday too (the recipe is in her first book, and also on her site) - and in the company of a napless and fairly cranky kid who grasped at my knees for dear life pretty much the whole time I was stirring the canning pot. 

I really can't get over the difference using just the pinkest part of the rhubarb stalks!  I think this is one of the nicest rhubarb jams I've had ever.  I left some of the errant earl grey tea leaves in for asthetics.

rhubarb vanilla jam with Earl Grey

All of that pink rhubarb left me with an amount of green rhubarb, which I think tastes just as fine as the rosy base of the stalk if not conjuring a more vegetal side of rhubarb.  Yes, I could do something savory with it... but I wouldn't bother trying to get the boys to eat it.  Instead, I chopped it up and was amazed to find I had exactly the 2 1/2 pounds that Deborah Madison calls for to make a green rhubarb puree in her Seasonal Fruit Desserts book that I was fortunate to find a copy of.  I have to pick up a grapefruit later today to make it, but look forward to her tarts made with a corn flour base and barely spiced green rhubarb puree.

green rhubarb

Hopefully, that can wait a few days until the rhubarb crisp is gone.  It does seem to me that sliced rhubarb keeps well in the refrigerator if stored in plastic.  That's probably a good thing.

Sourdough Surprises May 2014: Sandwich "Buns".

So it's been a few months since I made time for the Sourdough Surprises baking group but it's not because I didn't want to do it.  Time seems to be going even faster now that the weather has turned for the warmer, and just yesterday I realized that it was close to the 20th and that I had just happened to bake my rolls in the morning.  Technically the challenge was for a sandwich bun, and these are bun-shaped so I'm going with it. 

sourdough rolls

I don't usually mess with rolls.  I don't know why, maybe because bread lasts longer and stales slower?  Because it's less monkeying around?  I've been following a few bread boards on Pinterest, and when I saw these, I knew I had to make them.  Made of heftier grains and plenty of water, I suspected they would be a good sandwich roll, and I was right.  I made just a dozen and only one remains 24 hours later.

After baking, with just enough time for them to come to room temperature, they were actually nice and soft - despite me misting them with water to try and encourage a crustier crust.  I used Kosher salt instead of fine salt, and when eaten plain, I would have preferred them a touch saltier.  However, made into a sandwich with some type of salty cheese, they were perfect.

sourdough rolls
Not so creative, but delicious asiago cheese and cucumber sandwich.

They are heartier than most soft buns, but I think when using deeper tasting grains that is acceptable.  I'm still using the local Lonesome Stone Milling flours (except for the spelt, which I ground myself from co-op spelt berries), and the taste is so so good.  By today, they really had developed some great flavors.  In fact, I'm thinking of making them again for tomorrow.

The recipe is incredibly simple:  just mix up the dough and autolyse without the salt for 45-60 minutes, then add the salt and give it a few folds at 30 and 60 minutes.  Just wait until the next day, let it laze about on the counter for awhile and bake them.  I used a baking stone, and shoveled them in using a pizza peel dusted with cornmeal.  They are pretty sticky; use a bench scraper to help you cut them and gently form them into rough pieces.  The dough was so sticky I had trouble using a lame to slash - resulting in domed tops.  By the last pieces, I figured out to use a serrated knife - those rolls baked into a more appropriate shape.  Here is the recipe I used, I didn't alter it at all except to make a half batch.

sourdough rolls

I would like to experiment more with soft buns - and I'm sure the baking group will have lots of inspiration, have a look below!  I hope to be more on track for the summer months with Sourdough Surprises participation!