yeast

Yeasted Apricot Upside Down Cake

Before I start, maybe I should say that this isn't the most amazing cake I've ever eaten.  True, I did  love it for the sum of its parts, for the deliberate act of assembling its components, for its subtle mix of simple flavors.  But I think it's possible to love a cake purely for the process of making a cake.  That is how I love this cake.  I love this cake with all of my old soul.

yeasted apricot cake.

Last year I found a copy of Debora Madison's Seasonal Fruit Desserts at the library.  It may no longer be in print, but I loved it so much I found a used copy online, and I'm so glad I did.  It's become a manual I consult whenever I have extra fruit on hand, and it's consistent in the new inspiration and techniques it teaches me.  

Ripe apricots in hand, I began my search online for what to make with them when I remembered she had a recipe for a yeasted pear cake, baked in a cast iron skillet upside down style.  Obsessed as I've been with mint lately, I was really looking for a way to combine some perfectly ripe apricots with fresh mint... and preferably in some type of cake since it has been awhile since I've made a cake.  Fortunately, I decided on this old-fashioned skillet cake.  I was happy for a few occasions to share it, since it is a good sized cake and not really a "good keeper", although I have been appreciating it gracefully staling cold from the fridge and with a scoop of vanilla ice cream.  I can't complain.

browning apricots.

With only 6 tablespoons of sugar, this is a decidedly unsweet confection.  The apricots turn soft and jamlike and make this the perfect thing to have with coffee or tea (or with the aforementioned ice cream, the ice cream adds a little extra sweetness and helps the dry crumb go down a little easier).  I played around with the spices a little and think I could have maybe been a little more aggressive, but in a way it works because the apricots are the stars of the show.

browned apricots

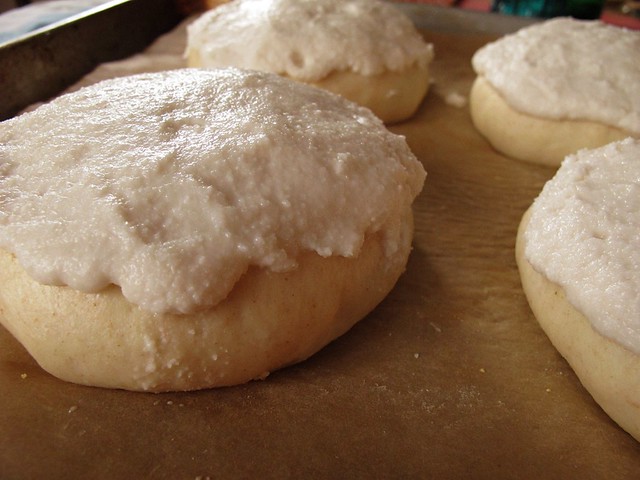
Make sure you take note of each part of the process, enjoying the steps as you go.  It's not a one-bowl cake; it requires some finesse, especially when working with a soft and somewhat sticky dough.  The 
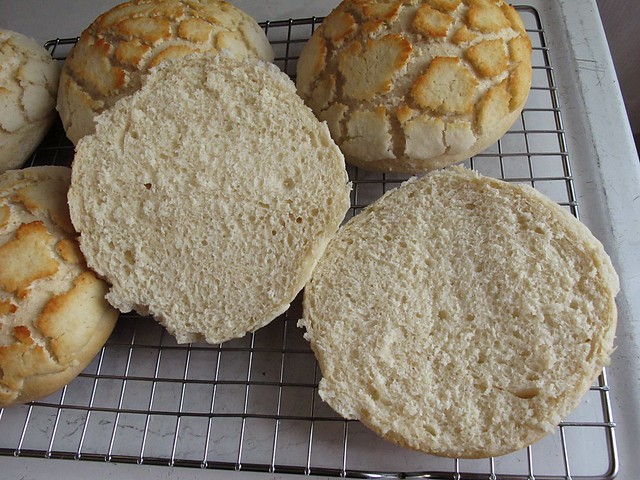
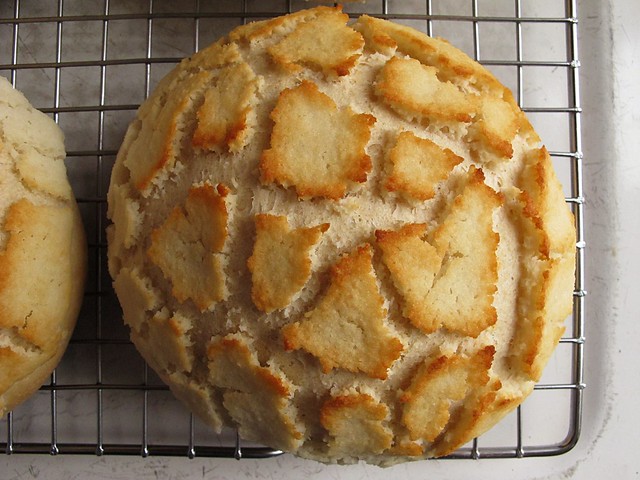
texture of the cake is akin to a biscuit, and as Madison says, it is best warm.  I would store any leftovers in the refrigerator and try to eat them within a few days.  The texture changes, but it's still good.

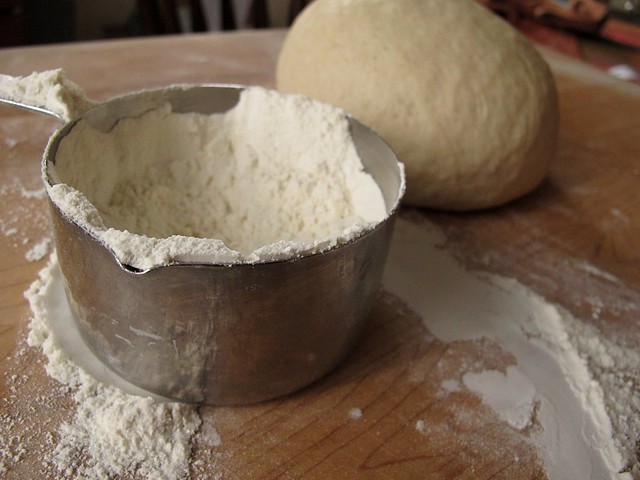
I used Lonesome Stone Milling's organic all purpose flour which is wheatier than most, more like a "white wheat" available in the regular grocery.  The recipe is written for a 10 inch cast iron skillet (oddly enough, that's my number 8 skillet), you could use a well buttered 10 inch springform or cake pan and brown the fruit with the butter in a skillet first if you don't have cast iron that size.

Yeasted Apricot Upside Down Cake (adapted from Deborah Madison)
makes 1 10 inch cake
  •  6-7 ripe apricots, washed (but not peeled) and halved
  • 2 T. dark brown sugar
  • 8 T. (1 stick or 4 oz.) soft butter, divided
  • 1/4 c. warm water (100 degrees)
  • 1/2 c. warm whole milk (100 degrees)
  • 1/4 c. granulated sugar
  • 2 1/4 t. active dry yeast
  • 2 1/2 c. ap flour, divided 
  • 1 t. cinnamon
  • 1 green cardamom pod, seeds removed and crushed
  • 1 egg plus 2 egg yolks, at room temperature
  • 1/2 t. almond extract
  • 1/2 t. kosher salt
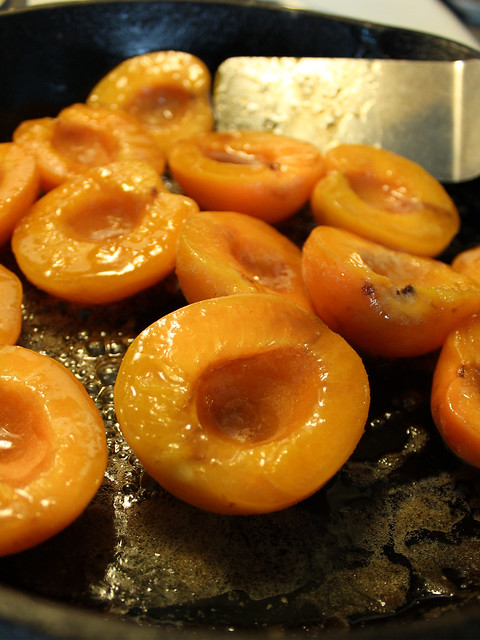
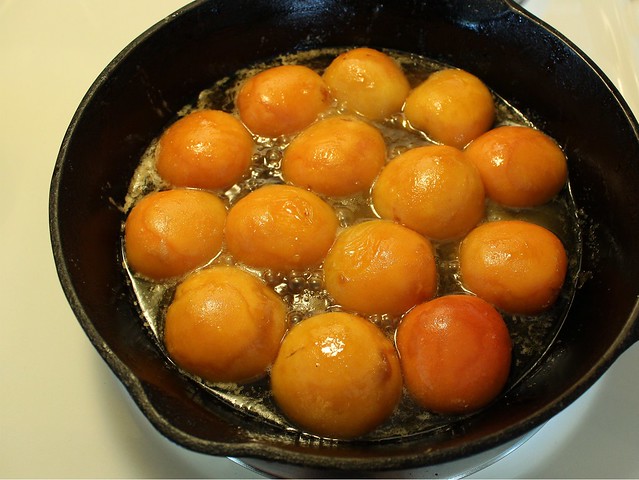
Melt 3 T. of the butter in the cast iron skillet over medium-high heat.  After it melts, brush it well up the sides of the pan and add the dark brown sugar and the apricot halves.  Toss the apricots in the bubbling mixture to coat, and then let them brown slightly on both sides, about 4 minutes total.  Turn them all cut side down and arrange them as you like and remove the skillet from the heat.

Put the warm water and milk in a small measuring cup and add the yeast and 1 t. of the sugar from the measured 1/4 c. of granulated sugar.  Set aside to proof, and meanwhile whisk together 2 c. of the ap flour with the cinnamon and cardamom.

In a bowl of a stand mixer (or in a large bowl if working with a hand mixer), add the egg and egg yolks, almond extract, remaining sugar, and salt.  Working with the paddle attachment, beat in the yeast mixture on low speed, then add the flour/spice mixture (also at low speed) 1/2 c. at a time until it is all incorporated.  Increase the speed to medium-high, and add the soft butter.  Beat for 2-3 minutes until the batter is smooth and glossy.  By hand, stir in the remaining 1/2 c. flour, and turn it out onto a lightly floured counter.  (It will still be sticky, use a bench scraper to help you maneuver it.)  Knead it gently a few times, then pat into circle the same size as the skillet holding the apricots.  Lay the disc over the fruit, and slide the whole pan into a plastic bag to rise for 30-40 minutes.

Preheat the oven to 350.  Once the oven is hot and the cake is noticeably risen, remove it from the plastic bag and bake until golden brown and a tester comes out clean, about 30 minutes.

After removing from the oven, immediately invert by placing a cake plate over the pan and flipping it carefully.  As Madison recommends, serve it warm with whipped cream (she also recommends sabayon) - I say go for the vanilla ice cream.

yeasted apricot cake
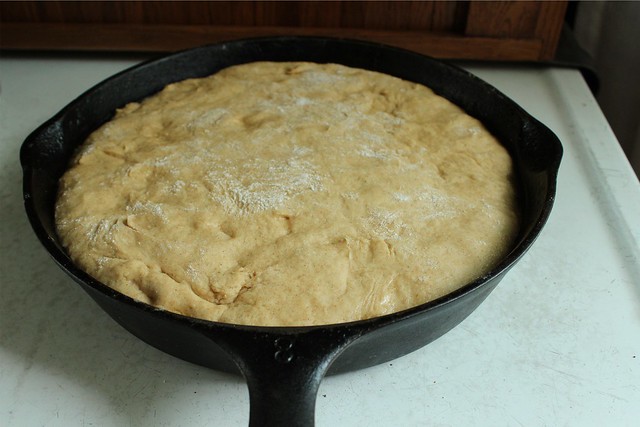
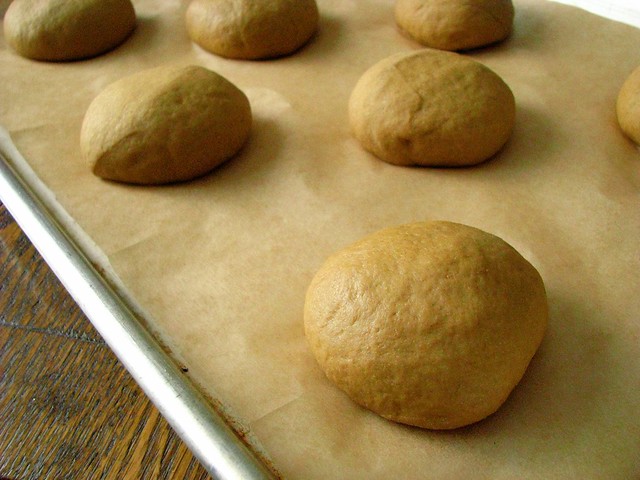
Just prior to baking.

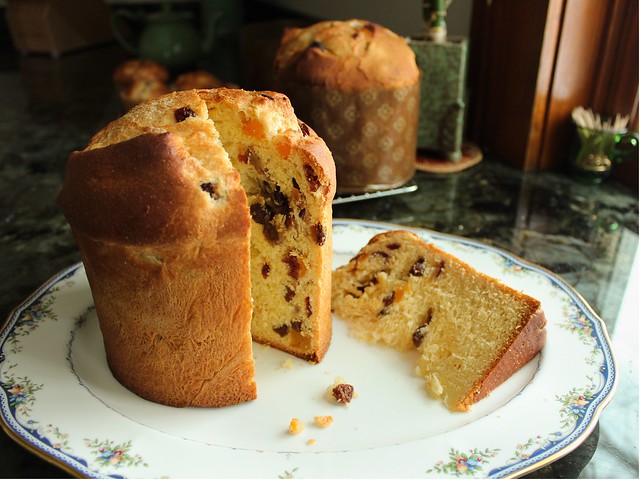
Of all the many cakes I've made over the years, not many yeasted cakes come to mind (a noteable exception is the panettone), and this one seems to be versatile enough that with mindful spicing, you could use just about any fruit that comes to mind.  I'd imagine using a whiter flour would result in a slightly less dense cake, but I like this old-timey texture and depression-era sweetness.  It's satisfying.

apricot cake slice

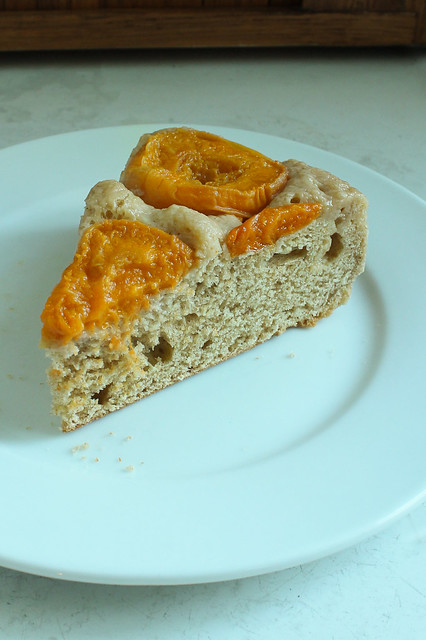
This slice is 3 days old, and I took the picture tonight just as the sun was about to fall behind the trees.  It's not photogenic really, but it shows the texture of the cold cake pretty well.  I always think there are two types of people (well, 3 really if you count "pie" people) those who refrigerate cakes and those who don't.  I am one who doesn't.  I don't like cold cake, I like cake about to fall apart under the weigh of my fork - or better, under the weight of thinking about my fork.  But this is a sturdy cake that I love and I hope you'll love it too.  If you happen to try it with other seasonal fruits, let me know will you?

(P.S. A couple weeks ago when I was just starting to see apricots pop up at my food co-op, I made this apricot jam... it's a winner.  I'm eating it nearly every day (it's particularly good in vinaigrette with really good olive oil and Bragg's cider vinegar) and I am still not tired of apricot!)


Daring Baker Challenge December 2012: Panettone

panettone

The December 2012 Daring Bakers’ challenge was hosted by the talented Marcellina of Marcellina in Cucina. Marcellina challenged us to create our own custom Panettone, a traditional Italian holiday bread!

After a two month break from the Daring Baker Challenge, I finally felt up to participating.  It helped that the challenge host, a blogger I've followed for years who is quite an accomplished baker, chose a bread that I've always wanted to make: panettone.

I can tell I'm not quite back to my normal levels of crazy experimenter, because had I been, I'd have chased all over town checking Asian markets for elusive citron and candying them myself.  Traditional panettone contains ample amounts of candied citrus peels and the candy peel of the citron fruit, which is pith-heavy and floral citrus variety with roots in the Middle East and Asia.  Had I more gusto and time, I would do a bit more digging and find out how this unusual fruit happened to become the most important ingredient in an Italian delicacy - but I'll save that curiosity for another time.

panettone, unbaked

This heavily fortified bread reminded me of pan de muerto.  With so much butter, you could hardly expect it to be tender and light, but it is.  Despite the fortification, it also "stales gracefully", with a changing texture and deepening flavor complexity as the days wear on.  I made the breads at my parents' farm, where I have spent the entire week catching up on relaxing and enjoying heavy dustings of picturesque snowfall, which always seem to miss us so close to Lake Michigan lately.  My Mom graciously bought me some candied citron and fruitcake mix to use in my panettone, but after smelling and tasting the rising dough we both agreed that we couldn't ruin it with grocery store standard (and quite chemically tasting) fake peel. 

Instead, I used the remainder of a little packet of wonderfully delicious candied Meyer lemon and sour orange peels that Julia sent me in a Christmas card (and I didn't send out a single card this year, either...).  I chopped it very small, and added it to a mixture of real dried fruits my Mom had on hand: some dates, cranberries, dark raisins, and apricots - all soaked in boiling water to soften them.  Combined with the small amount of candied peel and the zest from both a lemon and an orange, my panettone may no longer be truly Italian in nature, but it was more than delicious.  I couldn't be more thankful I didn't use the fake, supermarket peel in them!

mini panettone

panettone, mini

Last year, I had intended to babysit my starter for a week and feed it multiple times per day (while maintaining it at a specific temperature as specified over at Wild Yeast to make sourdough panettone.  My neighbor had two paper molds that she gave me, and I've stored them for a year.  This was definitely the year that I had to make the panettone.  I made some slightly smaller in muffin liners to compensate for the 1/2 inch I was lacking in diameter.  In general I think portion control is a good thing, and I would definitely make the muffin-sized breads again.  As a note, I'll remember that filling the tins nearly to the top with a ball of panettone dough made a prettier and slightly heftier miniature bread.

mini panettone

sliced panettone

Otherwise, I made the breads just as Marcellina outlined in the recipe.  I let the 1st rise dough raise for about 2 hours on the counter, then popped it into the refrigerator overnight.  My Mom has a fancy oven with a proofing mode, so I was able to proof the breads at 90 degrees the next day.  Filling the cold dough with fruit and rolling it was easier with a soft dough just from the fridge, and the formed breads raised in about 21/2 hours in the proofing oven.  (Another note:  that the muffin tin panettone baked much faster than the deep, molded ones.  I baked them the same way, 10 minutes at 400, 10 minutes at 350, and maybe about 5 minutes at 325.)

panettone

I hope I continue to feel well enough to continue with the DB Challenge again next month.  I forgot how excited I get when I try something and it meets all of my expectations (not that it happens every time with the Daring Challenge...).  A huge thank you to Marcellina for choosing such a wonderful recipe!  I'm certain that I'll be making this again next year!

Dutchie Crust: Daring Baker Challenge March 2012

Sara and Erica of Baking JDs were our March 2012 Daring Baker hostesses! Sara & Erica challenged us to make Dutch Crunch bread, a delicious sandwich bread with a unique, crunchy topping. Sara and Erica also challenged us to create a one of a kind sandwich with our bread!

Dutchie crust

Our San Franciscan hosts call this crispy, crunchy bread Dutch Crunch, but in Milwaukee we call it Dutchie Crust. I actually never had any rolls of this type until I met my Husband and his family, and was introduced to Canfora Bakery just down the road from our house. Canfora is a "European" style bakery, and I do confess that I feel no guilt in the occasional purchase of hard rolls from them. They are fluffy and soft inside with a thin, brittle crackling crust - and I couldn't help but want to compare this month's challenge to them.

I followed the provided recipes for both the rolls and the topping, although I'd like to experiment more with this topping, perhaps even on a sourdough roll. It is made primarily of rice flour, which I ground from white rice in my VitaMix. I haven't ever purchased any rice flour, but homemade rice flour never quite loses the trace of grit you would expect from a hard, brown or white rice kernel.

The rice flour is mixed with yeast and water, a little sugar, oil and salt and left to sit for about 15 minutes before "painting" the tops of the risen rolls. It is thick, and I used my hands to almost mold it to the tops of rising bread. The bread dough recipe itself was a pretty standard roll recipe, and the heavy rice topping seemed to make them flatten out a bit, even though they were rising fine. Not a bad thing, and they would probably make a good torta or sandwich roll (I dug through my frozen leftovers and found some pork and cabbage from December that I heated and thickened with a little flour. It wasn't picturesque, but it was tasty.)

rice flour topping

The topping made the rolls a bit gritty to eat, though the interiors were soft and pleasant enough. (My Husband picked out the filling and ate it alongside his meal...) I found them ok, in part because I was comparing them to the Dutchie crust rolls from down the street, and in part because the topping literally left a bad taste in my mouth.

I consulted Fany Gerson's recipe for conchas, and noticed that the topping uses flour and baking powder - the same type of topping I believe my Rhode Islander father-in-law said they used on top of the Dutch Crust rolls he made when he worked in a Portuguese bakery when he was young. Gerson's recipe has quite a lot of sugar, presumably because conchas are really a pan dulce, or sweet bread. But I may be on to something if I begin to experiment with it.

doughDutchie crust roll interior

I'll be sure to write an update when I try again to master the mysteries of the Dutchie Crust roll, Meanwhile, be sure to check out the Daring Baker blogroll to find other variations on the challenge this month.

Dutchie crust roll

Whole Wheat 'Burger' Buns, and a Healthier New Year.

A brand new year, and a fresh blank page: it seems that with each passing year, that happens more and more quickly. I remember this daily now as I think back to when I was the same age as the Kiddo and Christmas hung in the air for what felt like 6 months. The anticipation of Christmas Eve, when our Mexican Feast filled my Gram's little red log home to capacity, was the crown jewel of my year. The week between Christmas and New Year's Eve where we were pretty much free to do whatever and stay up as late as we liked was the best micro-climate of my youth . Even as I got older, I still held Christmas week sacred, using up what vacation time I had to take off most of the time between the 24th and the 31st, to just relax and not do anything related to my normal, routine life.

My week this year did not disappoint. I spent it in the company of some of my favorite people, my Parents. We ate frequently and too much, I whined about my sugar consumption, and made my first vow to lay off it for real. We took naps and watched movies. I did my Amish errands to pick up my egg, flour, and sugar staples, and I even ate lunch with my old boss and some long lost 90-year-old friends. I relaxed so much I didn't even have to feed my sourdough starter, since I had fed it and put it into my fridge the day before I left.

It's only been a few times now that I haven't traveled with my starter, and it still feels a bit like I'm leaving something behind. When I have that living thing on my counter every day, it's a good reminder that "if I take care of you, you'll take care of me". I really do love sourdough baking, and since I have ready access to well fed starter, it's become almost easy to calculate exactly how long until a wild bread can pop out of my oven. But every once in a while, it's so exciting to have the versatility of commercial yeast at my fingertips...

whole wheat burger buns

My Mom and I went to a thrift store over the break where I found a copy of Lukas Volger's Veggie Burgers Every Which Way. I read the whole thing cover to cover before I even got back home, and did so even though I was so full during most of my reading that the tempting combinations didn't even pique my appetite. I read a lot of cookbooks, and I haven't been this infatuated with almost everything in a book I've read in quite a while. I want to make everything! The man has a beet and brown rice burger! (And, a cauliflower burger!) It's infinitely inspiring I tell you, and all of it is healthy. While you are waiting for your copy to arrive, you can check out Lukas' equally inspiring website, like I did for a good chunk of my morning...

After a few new days of austere eating (and I've been without sugar now for 3 whole days - outside of a few bites of cream soda creme brulee on New Year's Day), I actually am rewarded with ravenous hunger and appropriate appetite, and those recipes are now completely dogging my every step. When I had only a heel of hybrid sourdough left from two days ago and needed an accompaniment for our soup dinner tonight, I decided to give one of Lukas' burger buns a go - and I am not sorry I did. His headnote states that he's "happy to eat them without anything sandwiched inside", and I would full-heartedly agree. So would both of my picky boys, who ate them and asked for seconds. I made them with the express purpose of having some leftovers for some veggie burgers for tomorrow, but they ended up fueling my excitement for non-wild yeasts!

hybrid sourdough (soft crust)
my first loaf of 2012: hybrid sourdough - but I baked this one in cast iron...

My problem with baking now is that I sometimes don't pay close enough attention to what I'm doing. I was mixing up this dough intending to use whole wheat (strong) flour and bread flour and accidentally opened the jar of AP flour. To a gorgeous caramel colored slurry of water, milk, molasses and a hint of maple syrup, I added 1 cup each bread flour and AP flour, and then added in all of the whole wheat flour as I mixed. My dough was the color of unbaked light gingerbread, and smelled wheaty and slightly sweet - a scent that with 3 days of sugar-freedom I was highly aware of. The recipe below has the flours as written with very few changes from me. Just be careful not to add too much flour, and these should be some of the softest burger buns you've ever had.

rising bun

Lukas Volger's Whole Wheat 'Burger' Buns (very slightly adapted)
yield 10 buns
  • 1 c. warm water (less than 115 degrees F)
  • 3 T. warm milk (I used cold milk, and slightly hotter water to warm it up
  • 1 T. maple syrup
  • 2 T. molasses
  • 2 T. olive oil, plus additional for coating the bowl
  • 2 1/4 t. active dry yeast
  • 1 egg, beaten
  • 1 1/2 - 2 1/2 c. bread flour
  • 1 1/4 c. whole wheat flour (I used a high protein whole wheat)
  • 2 1/4 t. kosher salt
  • 1 egg beaten with 1 T. water or milk for eggwash (I used egg whites, since I had a number leftover from the creme brulee), optional
  • mixed seeds for garnish (I used poppy, sesame, rolled oats, wheat bran, and chia)
In a small bowl, combine water, milk, maple syrup, molasses and olive oil, and stir well to mix. Stir in yeast, and let stand for 5 minutes, until the yeast looks foamy and activated.

In a large bowl, or the bowl of a stand mixer, stir to combine 1 c. of the bread flour, 1 c. of the whole wheat flour, and the salt. Add the activated yeast mixture and mix well. (Volger suggests using a paddle attachment at first if using a stand mixer, but I did it by hand with a Danish whisk, and then switched out to let the dough hook do my kneading.) Add the additional flours to feel (add the whole wheat first, since it's only 1/4), being careful not to make too stiff a dough. Knead 10-12 minutes by hand, or 8-10 minutes with the stand mixer. The dough will feel smooth and elastic, not really sticky. Form the dough into a loose ball.

Coat a large bowl with a bit of olive oil, and place the dough inside. Cover with plastic wrap and leave in a warm place to double in size, 1 to 2 hours. (It's very cold here today, and I actually did my first rise at 90 degrees in my dehydrator! It worked great, and the dough doubled in one hour.)

After the first rise, divide dough into 10 portions (I weighed it, each roll was 89 g. or about 3 oz. - a perfect size for a burger), and place on a parchment lined baking sheet. (Place them at least 3-4 inches apart if you don't want them to touch at all, this is 8 rolls for a standard quarter sheet pan) Cover with a lint-free cloth, and let rise until the buns are doubled in size, another 1-2 hours.

Towards the end of the rising time, preheat the oven to 400. Just before baking, brush each roll with the eggwash and sprinkle with seeds if desired. Bake the rolls for about 15 minutes, rotating the pans halfway through.

seedy topped.

I know I shouldn't be so surprised when something turns out great, after all shouldn't most published recipes be great? And, don't I know how to bake bread? Why shouldn't I just expect the bread is going to turn out? These could be some of the mysteries that prevent so many people from the the joys of bread baking. But, with each bread attempt, I still learn something. These taught me to realize that I don't care much for heartier Anadama bread, with larger amounts of coal black molasses. I like the flavor of molasses in bread much more when it is tempered to caramel goodness, and soft. Soft bread does have it's place on my table once in a while.

soft wheat burger bun
a sharp eye will notice the middle of this is just a bit damp. that's because I was too excited to wait for this bun to cool before slicing into it.

It is my goal to go without refined sugar for the entire month of January. (Julia and I have a dedicated Sugar-Free January Facebook page here, if you want to check it out or participate.) The blackstrap molasses I used today is maybe technically refined. It is a by-product of the cane sugar industry, but it's not unlike boiling down apple cider into cider syrup, or boiling down pomegranates into pomegranate "molasses". My goal for this month isn't to berate myself and get upset, it's only to be more mindful of my sugar consumption - and this includes my fruit intake too. I love vegetables, but fruits do seem easier to grab this time of year. I'm hoping a book like Veggie Burgers Every Which Way will continue to inspire me to eat differently and appreciate different flavors. Judging from just this first recipe, I have no doubts really.

When the month and the year are new, and I feel the same blank slate that many do this time of year, I am happy for the variation in my diet, and thankful that I have the ability to be so choosy about what I eat!


This post has been Yeastspotted.