Butter Tortillas.

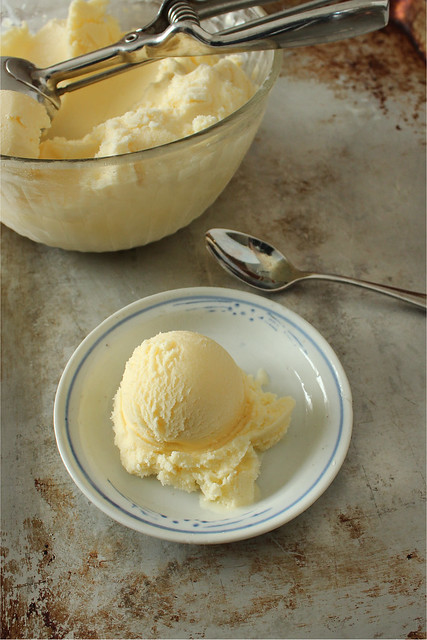
I'm sure you've heard we are once again living in the golden age of butter.  Butter makes everything better, and I can't tell you how liberating it is to just use it without the guilt of the low-fat '90's plaguing me.  My whole outlook on fat has obviously changed for the better over the past several  years, and strangely I not gained a single pound in the process (well, not counting the gains and loss of baby weight...).  While eating more fat, I have also never purchased less prepared food in my life: in part due to our economic status, but even more because whenever I read a label, I lose my appetite.

There are quite a few "convenience" foods that I haven't bought it ages and canned beans and tortillas top the list.  For years, I quietly made my own corn tortillas using Maseca and an aluminum tortilla press that someone gave me years ago.  I never made flour tortillas; my Mom always made them without a recipe, and hers were untouchable good.  Then two things happened.  My aluminum press broke, and Deena posted about some whole wheat flour tortillas that I tried and loved.  They were made with a ratio, not by feel and I could handle that.

I used her post as my only recipe for a long time, probably exclusively for about a year after my tortilla press bit the dust.  Then by chance, I was leafing through Peter Reinhart's Crust and Crumb - still one of my favorite bread books ever.  How had I never seen there was a tortilla recipe there?  How could a tortilla made with softened butter be bad?  I had to experiment.

tortillas

Not only are these consistently good, I found that I could use virtually any flour and have them turn out wonderfully.  I've used all whole wheat and part whole wheat, high-protein bread flour, or spelt, or whatever I've had ground and needing to be used up.  I remember to take out some butter early in the day and by the time I'm ready to mix up the dough it's soft and ready to go.

Before being forced to master the flour tortilla, I never let my cast iron heat up long enough.  Awhile back, my Mom bought me a double burner cast iron comal when we were shopping at our favorite "junk shop".  It was like new, and took very little reseasoning to get it conditioned.  This allows me to make tortillas twice as fast.  A batch of 8 can be done in about 20 minutes if I let the iron heat for about 10 minutes before I'm ready to start griddling them.  And 20 minutes standing over my stove tending to the rest of the meal simultaneously makes me feel like the best kind of multitasker. 

I like to mix up the tortilla dough several hours before using it.  It seems to hydrate the dough - and somehow makes the whole process feel like less work.  Many times, I'll cook the tortillas before I even start the rest of the dinner - nestling them in blankets of tea towels to keep them warm and pliable.  I used to try to roll them too thin, now I aim for a slightly more substantial feel.  I'm also lucky to have a Roul'Pat for my counter, which lets me use less flour when rolling too.  I use that for all of my breadmaking as well, so I'd recommend it as a good investment if you do a lot of baking, or as a gift for someone you know who does.

tortillas
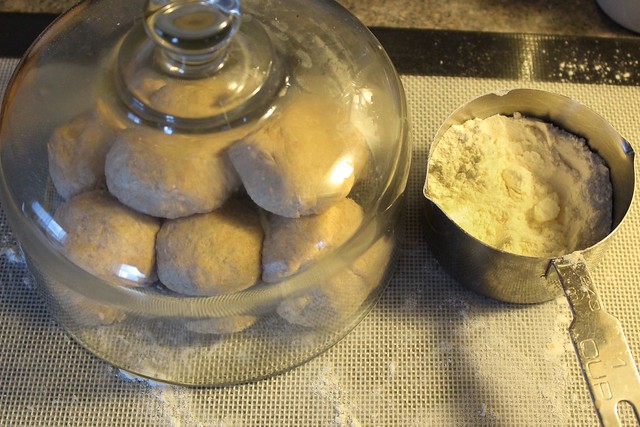
I form the dough into balls, and then let them sit up to several hours until I'm ready to griddle them.

I find this makes the perfect amount for one meal with perhaps a few leftover depending on our appetites.  Double the recipe easily if you'd like more. They do hold well for a few days in the refrigerator, but then I like to steam them in some sort of creative stovetop contraption before serving them.  If toasted, they become nicely brittle: make them into homemade chips or tostada shells easily by baking them for 10 minutes or so at 350.

Flour Tortillas made with Butter (Peter Reinhart's ratio)
8 tortillas
  • 8 oz. (1 3/4 c.) bread flour (I like half whole wheat and half AP flour most of the time)
  • big pinch of salt
  • 2 oz. (half a stick or 1/4 c.) room temperature butter
  • 4 oz. (1/2 c.) warm water
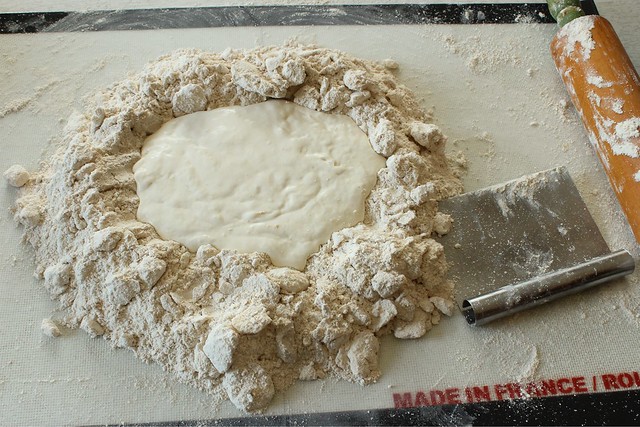
Combine flour, salt, and butter in a large bowl and use your fingers to rub the butter into the flour until it is evenly coated and no large pieces of butter remain.  (I usually taste the dough to see if the salt is to my liking.)  Pour the warm water over and use your hand or a wooden spoon to form a rough dough.  Turn the dough out onto a lightly floured counter and knead a few times to form into a smooth round ball.  (Because I like to let the dough sit for so long, I don't spend too much time kneading it as time is my ally in hydrating and developing the gluten.  If you are going to use the dough soon after making, knead for 2-3 minutes to form a better dough.)

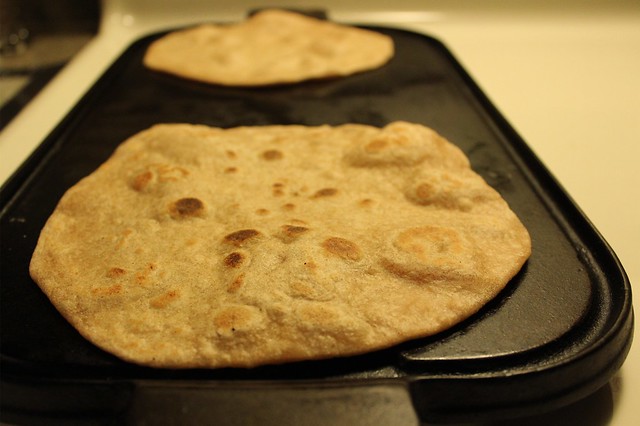
Divide the dough into 8 equal pieces, and roll each piece into a tight round.  Cover with a bowl (the same one used for mixing works) or plastic wrap to keep them from drying out.  Heat iron skillet over medium to medium-high for 10 minutes before cooking them (a drop of water should sizzle and evaporate quickly - you'll need to reduce the heat then because the cast iron retains heat so well).  Roll out each ball of dough to about an 8 inch circle using a bit of flour.  Try not to have an excess of flour as you transfer them to the pan or they can burn on the griddle.  Cook on the first side until large bubbles start to form, then flip and cook the on the opposite side.  Once browned, flip over if needed to finish cooking on the first side.  Meanwhile, you can roll your next tortilla and have it ready to go by the time the first one is finished cooking.

Stack the just cooked tortillas in a stack of tea towels to keep them warm.

tortillas

So just why haven't I bought another tortilla press yet?  In part because flour tortillas are just so good.  I also really do not want to waste money on another cheaply made aluminum press.  I have my eye on this $75 beauty, but better I want to have my brother make one for me.  With wooden plates more than an inch thick, it won't warp and will always press a tortilla perfectly flat... not to mention it will be something I'll have forever.  I'm actually glad I don't have one yet because in the time frame since I've been missing it, Mexico went corn-GMO free - so the Maseca of the future will be better for all of us.

Necessity is the mother of invention, and in my case, the mother of mastery since I no longer am phobic of making sub-par flour tortillas.  They still aren't my Mom's, but they are very good and I can make them almost as fast as corn tortillas.  I generally make something involving the tortilla once a week, so this past year I might have made as many as 30 dozen tortillas, and I am now completely sold on them made with butter. 

Just this week I saw that America's Test Kitchen released a tortilla making video, not using butter but also using warm water.  Give it a look for some science behind that - and for another recipe to try.


Chocolate Tahini Tea Cake.

Spring really seems to be taking the time in arriving this year.  We've had more downright cold and rainy days than moderately sunny and mild ones, and just when I think I should be craving more bright and light food, I'm drawn back to rib-sticking, carb heavy, comforting things.  Not that I ever need an excuse to bake.  Even in the hottest part of the year, I brave the lighting of my oven.  No matter the season, baking is akin to life-giving breath for me - especially in the sourdough department.  Quick bread making, however, seems to dwindle in the summer months, becoming much more of an occasional task than a weekly one.  

chocolate tahini bread

I was thankful for a rainy day yesterday to sneak in another quick bread before the world heats up, one that was more of a tea cake baked in a loaf form and healthy enough to be breakfast if so desired.  I had been thinking about making something with tahini all week, remembering this piece that Deena wrote recently highlighting it.  I love sesame, but never really have tahini on hand.  It seems that my co-op only stocks unhulled sesame seeds, which turn into a fairly bitter butter when ground and processed in the Vitamix.  On a recent shopping trip, I discovered they had packaged tahini themselves and I couldn't resist picking up a little container even though it goes against my grain of making things myself.

During the week Deena sent me more tahini links, and I was almost sold on this one for flatbreads rolled with sweetened tahini.  But couldn't shake both the feeling that I needed a quick bread, AND a little bit of chocolate.  I certainly didn't expect to hit that sweet spot on the first go, but I did!  A perfect concoction of not-too-sweet, reasonably healthy, and just a tad elegant.

loaf pan liners.

I used loaf pan liners that my parents brought me back from a trip they made to the UK. They are smaller than the standard 9x5 or 10x4 loaf tins I have, but fortunately a friend gave me a couple of Ziploc brand (they said "made in Italy" on the labels) glass loaf dishes.  They come with plastic lids for storage - and I love making loaves in them because it's like I have built in storage after baking.  This recipe fits perfectly into the 2 lb. loaf mold, it will likely bake faster and look a little more shallow if using a different sized tin.  I might actually seek out a metal tin this size, since I like a smaller loaf cake or quick bread that has some height to it.

As I searched for a starting point for this cake, I ended up "de-veganizing" a recipe I found on have cake, will travel.  I took a cue from the apple-walnut tea cake I love so much and used a shredded whole apple, peel and all.  It translates as near-applesauce bits and almost disappears altogether.  Some additional sesame seeds lend a little toothsome interest, and using raw honey makes me feel good in a way that agave nectar would never.  And of course, no new baking adventure happens lately without the addition of milk kefir...

I made this cake by weight - approximate amounts for conventional measure are also given.

Chocolate Tahini Tea Cake (inspired by have cake, will travel)
  • 40 g. cocoa powder (about 1/2 c.)
  • 180 g. ap flour (about 1 1/2 c.) (I used local Lonesome Stone Milling flour which is more wheat than most ap flours)
  • 1 1/2 t. baking powder
  • 1/2 t. baking soda
  • 1/4 t. fine salt
  • 96 g. tahini (1/4 c. + 2 T.)
  • 210 g. honey (1/2 c. + 2 T.)
  • 113 g. shredded apple, peel and all but core/seeds removed (1 small, 4 oz. apple - or about 3/4 c. shredded)
  • 154 mL whole milk kefir (scant 3/4 c.)
  • 3 T. sesame seeds, divided
 Preheat oven to 350.  Prepare glass loaf tin with a liner or butter generously and flour well.

Sift cocoa powder, ap flour, baking powder, baking soda, and salt together in a large bowl.  In a medium sized bowl, mix the remaining wet ingredients.  Add the well mixed wet ingredients to the dry and use a spatula to fold together until just mixed and no dry areas remain.  Fold in 2 T. of the sesame seeds, and mix just to distribute evenly.

Transfer mixture to prepared loaf pan, and use a knife to smooth the top evenly.  Sprinkle with remaining 1 T. sesame seeds.  Place in the center of the oven and bake for about an hour until a tester comes out clean.  Remove from oven to a wire rack, and cool for 45 minutes before removing the bread from the loaf pan to continue cooling.  Try to let the bread cool completely, about 2 hours, before slicing.

chocolate tahini bread-2

This bread has such a nice texture, almost "puddinglike" in the way that some British puddings are steamed and then marvelously moist-centered.  It has a satisfying sesame flavor, that if you wanted could be further complemented by spreading a slice with equal parts tahini and sugar (or honey), but that wouldn't really be necessary.  It's good enough to enjoy a fat slice alone, with the company of a cup of coffee or tea.  I've taken to storing the leftover in the refrigerator, as much to prevent myself from eating it too quickly as to protect the dense structure and ample fruit moisture.

I love how a tangent can take over my food life, winding away over a few days and inspiring me more by the hour.  I love having dedicated friends who are up for chatting spontaneously about the best uses for ingredients or which recipe to use or tweak for which occasion... and better yet don't find it the least bit strange when the overwhelming craving for sesame seed hits.

chocolate tahini bread-3

Not sure if I ever officially mentioned it here that I broke down and joined Pinterest.  You can find me under the same name: rcakewalk.  I've been enjoying it, and even more, I enjoy following the whims of my friends and seeing how pins morph and manifest into new inspirations.  I'm doing pretty good at going back over things I've saved for later too.  Unfortunately, I rarely make things more than once (when cooking and not baking, that is), but this social tool is also helping me remember things that were wonderful, and is a quick reference when I try to recall or share.  I probably won't (definitely won't) be adding paper straws to things to photograph, but a pin did lead to my Easter Lamb Cake

Ugly Food.

There is no shortage of naturally beautiful food.  Any quick look online for vegetable-centric recipes will turn up thousands of images:  brightly colored carrots and peppers, enough shades of salad greens to fill a forest, vibrant pink-red beets, unnaturally bright yellow and orange citruses.  Most of the time, cooking vegetables lends color to the plate and a deep satisfaction to ones body as she eats.  The variety of colors and textures, by nature, are photogenic.  And Pinteresters, Instagrammers, Facebookers and the like are all happy to oblige.

broccoli mushroom soup

I have about half a foot in the digital world.  I enjoy photographing things as I've made them as a way to preserve the art form I generally consider cooking to be.  It gives me visual cues to remember them for the future.  My process of creation for the foods I choose to make are as important as the the final plating; I certainly give thought to how something will appear in the end, but I don't let it overtake my frugality or health-mindedness.  I like to think that anything can look beautiful if given the opportunity, but often, I don't brag about the ugly but sustainable foods coming from my kitchen.  The concoctions that arise from the seemingly empty refrigerator go unrecorded, and don't find a way to social media boasting.  The ugly foods are eaten quietly alone for lunch without fanfare, tasty but completely unsightly.

Late last week I did a thorough fridge cleaning.  I cleaned out dozens (I wish that were an exaggeration) of partially full jars, things that had turned and things that were just collecting dust and unlikely to be used due to age or contents.  I was left with a vastness in there: brightly lit glass shelves that I could see through once again.  I found a whole cabbage that had somehow gotten crowded out and pushed to the back, a couple of stalks of broccoli that I all of a sudden remembered buying when it was on sale last week, some mushrooms that needed immediate attention or imminent tossing.

Saturday I wished I had more broccoli as I remembered the impressively simple broccoli soup I had made from Franny's a while ago.  I even considered running out and getting more until I acknowledged the guilt I had for the rapidly decaying mushrooms now occupying their own clean shelf toward the front of the fridge - right where I could be reminded of their presence every single time I opened the door.  Why couldn't I make a broccoli-mushroom soup using Franny's method of hot-searing the ingredients on one side only?  Who cares if I was bound to consume a dirt brown bowl of soup, something I couldn't well be proud of sharing on the Internet...

broccoli mushroom soup

My great-grandmother made the best soup of foraged and dried mushrooms.  It too was kind of an ugly soup, creamy colored and studded with wrinkly rehydrated mushrooms.  It had plenty of tang from sour cream and vinegar, and my Mom is able to make a version that tastes just about like I remember - although I've never reproduced it myself with good luck.  I added vinegar to this soup in memory of that soupYou could even add a little more, but I was feeding a baby as well as myself and so opted for only a couple of tablespoons. 

Broccoli-Mushroom Soup (inspired by Franny's)
 yields about 6 cups
  • about 5 cups of broccoli, florets cut and the stalks trimmed and cut into small pieces
  • 8 oz. (give or take) crimini mushrooms, possibly of questionable freshness, caps only
  • 3-4 good sized garlic cloves, minced
  • 1 medium-large yellow onion, finely chopped
  • olive oil, at least 9 T.
  • unsalted butter, at least 3 T.
  • salt and pepper to taste
  • 3 c. water
  • 1-2 T. apple cider vinegar
  •  asiago cheese (or other salty, firm Italian cheese) for serving
In a large dutch oven, heat 3 tablespoons of the olive oil over fairly high heat (I aim not to scorch the oil or send it to smoking and rendering it not quite as healthful).  Add about half the broccoli in a single layer and let it cook undisturbed for 3-4 minutes - until it is blackened on one side, bright green, and crisp-tender.  Transfer it to a large bowl, heat another 3 T. of olive oil and repeat. After transferring the rest of the broccoli to the bowl, dust it with kosher salt.  Then, heat a little more oil and arrange the mushrooms in a single layer, cap side up.  Put the lid on the pot and let the mushrooms cook for about 2 minutes, just until some moisture is released.  Then, flip the mushroom caps over, and continue cooking with the lid off for another 2-3 minutes until they are nicely roasted looking and somewhat dried out.  Transfer the mushrooms to the bowl with broccoli and reduce the heat under the pot to medium-low heat.  (Maybe give the pot a minute or two to cool down before continuing.)

Add some butter and maybe a little more oil to the pot, and add in the minced garlic.  Try not to let it brown.  After it cooks for a minute or so, add in the onions and a pinch of salt and saute for 4 minutes or so until they are nicely softened.  Add the broccoli and mushrooms back to the pot and add the water.  Taste, and adjust for additional salt, and grind in some black pepper.  Increase the heat and simmer for about 10 minutes until the broccoli and mushrooms are fully soft.

Remove the pan from the heat and blend with an immersion blender or in a blender until it is of the consistency you prefer.  Taste to adjust for salt, and add the cider vinegar to taste.  Eat as hot as possible, with plenty of grated asiago cheese.  (Cubing the cheese is also nice, as is a big spoonful of kefir cream...)

broccoli mushroom soup

The only way I can tell it is spring for sure (other than the date on the calender) is the bright green that has suddenly popped up in my lawn.  The trees aren't really even budding out yet, and overcast rainy days in the mid 30's or 40's has me perpetually thinking about the Nick Cave song that starts out "It was the dirty end of winter, along the loom of the land..."  The dirty end of winter is the time for dirty looking soups like these, vegetables that nourish and taste so good while not looking so good doing it.  It's the ugliest food, getting used up before the explosion of fresh, young things - and it's no less delicious. 

It reminds me of my most favorite, loathsome looking foods: army green pea soup made with dried split peas and bland and flabby looking pasties with cabbage and potatoes, cooked until the pastry is flaky but devoid of any life giving color.   The rhubarb kuchen made with the old industrially-colored workhorse rhubarb that springs to life every year at my parents house (not the pretty, pinky crimson variety favored by every food blogger on the planet), and beef soup made the way my forebears did it by combining everything (including the humbly brown, ground meat) with water and bringing it to a slow simmer with canned tomatoes and whatever else needs using up.  These are real life giving foods, although ugly - and they deserve at least these few moments in the Internet sun.

Book Review: Preserving by the Pint


Preserving by the Pint

When I got my review copy of Marisa McClellan's latest book a few weeks back, time seemed to stand still for the moment and I almost immediately read the entire thing cover to cover.  I had been looking forward to cracking open this one since I had the pleasure of testing a few of the recipes for it last year, and it truly is a lovely addition to the growing canning book section of my kitchen library.

I couldn't help but think as I turned page after page that Marisa is going to be writing new books for years.  She has the magic trifecta in her cookery books: timeless recipes, succinct instructions, and simple inspirations.  She is passionate about her craft, and eager to share with everyone - which I think is the underlying theme of Preserving by the Pint.  Organized by season, this book encourages everyone to make small batches using local and seasonal foods.  It tempts us to branch out and try something maybe we haven't considered before, even to source special ingredients that might not be cost efficient if making a more traditionally sized amount.

small batch preserving.

Personally I like to can for my storage shelves, but with my ongoing quest for sugar reduction, having a jar or two of a really stellar preserves is an excellent idea - especially since I can tend towards the hoarding jams and jellies even when I've made 8 or 9 jars of them.  After finishing the book, I immediate found some Meyer lemons at my co-op to make Candied Meyer Lemon Slices.  Only needing a pound for the recipe made it feel doable for me when I didn't have the foresight to get on the Lemon Ladies list for bulk fruit like Marisa did.  (And, she had made a beautiful Meyer Lemon Syrup on her blog not long before, and I was feeling especially bad for missing the lemon season...) 

candied meyer lemon

I really loved these candied lemons, they had a nice marmalade texture and trademark Meyer lemon astrengency.  I was glad I had a little bit of the syrup leftover which set into a little lemon jelly to enjoy right away on morning toast.  I intend to make a pound cake for my birthday in September and crown it with a jar of them, and I should be able to save a jar that long since the 2 jar yield leaves me one to enjoy before then.

Spring in my neck of the woods also signals maple syruping time and for a while my family had planned to make it to an Amish neighbor's sugaring operation to reacquaint ourselves with the small miracle that is maple syrup.  Last weekend, a small group of family members went to see Daniel Hochstetler's rustic sugar shack.  We arrived just as he was getting the fire going underneath a stainless vat of sap.  Already, he had harvested over 100 gallons of finished syrup and he was hoping for another good week of syruping weather.  (Last year was a perfect year for syrup; they harvested more than 300 gallons and still had some leftover before starting this year.  If boiled to the proper temperature, maple syrup never really spoils.  The two past seasons make up for the strangely warm spring two years ago when there was no syrup to be found.)  My Mom and Dad generously sent me home with 2 gallons, which usually can last us the whole year if we watch our pancake breakfasts...

sugar shack (#2)
I respect the Amish desire not to have their faces photographed, but was able to capture a photo of Daniel and his sugar shack from a distance...

As I stood there breathing in the sauna of maple scented sap, I was dreaming of a recipe Marisa included in the book for Blueberry Maple Jam - thankful for my hoarding of a gallon bagful of blueberries in my freezer from last year, and thankful for a new harvest of syrup to replenish my waning stores. When I got back home, I started the jam right away but got busy.  Fortunately, letting the fruit macerate overnight with the syrup and brown sugar is an acceptable practice.  My yield was a little less than the 2 half-pints, but I suspect it is because I used frozen fruit.  I haven't had blueberry jam in ages - in part because of the amount of berries it requires - and this one was so good.  I was actually glad I was a little shy of a second half pint so I had some to enjoy right away.

blueberry jam maceration

I made this jam with frozen berries and using the metric weights.  As I mentioned above, I think I lost a little volume due to the frozen fruit - but this is so good I probably wouldn't have needed to can it!  If canning, be sure to use the bottled lemon juice.  As Marisa explains, maple syrup is lower in acidity than sugar and the bottled lemon juice ensures a safe acid level.

Blueberry Maple Jam (Marisa McClellan, Preserving by the Pint)
Yields 2 half-pints
  • 1 dry quart fresh blueberries, rinsed, pickedd over, and mashed (about 1 1/2 lbs. / 680 g.)
  • 3/4 c. / 175 g. packed light brown sugar
  • 1/2 c. / 120 ml pure maple syrup
  • 2 T. bottled lemon juice
Prepare a boiling water bath and 2 half-pint jars.  Place 2 lids in a small sauce pan of water and bring to a gentle simmer.

Combine the blueberries, sugar, maple syrup, and lemon juice in a large skillet.  (I used this 3-quart one, which was a perfect size.) Stir to help the sugar dissolve and to integrate the maple syrup.  Once the mixture has begun to look syrupy, place the skillet over medium-high heat and bring to a boil.

Stirring regularly, bring the fruit to a boil and cook until it bubbles and looks quite thick, 10-12 minutes.  It's done when you pull a spatula through the jam and it doesn't immediately rush in to fill the space you've cleared.

When the jam is finished cooking, remove the pot from the heat and pour into the prepared jars.  Wipe the rims, apply the lids and rings, and process in a boiling water bath for 10 minutes.

blueberry maple jam

I can't say I've ever used my 3 quart saucepan to make jam before, and that is a great tip for small batches in particular.  The surface area helps evaporate the liquid faster; I really couldn't believe the small batch was finished cooking in just 10 minutes. 

Another great thing about this book is that if you make just a few jars of something, you wouldn't necessarily have to can it if you didn't want to.  Save yourself a jar, and share another with a neighbor or two and save yourself a hot water bath and the canning time.  But I am looking forward to a little patchwork of fully preserved jars on the shelf by the first frost of fall, new preserves from this beautiful book to take me through the winter and help me wait out the time until Marisa's next book.

You can catch more glimpses of Preserving by the Pint at The Preserved Life, Well Preserved, Hip Girls Guide to Homemaking (still a couple of days left to enter their giveaway), and of course at Food in Jars where you can also find Marisa's upcoming appearances.

blueberry jam pot

DISCLOSURE: I received a copy of this book for review, but as always all of my thoughts and opinions are my own.

Experiments in Milk Kefir.


A few years ago, I became overzealous with cultured foods.  I tried culturing everything from leftovers to condiments, and had buttermilk, yogurt, kombucha, and several types of experimental vinegars (not to mention the sourdough) all vying for attention around the kitchen.  Slowly, a few of the cultures lost their "oomph", victims I'm guessing of cross-contamination.  I began to streamline my cultured life, focusing on the things that I loved most and were most practical for me to continue with, and by default reducing the amount of stress of caring for all of the little “children” with varying needs and schedules.

First to go was buttermilk.  I loved making homemade buttermilk, but with yogurt also being made, I couldn’t justify keeping both – especially when the best quality milk I can find runs me $4.50 per half gallon.  I never drank plain buttermilk either, so I was keeping it solely for baking purposes.  Yogurt filled in this gap nicely, especially when I found a no-heat, Scandinavian culture at Cultures for Health called viili.  I loved it completely, and used it exclusively for about a year and a half until it died out on me.  I tried to restart it from some extra dehydrated, and didn’t have any luck.  I took to buying some local yogurt that was made from non-organic but also non-homogenized milk, and it was so good that for the last year I just called it good enough.  I was nice to have the break from weekly worry, even though it only took seconds to perpetuate the culture.  With a new baby on the way it just seemed refreshing not to do every little thing myself and to take it “easy” while I still could.

soaked soda bread
Kefir soaked soda bread: click the photo for recipe... 

Maybe because this winter got so long, I started feeling lonely for additional culture in my life.  I tried again to reactivate some powdered viili yogurt culture without luck.  Is there too much sourdough in my atmosphere around here?  After the arrival of Tartine #3 and the many recipes in it using milk kefir, I decided this was my new solution to a probiotic, milk-like baking and drinking medium.  Holly L. sent me a loving start from Minneapolis back in February, and every 24 hours since I’ve been harvesting a cupful of milk kefir.

The milk kefir grains are healthy and multiplying, and from what I’ve read the symbiotic relationship between the bacteria and yeasts (similar to kombucha) create more priobiotic punch in the finished product than a standard yogurt or buttermilk containing bacteria strains alone.  Mostly I culture whole milk, but culturing heavy cream is superior, and it’s good in absolutely everything – particularly as an ingredient in baked goods and stirred last minute into soups.  It seems to bake up heavier than yogurt or buttermilk however; there is a learning curve for me as I go about converting.

whole wheat kefir banana bread.
Whole Wheat Kefir Banana Bread - another recipe link if you click the photo!

Last week, I decided it’s been too long since I’d made ice cream and I was itching to try one made with milk kefir as a main part of the base.  On internet perusal, most people either heated the kefir or omitted the eggs – but I wanted no heat to come to my kefir and I wanted an egg yolk base to my frozen concoction.  I compromised my technique, heating 4 egg yolks with a small amount of whole milk to the 170 degree mark, then combining it with cold heavy cream and whole milk kefir.  The result was a mildly tangy, probiotic rich ice cream that I loved.  It was creamier and more like soft serve after about 2 hours in the freezer, and then slowly morphed into a more icy, crystalline structure that was still soft enough to scoop.  A week later, it’s still delicious!

milk kefir ice cream

This milk kefir ice cream seems to have a naturally lemony taste, which could be enhanced by including some zest if you like that sort of thing… I actually added a tiny bit of almond extract which lends a pleasant bitter note in the aftertaste.  I would omit that if playing up the citrus zest.

Milk Kefir Ice Cream (inspired by recipes from David Lebovitz and the Bojon Gourmet)
yields about 1 quart
  • 1 1/4 c. whole milk kefir
  • 1 c. heavy cream
  • 4 egg yolks
  • 3/4 c. whole milk
  • 1/2 c. granulated sugar
  • 2 T. brown sugar (light or dark)
  • 1 t. vanilla extract
  • 1/4 t. almond extract (optional)
Combine kefir and heavy cream in a large bowl or quart jar.  Beat the egg yolks briefly in a small bowl and set aside. To a small sauce pan, combine whole milk and the granulated and brown sugars and heat over medium heat stirring with a spatula until the sugars melt. Temper the egg yolks with the warm milk, then add them to the saucepan.  Increase the heat a bit, and cook, stirring constantly, until the mixture just thickens (or until the temperature reaches 170 degrees).  Pour into the large bowl or jar with the kefir and heavy cream, add the vanilla and optional almond extract and stir well.  Chill thoroughly, preferably for 24-48 hours, before churning in an ice cream maker according to the manufacturer instructions.


milk kefir scones
That's a good amount of the new local flour I just discovered from Lonesome Stone Milling.  I can't be more excited to begin baking with Wisconsin grown and milled organic flour...

Last Friday, I used milk kefir cream in the Tartine #3 recipe for whole grain scones, the recipe I'd had my eye on since first cracking that book open, and probably the one that made me anxious to start my own milk kefir culturing in the first place. I made my version with Cara Cara orange zest and some of the blackberries I had hoarded in my freezer since last summer.  Without a doubt, they were the messiest endeavor I'd ever encountered, but the result was thankfully more than worth it.

milk kefir scones

I cut 16 scones instead of 12 (which would have been massive in my opinion), and froze them all.  The point of scones to me is baking them from the freezer, and these passed this test.  They might not have been quite as flaky as baked fresh after forming, but they were perfect.  Not too sweet, flaky and crisp on the outside - I was so pleased that I had kept the blackberries for such a worthy pastry.  (When baking scones from frozen, I give them about 40 minutes at room temperature before they go into the hot oven.  I look for just being able to indent them with my fingertip - signaling that they aren't frozen completely solid.  With high butter content, this time frame usually is about right.)

milk kefir scones

I'm far from finished working out new projects with milk kefir.  On my short list: pancakes (subbing for buttermilk in my basic recipe made for flapjacks a little on the dense side), non-banana quick breads, and another ice cream built entirely on kefir cream.  All in all, the new culture on my block seems easily at home after just a few short weeks - and it seems to inspire me to get back to a few other long lost ferments.