strawberry

(PRiMO Strawberry Ancho Preserves + Giveaway)

Untitled

I took a deep breath while standing at my kitchen sink this morning after doing the breakfast dishes. One boy ate leftover blue cornmeal pancakes from yesterday morning, and the other several leftover rolled up crêpes spread with an iteration of Megan Gordon's chocolate-hazelnut spread. My timing was on. It was 7:15 and everything was cleaned up.  I had my pre-measured coffee beans in the grinder and ready to brew, 2 hours before I usually even think of making my coffee.  Not taking into account the time needed to dress myself appropriately, I feel like I'm getting this.  My new life is about to start and I have one last week of daily homelife to myself before embarking on this new adventure, new chapter in my life.  Before it all begins for real.

As this space where I collect my kitchen life felt slowly more and more neglected, I have found all the words pouring around in my head.  A food blog is no place to recount the details of broken hearts, and lives forever and irrevocably changed.  Or maybe it is.  The truth of it all is that the broken bits of my life that have suddenly arranged themselves into a brand new pattern, one I probably would have never put together myself, but also intricate enough that I know the Almighty power behind it all: the One pushing me out and into a place that might feel foreign and uncomfortable.  A brand new normal with all of the knowledge of the past decade to back me up.

I hesitate to go into detail. Every relationship that comes to an end has moving pieces and two sides to the story. But my conscious is clean. It's the only path through that I could see. For the immediate time being, I'll move through life once again a single person - albeit one with two boys in tow. The inner workings of a girl who has spent 10 years cultivating a home, growing boys and plants, becoming a preserver, a baker, a writer are tough to separate and sift out. I continue to struggle with the feeling that my life, the essence of my personhood, is changing. I'll no longer measure my days with sourdough feeding and line dried clothes. But the slow timing in so much change has convinced me that it is, after all, only change. I'm going to stand at the helm of my kitchen with less time, but never without homemade bread.  I will still be me, just with a little less time.

Meanwhile, I have been wordless at the outpouring of support from the people in life that have graced me with their friendship. There have been quick notes from those in my tribe, the Internet friends that are real and living and aren't at all hollow and dismissive, and there have been too many coffee beans dropped at my doorstep to count. I am bolstered by support of people who get what it is to be forced into so much change, those who have been through something similar themselves, those whose voices echo that yeah it is hard, but you are able and that trials in life are not purposeless. Those that remind that something good will come again and that it really is an adventure to find out just what that will include.

image from PRiMO

image from PRiMO

I wondered if this was the right post to include my review of PRiMO's new Strawberry Ancho Preserves, and offer up a jar to give away.  I mean really.  Life changing, deep sorrowful stuff, written with total ambiguity?  But it can't be any other way.  Somehow all the little pieces of this gigantic puzzle also include this small company, and their truly homemade jams.  Somehow them sending me a jar in the mail (and they have IMPECCABLE packaging which always makes me smile even wider) for me to give my honest opinion of made me feel validated as a small time food writer and recipe developer. 

This jar was bright and warm, not spicy really - but like the blend of chiles only added to the "strawberryness" of the strawberry.  I originally thought that I'd come up with something complicated to showcase it, a mole maybe or a marinade for meat.  But then I realized that complicated is just not what I do anymore.  I make scones instead of croissants and other laminated doughs. I make a big pot of dal and we eat it for days in a row instead of cooking every night. And this special jar of jam fit right in with the timing of my life which I am ever so mindful of right now. It is perfectly enjoyable on a spoon, in plain yogurt, on toast. It complements all the most comforting things, because after all it is strawberry jam and strawberry jam is king of the jams. And royal jam is meant to be eaten so that you can really taste it.

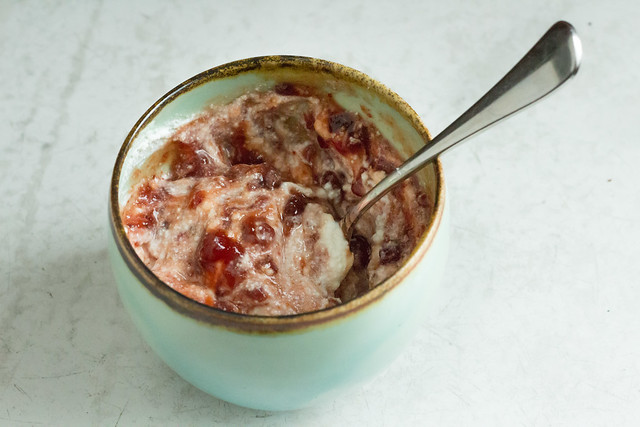
strawberry-ancho ricotta

Crêpes might seem like a luxury, but they don't actually take too much time - especially if you mix the blender batter in the evening and let it laze about in your refrigerator for a couple of days.  They actually only improve with time. When you get to making the actual crêpes, layer them on a large dinner plate with a square of waxed paper between each and let them cool completely before stashing them in the fridge. Covered well with plastic wrap, you can get another 2-3 days storage out of them.  Don't worry if you need a bit of practice to get nice, round crêpes, all of your practice is edible.

Crêpes with Strawberry-Ancho Ricotta

for the crêpe batter (Alton Brown's is best in my book):

  • 2 large eggs
  • 3/4 cup milk
  • 1/2 cup water
  • 1 c. ap flour
  • 3 T. melted butter
  • 1 T. granulated sugar
  • 1 t. vanilla
  • pinch of salt

Combine all ingredients in a blender and blend well.  Transfer to a wide mouth canning jar and let rest at least 1 hour and up to 48 hours.  (Stir gently to recombine if resting for a long time.) Cook the crêpes using a scant 1/4 cup batter in a nonstick skillet, using a brush of butter after each one. (If you want to use them for savory purposes, omit the granulated sugar and vanilla.)

Strawberry-Ancho Ricotta

Mix 2 parts premium ricotta cheese (homemade ricotta would also be stellar) to 1 part PRiMO Strawberry Ancho Preserves in a bowl. (6 T. ricotta and 3 T. preserves makes enough to fill at least 6 crêpes.)

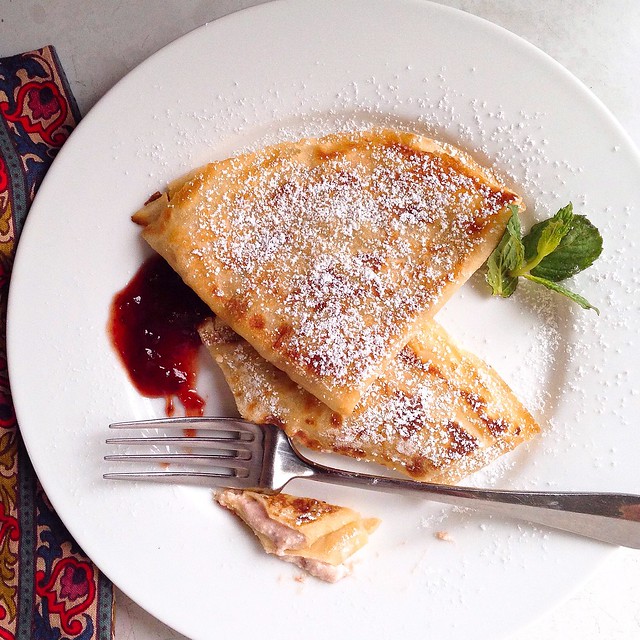
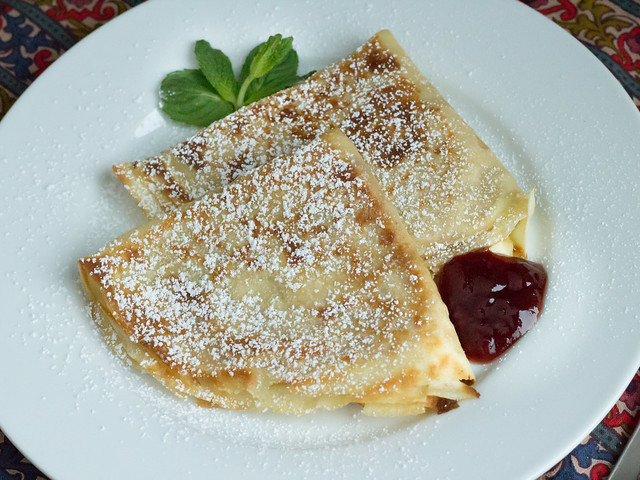
Spread the preserves/ricotta mixture evenly on a crêpe and fold in half and in half again. Melt a little butter in a skillet and gently fry them on both sides until browned and crispy around the edges. Dust with powdered sugar and do eat with mint leaves if you have some growing as I did.

crêpes with PRiMO

The generous folks at PRiMO have offered up a jar of this new release Strawberry Ancho to one lucky reader! Please comment on this post with a simple but favorite food that brings you comfort and inspiration before midnight next Friday (May 6th, 2016) and you might find a jar in your mailbox shortly thereafter. You may also decide, and rightly so, that you can't wait for all of that and find your new favorite strawberry jam at PRiMO's website.  I'll number the comments and select the winner at random.  (Please be sure to shoot me an email from the contact tab at left if your comment isn't attached to an email/blog/way to get in touch with you.)

I've spent the past month gearing up for my new job, outside of the home, out in the big world that lies past the threshold of my own kingdom. It's been a good run. I'll look back on my 30's at home with general good thought and pride in my independent work. I'll remember all of the lessons learned and remember there are still more to come. When I prepare for the workdays ahead, I page through some of my most favorite simple food books, Peter Miller talking about collaborative lunches at his bookshop, Cal Peternell's chapter on toast, and Tamar Adler's making the most of boiling pot of water and I know life doesn't end with work outside the home no matter how scared I am of that. It's just another chapter in my own running story, one that's still developing and "fast breaking". And that chapter includes a ton of simple food and the pleasures found therein.

Is there room for preserves?  Most definitely. Certainly, there is ample room to purchase a few jars this year as well, and from a small producer like PRiMO, I'll almost consider them my own.


Disclosure: PRiMO did send me a jar of their preserves for review, but as always my thoughts and opinions are fully my own.


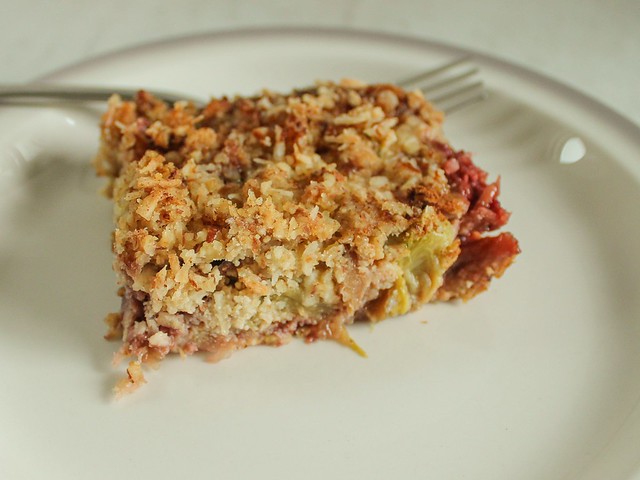
(Paleo and/or Gluten-Free) Strawberry-Rhubarb "Bars".

It is no secret that I have a wicked sweet tooth.  I have made great strides in consuming less sugar, specifically less desserts, but lately?  Man.  I am really craving the sweet stuff.  I'll go ahead and blame the pregnancy hormones, which is fun and easy to do - but so far, I'm doing a pretty good job of not giving in to overly refined sweets.  Part of the reason is that I'm finding naturally sweetened things to help me out.  The post-suppertime call of dessert is after all a part of my genetic make up, and who am I to buck the mold and abstain?

rhubarb strawberry bars, gluten-free

I will also publicly confess that I don't think I should be eating rhubarb.  This kills me, because rhubarb is one of my most favorite things - especially during this time of the year when you can't barely log onto your computer without finding a half dozen stellar looking rhubarby treats.  Rhubarb is part of the nightshade family, and one of the foods that I've self-diagnosed as a trigger for my skin problems.  Last spring, I may have overdosed on the kuchens and jams... and my hands really paid the price.  But this week there was one last bag of frozen, chopped rhubarb from last year in my deep freeze, and after this gorgeous post by Alanna at the Bojon Gourmet I figured I'd risk the minor skin irritations and come up with a no-refined sugar dessert for myself.  (Even though I'll likely have to make Alanna's version when the new crop rhubarb finally gets here!)

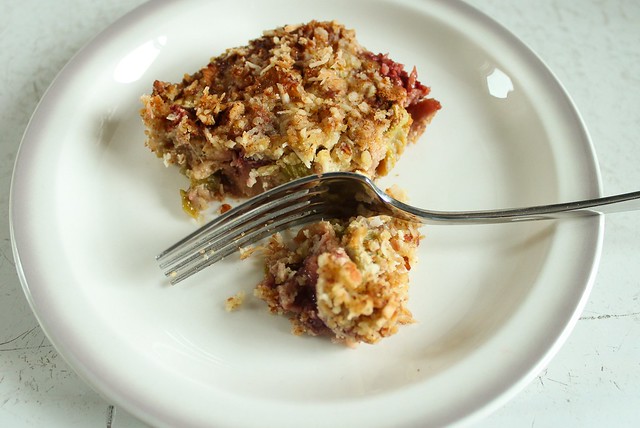
I suppose this dessert is mostly paleo friendly;  it's definitely gluten-free and refined sugar free.  It's also very much on the not-too-sweet side, leaving just enough room for a scoop of vanilla ice cream on the side, though I've been just as happy having a generous spoonful of full-fat plain Greek yogurt on top. To coerce my son into having some, I just added an extra drizzle of maple syrup over the top which made it plenty sweet enough to convince him that he might just like rhubarb after all.

rhubarb strawberry bars, gluten-free

If you use frozen rhubarb and strawberries, there is no need to defrost them first.  I think the flavor of the dessert is better the next day, after it has fully chilled and had a chance to "set up".  These are the type of bars that require eating with a fork, unless you are very cautious and eat over the sink.

Strawberry Rhubarb Bars
  • 2 c. chopped rhubarb (frozen is fine)
  • 1-2 c. sliced strawberries (frozen are fine)
  • 1 T. rapadura
  • 1 T. maple syrup
  • 1 T. cornstarch or arrowroot powder
  • 10 dates
  • 3 eggs
  • 1/2 c. sprouted almonds (50 g.) ground into a meal
  • 1/2 c. (50 g.) unsweetened, dried coconut
  • pinch of salt
  • 1 T. rapadura
  • 1 T. olive oil
  • 2 T. butter, cut into small pieces
Preheat oven to 350.  Butter a 9x9 glass baking dish and set aside.

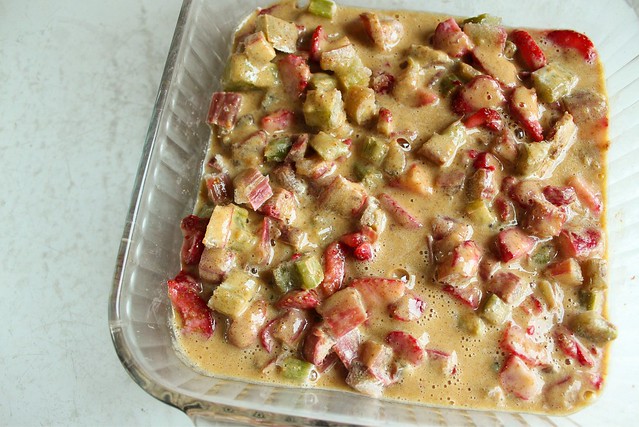
In a medium bowl, combine rhubarb, strawberries, 1 T. rapadura, 1 T. maple syrup, and cornstarch and stir well to combine.  Pour into prepared baking dish.
Using a blender, blend the eggs and dates until they are fully blended.  Pour over the rhubarb and strawberry mixture.

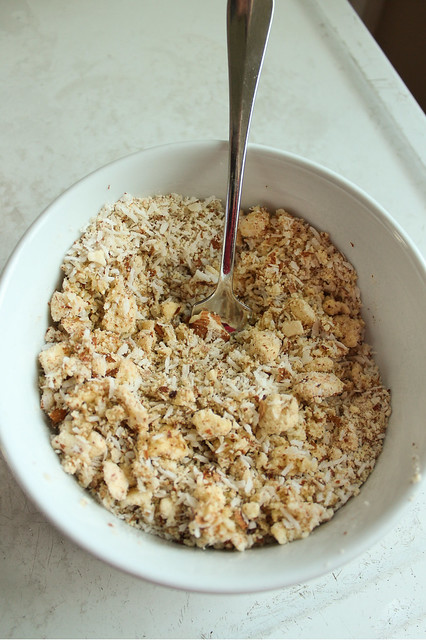
In a small bowl (or the same bowl you used to mix up the rhubarb and strawberries) combine the almond meal, coconut, salt, rapadura, oil, and butter and mix with your fingertips until you reach a good crumbly consistency.  Spread evenly over the top of the dessert.

Bake until puffed and lightly browned across the top, and a tester inserted in the center comes out clean - about 1 hour.  Cool completely to room temperature, then store in the refrigerator.  Serve with an extra splash of maple syrup, vanilla ice cream, and/or plain Greek yogurt.

gf coconut topping

Spring in Wisconsin is off to a slow start - which is really excellent news for maple syruping, but not so good news for us sun-starved northerners.  In many places around the country, the rhubarb is already up and ready to cut, but we're still waiting for a bit more warmth here to be so lucky.  Then, I'll replenish my frozen stores and continue to repress my physical sensitivities to this most wonderful marker of spring.  I'm sure I'll be figuring out a few more ways to enjoy rhubarb without so much sugar!

rhubarb strawberry bars, gluten-free

Daring Baker Challenge July 2011: Fraisier.

Jana of Cherry Tea Cakes was our July Daring Bakers’ host and she challenges us to make Fresh Frasiers inspired by recipes written by Elisabeth M. Prueitt and Chad Robertson in the beautiful cookbook Tartine.


I was excited for this challenge because I had a cause to share my dessert. If I'm honest, the Daring Baker Challenges are starting to wear on me if only because I don't know enough people to share them with. On occasions like last month's baklava, I had no trouble polishing up most of the dessert myself in a full week's time, but this month's choice of fraisier is not what I'd call a "good keeper". Depending on next month's challenge choice, I may put a declaration on my Facebook page for any Milwaukee area readers to come share the dessert, like a pie social for the 21st century. If that sounds right up your alley, keep an eye out!

I had never heard of a fraisier before. Essentially, it is sponge cake soaked with simple syrup, layered with fruit and a gelatinized pastry cream. It was supposed to be topped with a final layer of rolled almond paste, but I spread a thin layer of orange spiked whipped cream instead.

My whole flavor scheme this month was really inspired by the success of my strawberry guajillo jam. Just after making it earlier in the week, I made a thin sauce of strawberry, guajillo peppers, and a touch of cayenne powder. Then I flavored the other components along the way with little whispers of my orange liqueur. The finished dessert was light, and not at all too sweet, the perfect thing for a hot summer evening spent with friends.


The sauce wasn't a true simple syrup, but did sink into the layers pretty well and lent that little bit of heat that I was looking for. I also brought along a little bottle to use on top for those who wanted a little more strawberry heat. I think it would also be an excellent component to drinks, to drizzle on ice cream (basil ice cream perhaps?), to add to milk and stir - enjoying far more than you did as an 8-year-old pigtailed girl slurping slowly (quickly?) out of a Nesquik Rabbit cup...

Stawberry Guajillo Cayenne "Sauce"
  • 3/4 c. crushed strawberries
  • scant 3/4 c. raw sugar
  • 1 dried guajillo pepper, stemmed and finely chopped (I used the seeds as well)
  • 1/4 - 1/2 t. cayenne pepper powder (to taste)
Combine strawberries, sugar and guajillo pepper, and let sit at room temperature for 6-8 hours (I did this in a non-reactive pot seen above, then used the same pot to bring it up to a boil). Bring the mixture to a boil, let simmer one minute, then remove from heat. Transfer to a blender and blend until completely smooth. Pass it through a fine sieve, saving any pulp to use as jam. Add cayenne to taste.


unbaked, the batter reached the top of the tin...

When I first read over the recipes for the challenge, two things caught my eye straight away. The first were the implicit instruction that this dessert should be a free-standing cake and not a trifle. The second was that the pastry cream recipe had only a single egg.

The sponge cake, a true chiffon, was supposed to be baked in an ungreased 8 inch springform tin, which I dutifully did after confirming several times that it was an 8 inch pan. I figured if the cake stuck miserably and I would break instruction and just make a trifle since judging from the batter I could tell the cake was delicious. The chiffon cake needs no pan greasing because the batter needs to "climb" the sides. Once completely cool, a knife run between the cake and the sides of the pan breaks the seal, and the cake pops out. Even though the cake mushroomed out over the top of the pan, once cooled it did remove easily. I was quickly able to remove the domed top with a serrated knife.

(There was no height on the pan size, and since my pan was 2 1/2 inches high, I can only assume that the cake tin size should be taller or that the cake should be baked in a 9 inch tin and be slightly less high when finished. Next time I make this cake, I will either use a taller 8 inch springform, or maybe 2 8 inch cake pans and divide the batter. To make a quicker version, I'd also be unopposed to making it as a sheet pan cake.)

I used the metric weigh measurements, and frozen egg whites. I also found (probably due to the height of the cake) that my cake baked almost 20 minutes longer that the suggested baking time. I covered the top lightly with aluminum foil for the last 20 minutes so that the top didn't continue browning and it baked perfectly. Just make sure a long skewer inserted into the center of the cake comes out clean. The only other addition I made to the recipe was to add the zest of one orange, and substitute 2 t. of orange liqueur for the vanilla extract.

Chiffon Cake (Elisabeth M. Prueitt and Chad Robertson, Tartine cookbook via The Daring Kitchen)
  • 1 cup + 2 tablespoons (270 ml) (5½ oz/155 gm) all-purpose flour
  • 1 teaspoon (5 ml) (4 gm) baking powder
  • 3/4 cups (180 ml) (6 oz /170 gm) sugar
  • 1/2 teaspoon (2½ ml) (1½ gm) salt, preferably kosher
  • 1/4 cup (2 fl oz/60 ml) vegetable oil
  • 3 large egg yolks
  • ⅓ cup + 1 tablespoon (3.17 fl oz/95 ml) water
  • 2 t. orange liqueur
  • zest of one orange, grated
  • 5 large egg whites
  • ¼ teaspoon (1¼ ml) (1 gm) cream of tartar
Preheat the oven to 325°F (160°C/gas mark 3). Line the bottom of an 8-inch (20 cm) spring form pan with parchment paper, and do not grease the sides of the pan.

In a large mixing bowl, stir together the flour and baking powder. Add in all but 3 tablespoons (45 ml.) of sugar, and all of the salt. Stir to combine.

In a small bowl combine the oil, egg yolks, water, vanilla and zest. Whisk thoroughly. Combine with the dry ingredients and mix thoroughly for about one minute, or until very smooth.

Put the egg whites into a stand mixer, and beat on medium speed using a whisk attachment on a medium speed, until frothy. Add cream of tartar and beat on a medium speed until the whites hold soft peaks. Slowly add the remaining sugar and beat on a medium-high speed until the whites hold firm and form shiny peaks. Using a grease free rubber spatula, scoop about ⅓ of the whites into the yolk mixture and fold in gently. Gently fold in the remaining whites just until combined.

Pour the batter into the prepared pan. Bake for 45 to 55 minutes or until toothpick inserted into the center comes out clean. Removed the cake from the oven and allow to cool in the pan on a wire rack.

To unmold, run a knife around the sides to loosen the cake from the pan and remove the spring form sides. Invert the cake and peel off the parchment paper. Refrigerate for up to four days.


mushroom?

My next battle was the pastry cream filling, which I made when the chiffon cake was cooling. I have never seen a recipe for a pastry cream that has a single whole egg in it. I suspect I didn't cook it long enough, and it never did set past the "slightly beaten whipped cream" stage. I saved it to make into ice cream, and made a second, more reliable batch of Dorie Greenspan's pastry cream which uses 6 egg yolks. (I froze the remaining egg whites, (6, plus the 3 from the earlier cake) and I'm well on my way to making an angel food cake!) Because I made Dorie's recipe for the pastry cream, I had to approximate the amount to mix with the gelatinized whipped cream to make the filling as written. I just eyeballed it, but it worked well and was fairly stable when assembled. You can find the pastry cream recipe on The Daring Kitchen website, but I made this version:

Dorie Greenspan's Pastry Cream (plus gelatinized whipped cream for Frasier Filling from Elisabeth M. Prueitt tand Chad Robertson, Tartine cookbook via The Daring Kitchen)

for the Pastry Cream:

  • 2 c. milk (Dorie says whole milk, I used 2 %)
  • 6 large egg yolks
  • 1/2 c. sugar
  • 1/3 c. cornstarch, sifted
  • 2 t. orange liqueur (originally 1 1/2 t. vanilla)
  • 3 1/2 T. unsalted butter at room temperature, cut into small pieces
Bring milk to a boil in a small saucepan.

Meanwhile in a heavy-bottomed saucepan, whisk egg yolks with sugar and cornstarch until thick, and lightened yellow in color. When still whisking, slowly add about 1/4 c. of the hot milk to temper. While continuing to whisk, add in the rest of the hot milk.

Put the pan over medium heat and whisk "constantly and thoroughly", bring the mixture to boiling. Boil for 1-2 minutes, whisking all the while, until thick. Remove the pan from heat.

Whisk in orange liqueur, and let cool for 4 minutes. Whisk in small bits of butter, stirring until they are fully incorporated and pastry cream is smooth.

Transfer to a clean, glass bowl and press a piece of plastic wrap on the surface to prevent a skin from forming. Transfer to the fridge until chilled. (Finished pastry cream will last 3 days.)

to make the Pastry Cream into Fraisier Filling:
(from the source listed above)
  • 3/4 teaspoon (3¾ ml) (4 gm) gelatin
  • 1/2 tablespoon (7½ ml) water
  • 1 cup (8 fl oz/250 ml) heavy cream
In a small dish, sprinkle the gelatin over the water and let stand for a few minutes to soften.

Put two inches (55 mm) of water into a small sauce pan and bring to a simmer over a medium heat.

Measure 1/4 cup (2 oz/60 ml) of the chilled pastry cream into a small stainless steel bowl that will sit across the sauce pan with the simmering water, without touching the water. Heat the pastry cream until it is 120 F (48.8 C). Add the gelatin and whisk until smooth.

Remove from the water bath, and whisk the remaining cold pastry cream in to incorporate in two batches (because I made another recipe for the pastry cream, I approximated the amount of pastry cream to use, about 2/3 of the whole recipe of Dorie's).

In a stand mixer, fitted with the whisk attachment (I used a hand mixer to blend the whipping cream since is was a small amount), whip the cream until it holds medium-stiff peaks. Immediately fold the whipped cream into the pastry cream with a rubber spatula. Refrigerate until fully chilled.


To Assemble:

Since the components can be made over the course of a day or two, the cake is actually easy to assemble, the sponge is a dream to cut hardly losing any crumbs at all. Line the sides, but not the bottom of the 8 inch springform pan with plastic wrap. The easiest way I found to do that was to fit the bottom on top of the wrap, then cut off the excess from underneath. I used tape to fix the bottom of the pan to a glass serving platter.

Place one half of the sponge into the bottom of the pan, and brush heavily with the syrup (sauce). Fit the strawberries decoratively around the sides of the pan. Help keep them in place by piping the pastry cream in around them, and then piping a thin layer of pastry cream across the bottom. Smooth, and fill with a layer of sliced strawberry and then top with the remaining pastry cream filling. (This should bring you to the top of the springform pan.) Top with the remaining sponge cake layer, and brush heavily with syrup (sauce). See pictures below.

Just before leaving with my cake, I whipped another half cup of heavy cream with just a tablespoon of confectioner's sugar and 2 t. more orange liqueur. I spread it across the top in a thin layer and garnished with a strawberry. I cut off additional plastic wrap from the top of the springform pan, so all I'd have to do to unmold it is open the springform and peel away the sides. Even though my layers were not perfectly even, the cake was neat in appearance and stayed together well. I refrigerated it as recommended, at least 4 hours before transporting it. It cut much easier than I expected, and the slices held their shape.


Even though my finished recipe wasn't quite as pretty as our host's, I was still happy with the result. It really is an elegant cake for Summer, which could be easily adapted to any fruit and liqueur combination. I look forward to having an excuse to make it again! Even though it seems a touch time consuming, the work can be split over a day or two and the finished cake assembly time is nominal - a half hour at best.

Thank you to Jana for an interesting challenge!


**Note to Self:

I did make the failed pastry cream and the leftover Dorie Greenspan pastry cream into strawberry ice cream. I blended the pastry creams with a cup of yogurt and 1/4 c. of leftover strawberry jam/syrup runover in a blender and got it nice and cold. It tasted exactly like frozen strawberry cheesecake, I think because the yogurt added a bit of a sour tang. I'd make it again, actually - and definitely won't be too sad if I ever have failed pastry cream again.

Strawberries. With Chiles.

Strawberry jam has never really been one of my favorite things, though the strawberry itself is. I I feel that not much can improve the natural sweetness of early Summer berries, and adding a boatload of sugar to jam boosts that sweetness to a level that almost makes my teeth hurt just thinking about it. Nevertheless, I make strawberry jam every year.

My strawberry season is late this year. My 16 quarts of Amish grown and picked berries were delivered to me last weekend by my Parents, who came to celebrate the Kiddo's birthday. The berries were close to the final picking, and were smaller than the first pickings, but they were sweet and delicious and I was thankful for them.


In the past, my strawberry jam was always made with boxed pectin, but as a recent convert to pectin-free jams I may just find that my stigma against strawberry jam is over. Although the sugar is still high, the soft set of the jam is much more desirable to me - and deciding to add some chiles to the jam pot tempers the too-sweet phenomenon with a deep earthy undertone.

I've seen a number of strawberry-chile recipes around, and originally thought I'd make this one: Tigress's Strawberry Chipotle jam. I do love chipotle, but thought that making a batch may limit my consumption and gifting options. Chipotle is a strong chile flavor, and although I love it, I wanted a soft, what-is-that? flavor. Ever remembering Rick Bayless's words declaring the stately Guajillo chile the "workhorse", I dipped into my large bagful and chose two brick red specimens to include.


I based the recipe on Linda Zeidrich's Strawberry Orange Jam in The Joy of Jams, Jellies, and Other Sweet Preserves. I altered her method a little, since I combined all the ingredients and let them sit at room temperature for about 24 hours. I think 12 hours would have sufficed. I didn't mash the berries until I began to cook them down. Curious as I am, I lifted the lid on the pot several times when the berries were relaxing. I knew orange and guajillo worked well on pork, and figured they could only improve berries too - but the seductiveness of strawberry-guajillo jam was too interesting for words. Spoons dipped in, I followed the mellowing process to discover the chiles adding the mildest bit of heat, but the strongest undertone of warmth. Indeed, the finished jam coated the back of my throat in coziness, a nice departure from the tongue-stinging bite I usually demand from chile. This is one recipe that I'll be making for a long time I think.


Strawberry Guajillo Jam with Orange (adapted from Linda Zeidrich)
my yield was 6 half pints
  • 3 lbs. strawberries, hulled
  • 1 medium sized orange
  • 2 dried guajillo chiles, stemmed (use the seeds as well)
  • 4 1/2 c. sugar
Remove the zest of the orange with a peeler, and slice into thin shreds. Squeeze out the orange juice and add to the berries in a non-reactive preserving pot. Chop the guajillo chiles into small pieces and add to the pot. Add sugar, stir carefully to combine, and let the pot sit covered at room temperature for 8-12 hours, or longer if you have to.

When ready to make the jam, heat the pot over medium heat and stir gently to fully dissolve the sugar. Raise the heat, continue cooking until the jam boils, mashing with a masher to break up the fruit as desired and skimming off the foam, until a drop of jam mounds slightly in a dish. (I had a number of dishes in the freezer to use as testers, but didn't use them at all. You can really feel when the consistency of the jam changes as you stir.)

Ladle the jam into sterilized jars, add lids and rings, and process for 10 minutes in a hot water bath.

(I have not made my own pectin, which I plan on trying. This can be done with high-pectin fruit such as green apple or gooseberry. My jams boiled away for quite a while before reaching the jam point, the added pectin would reduce that. But like I've said before, if I'm rich in anything, it's time...)


after sitting overnight.


the finished jam. softly set, perfectly gorgeous.

I actually bought the Linda Ziedrich book I mentioned above for my Mom this past Mother's Day. I had rented and read it from the library, and figured that she and I both would enjoy the use of it in our own shared library. She brought it down when she came, and I hungrily reread the opening "Preserver's Primer" where Linda gives an overview of the history of preserving and the tables of pectin and acid contents of fruits. Then, I happily skipped to the recipes on strawberries, figuring to choose 2. Thinking of shrunken heads and whole fruit preserves, I made the extremely high sugar strawberry preserve recipe. I didn't add anything to her recipe, though next time I may like a little diversity. The berries did turn out well, very sweet, and I think this will be a case where I use the preserve in something else that tames the sweetness rather than to slather it heavily on jam.


resting.


I had just a little 2 oz. jar leftover that I could taste when fully cool, and it was still super sweet. the berries were a great texture, however.

Now 10 jars of jam are resting on the shelf, but my favorite strawberry preservation method is just to hull, wash, dry and pack the whole berries into quart jars and then freeze them. Of my more than 16 lbs of berries, 5 1/2 were made into jam, a pound or two disappeared in fresh eating, and the rest are frozen in the deep freeze. I can usually finagle a few frozen berries out with a butter knife for smoothies, or better, I defrost a whole quart. When the berries are still half frozen, I cut them in half or quarters, and sprinkle them with just a bit of sugar. Then, they taste like their true strawberry selves, even if not able to be spread thickly upon bread. (Though if the bread has cream cheese on it first, it will work in a pinch!)


It seems I can never appropriately judge the volume of a container; I can't tell you how much extra dish washing I have done because of this. I suspect I've lost a week of my time to poor judgement, but I find it kind of funny. Frequently I can be overheard talking to myself - congratulating myself on my great spacial handicap, but fortunately the errors in my judgement usually only pertain to volume.

When I add chiles to sweets or savories, it always proves to be good judgement, and makes up for any disheartening times I've had meanwhile. I'm imagining even now that a spoonful of strawberry-guajillo jam stirred into hot chocolate may be transcendent, though I will wait until Fall for that. Meanwhile, I'll wonder if there is anything that the Guajillo can't do. I'm not sure I love any other chile more.

Raw Vegan Monday: Strawberry Cheesecake

It would seem that I can not help myself with my self-imposed Raw Vegan Mondays. I didn't really think I would do it this week, but I guess I changed my mind last night when I was looking for more dessert options...


Because I wanted to keep it raw, I thought I would search for a nut-free raw crust. If you know of any recipes out there, please let me know! I searched high and low on the Internet, and couldn't find one. I'd imagine this would pose a problem to someone with a nut allergy wishing to eat this way, but really I was thinking about myself.

Most raw vegan desserts I've been seeing are very nut heavy. In fact, this cheesecake is based entirely on a creamy cashew center. Of course, I could just opt for a bowl of fruit, but what fun would that be? Last week's Chocolate Pudding Pie was so good (and lasted very well, by the way, we had the last slices after our Beet Gnocchi dinner Saturday night), that I thought it would be hard to beat. Certainly, it is if you love chocolate... but if you love cheesecake, let me introduce you to this raw vegan version.

I found a base recipe at Gone Raw, but then proceeded to cut some nuts and sweetener from it to result in a not quite as nut-heavy endeavor. My cheesecake is light and refreshing, and can be stored in the freezer - a total plus for a daily dessert indulger such as myself.


I happened to have a lot of preserved lemon and no fresh lemon, so I used it. You could also use grated lemon peel, or add a touch of lemon juice if you have fresh to work with.

Raw Vegan Strawberry Cheesecake (adapted from Bees Knees Kitchen via Gone Raw)

Makes one 8 inch springform pan (I used my tart tin, since I don't have a little springform)


Crust:
  • 1/2 c. walnuts, ground to a "flour" in a spice mill
  • 16 dates
  • 1 T. water
  • pinch of salt
  • flax meal, to achieve proper consistency
Process the dates in a food pro until they are well chopped. Add the walnut flour and pinch of salt and pulse to combine. Test the consistency - I added 1 T. of water, then added a bit of flax meal to achieve my ideal. Press into an 8 inch tin, I left mine mostly on the bottom and not up the sides. It is a very thin base.

Cheese Filling:
  • 1 1/2 c. cashews, soaked in plenty of filtered water overnight
  • 1/4 of a preserved lemon (rinsed thoroughly and flesh removed, peel sliced thinly)
  • 2 T. coconut concentrate
  • 1 T. raw agave nectar
  • 1 T. brown sugar
  • pinch of salt
  • 1/2 t. vanilla extract (not raw, so you could use vanilla seeds scraped from a pod)
Blend all ingredients in a blender or food pro (or VitaMix for the creamiest result). I got pretty smooth by using my hand held immersion blender on the cashews first, with about a tablespoon of water to get them going. Then I transferred them to the food pro and continued with the blending and adding of the other ingredients. Taste and adjust the sweetness level to your liking. Spread over the crust in the 8 inch tin.

Strawberry Top:
  • 1 heaping cup chopped strawberries
  • 1 t. agave nectar
Pulse in a blender (I used my kitchen shears to cut up the strawberries, and that worked fine) until coarsely chopped and releasing some juice. Spread over the top, to within a half inch of the sides.


I put my cheesecake right into the freezer, and then took it out after lunchtime to slice it. It cut into nice neat slices and tasted delicious! Light, slightly lemony, and not at all too rich like a conventional cheesecake. I think if you like icy cold things as I do, it's perfect right from the freezer, but I am also going to try letting some defrost in the fridge for a few hours before eating to test it at another temperature. I cut my whole tart into slices (I got 9 plus the one I ate...) and froze them in a container between sheets of waxed paper, so I can be assured of dessert for at least a week to come. I may try a balsamic reduction one day too, but then it would involve cooking...

I really think that raw vegan desserts are so attractive to me in part because I really do feel less guilty about eating some every day. I tend to eat them slower and savor them more than traditional desserts, I don't know if that is because I'm trying to read into the flavors more or what. While again, I can't promise yet another week of Raw Vegan Monday, I know that this is one diet and foods experiment that is going to linger on for some time!