northern brewer

Learning Vinegar.

Saturday, just after lunch, I went down the road a half mile to my Parents' Amish neighbor's house to see if I could get a cup of heavy cream. An hour and a half later, I returned back home with a quart of heavy cream, and a bucket full of mother of vinegar.


The first time I officially met Elizabeth Hershberger last Spring, my Mom introduced me and said "This is Elizabeth, but most people call her Lizzie...". Lizzie smiled at me warmly and snapped back, "That's just one of the things people call me!" We spent at least an hour chatting about pork and beef (we were looking for sources to raise for us), and I wished for many split seconds that I was raised Amish. She told us stories that seemed straight out of Little House of the Prairie, how her and the children dispatch their cow every year, and all of them are made to help, even though a couple of them would rather not. They do the work as a family in the warmth of her husband's wood shop, since that wood stove is warmer, and they keep a cast iron skillet on there ready to go for when they get hungry. I wanted to crawl up into their world of a quiet, hard-working life and never leave. I figured that any homesickness for technology and indoor plumbing would subside after a few months of eating around that house...

Lizzie's gregarious demeanor makes her home on the corner the hub of information for both the Amish and English (the Amish term for us) communities: her family has a huge array of friends, many of them non-Amish. As I witnessed Saturday, a steady stream of visitors dropping in, picking up, dropping off - every one with a bit of information to trade. It's quite possible that Lizzie operates her family under the radar of conventional Amish eyes - I know that she watches some English children for a friend, and conceals them cleverly in Amish clothing so no one's the wiser. The bonus of that set-up is that the children are learning German.

I never went to Lizzie's home before without my Mom, but did Saturday for the first time. She welcomed me in, pulled me up a chair, and offered me a doughnut. Their kitchen table was a mess of coffee cups and half eaten pies, two of her daughters were attacking the post-lunch dishes. (The Amish don't keep daylight savings time, so I accidentally caught them just after their mid-day meal.) I stole sideways glances at them, since their hair was likely just washed for Sunday church and hung down well below their waists as it was drying. It isn't often you see an Amish girl with her hair down - and it really takes you by surprise.

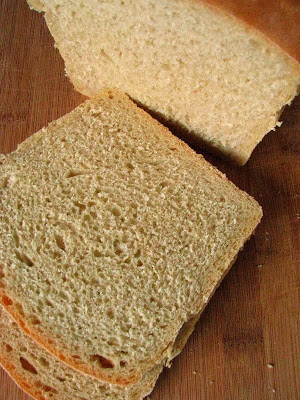
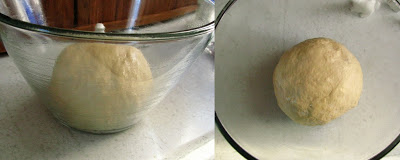
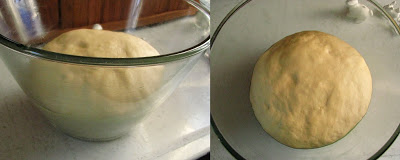
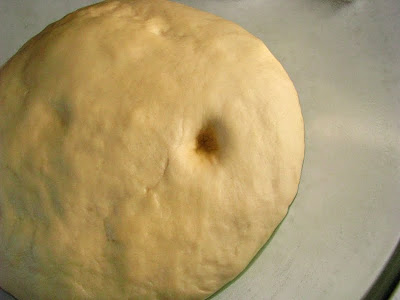
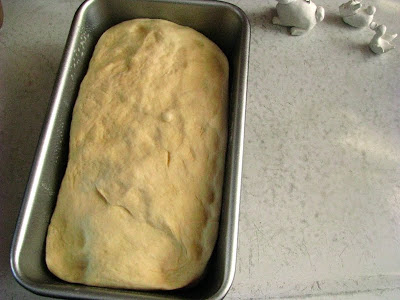
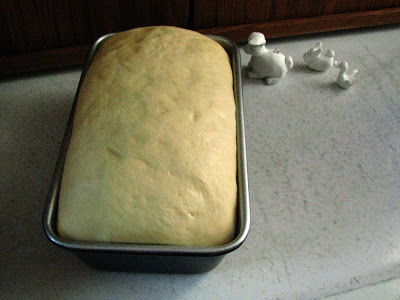
I tried to make all of the mental notes possible about Lizzie's kitchen: the Pioneer Princess cookstove that her daughters drew hot water from to fill their dishpan, the stainless bowl that was heaped full of rising bread dough and covered with store-bought bread bags that had been cut open to increase their surface size. The Amish waste nothing. My Mom once saw an Amish woman sewing a plastic bag on her treadle machine to extend it's life.

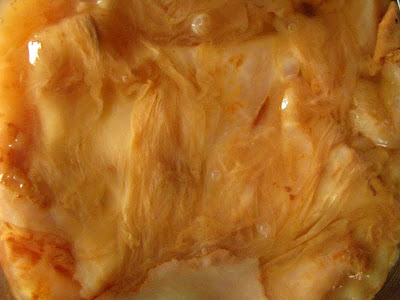
After an hour or so of the news from around the area, Lizzie remembered that I was looking for vinegar mother last summer. I remember she ran down to her basement and came back with her arm dripping wet with vinegar up to her elbow. Her vinegar was made from cider, and stored in a 50 gallon barrel. She must have remembered as well, since she told me that the mother was ready and she could give me as much as I needed. She grabbed a clean plastic pail that once contained cottage cheese from the local creamery and quickly disappeared to fetch it.

"Do you want to see it?" She smiled at me, and took the lid off. It smelled delicious - like a floral alcohol tinged vinegar. I was surprised at the similarities to my kombucha SCOBY, but it was definitely different. It looked like a pile of fleshy rags. I started to get really excited.


Although I had been wanting to play around with vinegar since almost a year ago, I was totally unprepared. Lizzie's instructions were vague to say the least She said to just add it to some cider or wine or juice, her suggestion was to use the liquid that peaches are canned in since that tastes really good. She also said to leave it in a nice warm place, since her vinegar took a very long time to work in the basement- once she moved it upstairs, she had better luck. I figured with the Internet on my side I would have great luck in finding all the information I'd need to get started - including the very basics like how long will the vinegar mother last without being in a liquid? and how much vinegar mother do you need to inoculate the liquid you intend to make into vinegar?

A brief hour on the computer yesterday proved me enormously wrong. It seems a very simple thing like vinegar is somewhat complex. As with any culturing adventure, everyone you ask has a different perspective and set of rules. What am I actually looking for in my vinegar anyway: a gourmet extract that I can impress people with or a humble and quick addition to a salad dressing? Seeing that I got a quart of rhubarb-raspberry juice from my Mom's pantry to try and vinegarize, I'd say my goal is probably a mix of the two.

My quick research was telling me that to make successful vinegar, you need to put the mother culture into an alcoholic solution. The culture then ferments to make acetic acid, and at that point I need to decide whether or not to stop the fermentation process by pasteurization of the vinegar prior to bottling and aging. I'll have a few months to worry about that last step - and a few months to be more thoroughly confused by all the conflicting information. I do not have a scientific mind, and I have to read and re-read a lot of information that is somewhat scientific to digest it. If that fails, I know I have a great contact.

My ponderings were made a bit easier by a visit to Northern Brewer today. I should have been cleaning my house and doing some laundry, but I ducked out after lunch and got to meet Jeremy King in real life. I think I apologized to him a few times for looking "glazed over", when he was explaining how yeast eat, and how best I should go about making my quart of fruit juice into alcohol. We talked for quite awhile, and then he suggested that I try using already fermented wine. I knew (and so did he) that I was supposed to use low-sulfite wine, and lucky for me, he had a menagerie of homemade wines in the basement. I know I need another food hobby like a hole in the head, but I was so excited looking at what all the people at Northern Brewer are fermenting!

He insisted that I take a couple gallons of an amazing new-to-me wine varietal Lemberger. The grapes were grown in Washington, and the wine was started last October if I remember right. Since the wine is already fermented, I pulled off a portion of the mother of vinegar, and added a few tablespoons of the liquid to the pail Jeremy gave me. I stashed it under the kitchen counter, and now I just have to wait a few months. I have a feeling it is going to be amazing.


Jeremy also coached me on a yeast strain to use for kick-starting my rhubarb-raspberry juice into alcohol. I felt like an apothecary (looking at crib sheets, of course) adding nutrients, energy and yeasts together this afternoon. I hope it works, so I can give him all of the credit for helping me turn Wisconsin rhubarb and raspberries into salad-worthy vinegar. I have another little packet of yeast to try my hand at fermenting some cider, I just hope my co-op still has the gallon jugs I remember seeing a few weeks ago.

I can't help but think that all of the time I feel like the our world is such a fast-paced place, and that we really make it that way for ourselves. Lizzie can be up to her eyeballs in canning in the mid-Summer, but if you stop by, she is never too busy to make you feel at home. Places like Northern Brewer are unique since it's expected that their employees would need to chat to effectively serve the customer, but it's really more than that I think. Food people always take time for other food people, and it really makes the world feel smaller and more intimate. It's comforting that I'm actually able to connect with other people and learn things from them, something a computer will ever be able to do. That kind of one-on-one schooling is priceless.

It may be a good long while until you read more about my vinegaring... but sometime it will pop back up here. Meanwhile, if you have ever made vinegar (intentionally or not), drop me a line and give me some advice!

Test Driving Yeasted Beer Bread

I was more than excited when Jeremy at Northern Brewer asked me to try making his yeasted beer bread recipe. Lately, I have been so obsessed with Christmas baking and one-pot meals that I feel that I haven't been overly creative when it comes to kitchen experiments. This experiment confirmed that not only do I love a challenge, I love to document the challenge and I love the feeling of usefulness that comes from helping out a fellow experimenter. I was also secretly glad that the dough was vegan, since I haven't posted anything vegan in a while!


Using beer to make yeast bread seems to be a natural fit. After all, the exact same type of fermentation is taking place to develop each. The recipe Jeremy provided me was pretty bare bones: flour, yeast, salt, a touch of oil, and beer. I used a spare IPA that has been in the far back of the fridge for awhile. It's certainly not my most favorite IPA, (I'd probably give that award to Three Floyds or Lagunita's) but for the purpose of carbonation and moisture in bread, it did just fine.


I have to preface this whole experiment by saying that in all of the breads I've made over the years, I have had none that had this much rise, and such a perfect interior crumb. It was soft, and golden brown. The dough felt smooth to work with and actually felt like it was carbonated. I could tell when I worked with it that it was going to be light, but wouldn't have suspected that it would be feather-light...

I used a basic method of straight-dough breadmaking, taking a few tricks from Cook's Illustrated. When I first started baking yeast breads regularly, I began with their American Sandwich Bread, which is just that: a standard, slightly sweet and fortified, white loaf bread. Applying the same technique to this dough seemed to work just fine.

The first thing I had to do with an ice-cold, refrigerated beer though, is warm it up. I didn't want to heat it on the stove or in in the microwave, hoping to preserve those carbonating bubbles. Instead, I ran some super hot tap water, and put the sealed bottle in a bowl of it for about an hour. The bottle felt warm to the touch, as did the beer when I poured it out.

I altered the recipe slightly to include a little more liquid and salt, and I mixed it in a stand mixer. You could easily mix it by hand, just increase the kneading time slightly. Basically, you want a smooth dough that isn't sticky to the touch. The finished bread has a bitter edge from using the IPA; even though I really liked it, I think I may add a tablespoon or two of honey next time to counteract. This bread makes a killer grilled cheese.

IPA Bread (a.k.a. Jeremy King's Beer Bread)
  • 4 c. bread flour (I use King Arthur bread flour)
  • 1 1/4 t. kosher salt
  • 2 1/4 t. active dry yeast (or 1 packet)
  • 1 T. vegetable oil (I used olive oil, and eyeballed it)
  • 1 1/4 c. warmish beer, as described above
  • up to 1/2 c. additional water or beer if needed
Preheat oven to 200 degrees. When the oven comes up to temperature, leave it on for 10 minutes, then turn it off.

Meanwhile, place flour and salt in the bowl of a stand mixer fitted with dough hook, and stir to combine. Open beer, and pour carefully (to avoid a "head") into a large measuring cup. Add oil to measuring cup. Have the additional water or beer ready at the side of the mixer.

With the mixer running, add yeast to the beer and oil in the measuring cup. It's going to foam up vigorously, so work quickly. Stir to combine and immediately pour into the running stand mixer. You should be able to tell within a minute or so if you need additional liquid, I used about 1/2 c. extra water. Continue kneading for about 5 minutes until a smooth, cohesive dough is formed.

Turn dough out onto a lightly floured surface, and knead by hand for a minute or so to shape into a tight ball. Place dough into an oiled bowl, turn to coat, and cover with plastic wrap. Place in preheated oven (which has been turned off), and let rise until doubled in size, 40-50 minutes.

When dough is finished with the first rise, turn it out onto a lightly floured surface and gently press air out. Aim to make a rectangle about 1 1/2 inches thick, that you can roll up into a loaf shape (so no longer than about 9 inches on one side). Tightly roll dough up into a loaf shape, and pinch the seam closed. Place dough in an oiled loaf pan with seam side down, and gently press dough into all the corners of the pan. Cover with plastic wrap (you can use the same piece that you used for the first rise), and place pan in a warm place to let rise for 20-30 minutes until dough almost doubles in size (this was about an inch over the top of my loaf pan).

Preheat oven to 350 when this is happening. (I typically put the loaf pan to rise on top of the stove, since it is pretty warm with residual heat from the oven.)

Bake for 35-45 minutes, until the bread is golden brown, and sound rather hollow when tipped out of the pan and tapped on the bottom. Temperature, if you choose to check it this way, should read at least 190 when thermometer is inserted in the bottom of the loaf.


Prior to first rise.


End of first rise.


At the end of the second rise, a finger poked into the dough should remain...


I let the dough rise in the pan to about an inch above the rim.


...and I took it's temperature to double check my done-ness. It was 192.7 f.


So there it is: a perfectly tall and domed yeasted beer bread. It was hard to wait for it to cool, but I was able to endure the time to confirm that the interior was tightly knit and perfectly uniform. I ate the heel straight away, unadorned, so I could get an unbiased taste. It was great, and it was actually beery - something that surprised me. It was great alongside the soup I made for supper last night, and toasts extremely well. I may have a new favorite loaf pan bread recipe...


I'm not sure if this technique would work with my sourdough method. I am curious if the beer would ferment happily along with the starter for 18-24 hours before becoming bread, or if it would become too alcoholic and kill off the balance of the sourdough culture. The only way for me to know would be to try (or Google, I found one already here)... I'm also wondering how the flavor would change if I used different beers, weiss beers may make a fruitier loaf, and syrupy stouts perhaps a more molasses-y one. More complex home brews are going to have more interesting results, no doubt.

Now that the newness of January is almost a week old, I can start to see where my new year is heading. While I don't envision myself becoming a full-fledged brewer this year, I can see myself tinkering around with more beer-based recipes. I like thinking that in times past it was probably the women of the households that were culturing, brewing, and fermenting things to feed and nourish their families. In our modern American world, the craft of home brewing is usually dominated by men. Where and when did this shift take place? Man, have I got a lot of reading to do... good thing it will still be Winter for a few more months.

The more I experiment with and read about, the more I realize just how connected all foodstuffs are. The people curious in general with food and drink tend to overlap, making us all better rounded in the long run. Good things to remember in the New Year!

On and Around New Year...

New Year's Eve and Day have both come and gone, and now I'm surrounded by leftovers from the past several days. Not that I'm complaining. It was fun turning my house into the central hub of girlie conversation for a few days, punctuating our jabbering with as many sweets as we could hold. I rarely do as much visiting as I have done in the past few days, and now that the house is quiet, I miss it greatly.

On the sweets front, I already had quite an impressive amount of leftover Christmas cookies, and more added to me from my Mom. But an email from Northern Brewer convinced me to bite the bullet and add even more. You may remember the beginning of my obsession with them back in June when I started brewing kombucha. Though I haven't been there for a visit in a pretty long time, just the thought of their store still excites me. It's like a well organized and stocked pantry of laboratory supplies for obsessive fermenters like myself. If you are of the curious type and just walk in the front door, you immediately find inspiration and 20 new things you feel as if you must try. No surprise then that the mere mention of a New Year's Champagne Cake led me to yet more sugar.


I decided to turn a half recipe into 18 cupcakes. They are simple, yes, but actually quite elegant and complex. I topped them generously with an orange cream cheese frosting, which proved to be the perfect complement. I think I ate 4 of them all by myself on New Year's Eve... and I'll be the first to admit that I'm not the least bit sorry. I tried them both cold and at room temperature (since some people like refrigerated cake, and I usually do not), and I couldn't really decide which way I liked them best. At room temperature, the frosting was soft and droopy, from the fridge it was a bit more sturdy.

The room temperature cake tasted surprisingly like the inexpensive, yet delicious, Cristalino Brut Cava. This Spanish sparkling wine is actually a really great match for many different food types. (I once memorably served it with a Portuguese fish stew.) It has aggressive bubbles, and a semi-sweet flavor that believe it or not actually makes a simple butter cake recipe taste beautifully like champagne.

Plus, how much fun is it to say Champagne Cupcake?

Champagne Cupcakes (slightly adapted from the Northern Brewer blog)

makes 18
  • 1/2 c. (1 stick) butter, room temperature
  • 1 1/4 c. granulated white sugar
  • 2 eggs
  • 1 t. vanilla extract
  • 1 1/4 c. champagne or sparking wine
  • 1 1/2 c. plus 3/8 c. (6 T.) AP flour
  • 1 1/8 t. baking powder
  • 1 1/4 t. baking soda
  • 1/4 t. salt
Preheat oven to 350.

In a medium sized bowl, sift (or stir) together flour, baking powder, baking soda and salt.

In a large bowl, cream butter together with sugar until light and fluffy, at least 5 minutes. Beat in eggs, one at a time, beating a full minutes after each. Beat in vanilla.

Add flour alternately with champagne (or sparkling wine). (Add flour in three additions and the wine in two, beginning and ending with the flour.) Mix until well incorporated, but do not over mix.

Portion batter into 18 cupcake liners and bake for 20 minutes, or until toothpick inserted in the middle comes out cleanly.

Cool completely before topping with Orange Cream Cheese Frosting. (recipe follows)


This frosting makes a little more than you probably want to use on a batch of 18 cupcakes (or, maybe not!). This frosting is so good, I have an overwhelming urge to make some vanilla ice cream to use up the rest. I've never added leftover frosting to an ice cream before, so I'll let you know how that works out for me.

Orange Cream Cheese Frosting
(adapted from Epicurious)
  • 8 oz. cream cheese, room temperature
  • 4 T. unsalted butter, room temperature
  • grated peel of 1 orange (preferably organic, about 2 t.)
  • 1/2 t. vanilla extract
  • pinch of salt
  • 2 1/2 - 3 c. powdered sugar
  • 1/3 c. sour cream, cold from fridge
With a hand mixer, beat butter and cream cheese until very soft and well combined, then add orange peel and vanilla. Add about half of the powdered sugar, and continue mixing. After the powdered sugar is incorporated, add about half of the remaining amount. Mix well, then taste and add a pinch of salt if you feel it needs it. Mix in sour cream, and beat well. If the consistency is too soft, add a bit more powdered sugar. Refrigerate for a half hour or longer (to firm up a bit more) before using a knife to top cupcakes.


Prior to the overindulgence of sugar, we actually attempted to be quite virtuous by making pizza. Any time I have company, I use the excuse to knock out another of the veg heavy Lahey pizzas on my Lahey Project list. This delicious specimen was the Pizza Radici de Sedano, or celery root pizza.


I'd have to say, that this is the variety that I was looking forward to the least, and the one that is probably my favorite so far. The celery root turns soft and nearly potato-like in some parts, while still retaining the trace of celery flavor. Another of the cheese-less pizzas in My Bread, I decided that being from Wisconsin entitled me to add just a little bit of Parmesan during the last few minutes of baking. We can't see it floating on the top, but are convinced that the salinity of the cheese is a good addition to an already perfect recipe. I can't help but say it again: You have to get a copy of My Bread for yourself!

Though we could have easily survived on leftovers and sugar well into the new year, I decided to make a New Year's Eve Gumbo on December 31, 2010. I had proudly made a stock from shrimp peels that my Husband peeled for me (his only kitchen task, and one he enjoyed!) last month using the method that Sally Fallon outlined in Nourishing Traditions. I'm actually a "take it or leave it" type when it comes to shrimp, and this stock smelled so delicious when I was simmering it that I could hardly wait to use some up in something. I only ended up using a cup in this gumbo recipe from Paula Deen, but I'm convinced that it made a difference.


I took back my vow of "no chicken parts" for one day, and used 3 chicken breasts along with andouille sausage and a half pound of shrimp for this southern stew. I have never made this before, and am so thankful for leftovers and the promise that it will be made again. I hate the description, but I'll use it anyway that the broth was actually silk-like, since the pot was thickened with a whole half cup of flour. A fair amount of veg was present for all of that meat: a large green pepper, onion, okra and home canned tomatoes. We served the gumbo on plain white rice, and garnished with slices of sourdough bread. I was actually surprised that the meal wasn't as heavy as I anticipated. Well, at least not until I continued eating Champagne Cupcakes on into the wee hours of the morning.

Gumbo (adapted from Paula Deen, via Food Network)

serves 8-10
  • 3 large boneless, skinless chicken breast halves
  • salt and pepper
  • 1/4 cup coconut oil
  • 12 oz. andouille sausage, cut into 1/4-inch slices on the bias
  • 1/2 cup AP flour
  • 5 tablespoons butter
  • 1 large onion, chopped
  • 5-6 cloves garlic, minced
  • 1 green bell pepper, seeded and chopped
  • 3 stalks celery chopped
  • 1/4 c. Worcestershire Sauce
  • 1 smallish bunch of parsley (flat leaf)
  • 1 c. shrimp stock (could use chicken or beef stock to equal the 4 cups of liquid, we agreed that 4 cups of the shrimp stock may have been too "shrimpy".)
  • 3 c. water
  • 14 oz. "stewed tomatoes" (1 can, or equivalent home-canned)
  • 2 cups frozen, sliced okra
  • 4 green onions, sliced, white and green parts
  • 1/2 pound small shrimp (25-30 size), peeled and deveined

Season the chicken with salt and pepper. Heat the oil in a non-reactive (enameled) dutch oven over medium-high heat. Cook the chicken until browned on both sides and remove. Add the sausage and cook until browned, then remove. Sprinkle the flour over the oil, add 2 tablespoons of butter and cook over medium heat, stirring constantly, until brown, about 10 minutes. Let the roux cool slightly.

Return the Dutch oven to low heat and melt the remaining 3 tablespoons butter. Add the onion, garlic, green pepper and celery and cook for 10 minutes. Add Worcestershire sauce, salt and pepper to taste and 1/4 bunch chopped parsley. Cook, while stirring frequently, for 10 minutes.

Add 4 cups liquid (shrimp stock/water or other stock), whisking constantly. Add the chicken and sausage. Bring to a boil, then reduce the heat, cover, and simmer for 45 minutes.

Add tomatoes and okra. Cover and simmer for 1 hour. Just before serving add the green onions and shrimp. Cover and cook until shrimp is opaque and cooked through about 3 minutes. Add additional chopped parsley, and serve over rice.


I reheated the last of the celery root pizza for lunch today, and look forward to a little bowl of gumbo for supper later tonight. Meanwhile, I'm sitting around in a clean-ish house after having taken my tree down yesterday. It's always a bittersweet time of year for me, I love Christmas and it's joy, the remembrance of the deepest things of life. A year ends, another notch indelibly marked into our lives, and January begins as a clean slate with nothing on the horizon.

The days seem immediately to lengthen, and the circle of seasons and life continue on. Being the homebody I am, I wonder what I can get myself into for the next few months before all I want to do is be outside, and I have a few ideas. If you have any suggestions, send them my way. Meanwhile, I'm off to read about sprouting grains...

Happy New Year!!