Dreena Burton

Vegan Monday: Pasta!

Well, a whole week has passed without a single word from rcakewalk. The truth is, I had a lovely Summer Cold most of last week, and really didn't do much cooking until I needed to get ready for the Boy-O's birthday on Friday. I feel like I have a lot of time to make up for, since being compromised in taste and smell faculties rendered me a pretty poor kitchen experimenter for many days. (Though, I did manage to read all the way through Wild Fermentation - and start a "ginger bug", and then after the bug was going, I bottled a little batch of ginger beer.)

Last night, I knew that I was feeling better, when I was automatically planning what I could come up with for my continuing Vegan Monday postings. Since my basil was in need of pinching back again, I figured pasta and pesto would be a good choice for supper... and it was a happily sneaky one that my Husband ate without knowledge of its delicious vegan-ness.


I really love making pasta from scratch. I've done it now for probably 12 years, and can't say that I've ever tried to make it without eggs. What's even worse, is that I wrote a post about beet pasta, in which I tweaked a recipe I saw in the Outpost Exchange that did not contain eggs, and I actually said that I prefer pasta that does. I can now attest that this is because I never had homemade semolina pasta. It is wonderful, and easy to do, and I may just have to take back the song previously sung about the wonders of egg pasta.


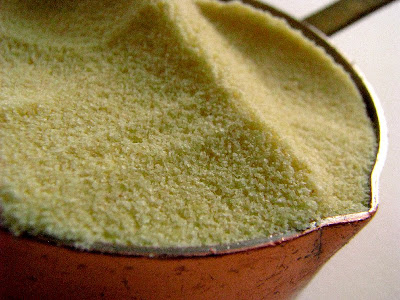
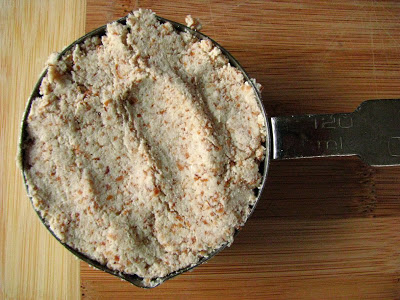
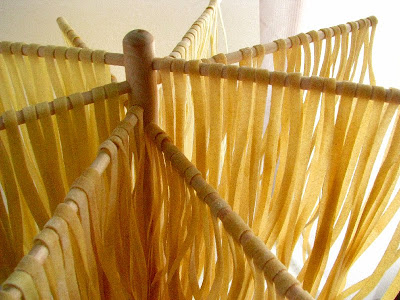
Semolina flour, in it's sand-like peskyness, is very high in gluten - which enables it to stretch and not break when cooking. I noticed the difference immediately when working with the dough. It was a resisting, silky thing; when rolled thinly (notch 6 on my Atlas Pasta Queen), it felt as if I were feeding a sheet of peached cotton through the cutters. The strands of finished fettuccine did not stick together either, and I could see myself actually able to roll little nests like Marcella Hazan without much difficulty. The dried pasta (seen in the first photo, above), did not break or crack when I moved it to a sheet pan. I was excited, since already I could tell that I was going to be so happy with the cooked result.


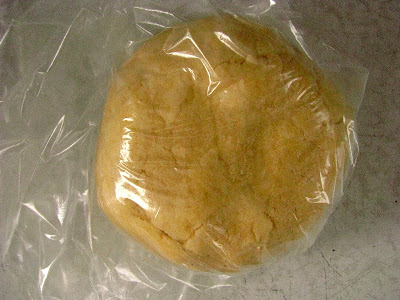
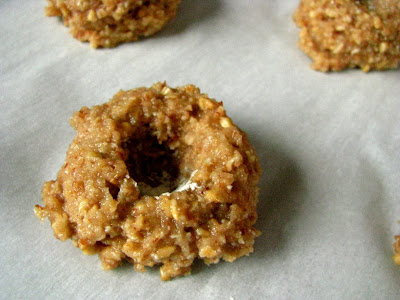
This morning, I mixed up a small batch using proportions from A Life(time) of Cooking. I needed almost twice the amount of water she recommended, but went by the feel of my egg pasta past, and was indeed rewarded with the pretty little dough seen above. Then, Boy-O (now a proud 4 year old!) and I went for a walk. As I like to err on the side of gluttony (a phrase coined by my Husband and Maeckel), I decided I had to make a second little batch, only whilst walking, I figured there was no reason not to try it with wheat flour and semolina.

Since the recipe calls for equal proportion of all purpose flour and semolina flour, I'm imagining all kinds of whole grain flour combinations are going to be tried sometime in the future. I used a white whole wheat flour from King Arthur Flour. The dough was just as nice to work with, and cooked up into a mildly, wheat flavored pasta. I heard no complaints from either of my guys, so I'm taking it that they couldn't even tell. I think the truth of the matter is that homemade pasta so far surpasses store bought pasta, that you would be hard pressed to find someone who thought otherwise.


The base recipe suggests that for each generous serving, these are the proportions to use. When I had two batches (using different flours), the total weight was just shy of 1 lb... The best thing about homemade pasta, is that it does store well. Just make sure it's dried well first, and then seal it in a zip top bag. It's even more of a convenience food than it's supermarketed brethren, since it takes mere minutes to cook. Even more reason for you to give it a go!

(Vegan) Semolina Pasta (adapted from A Life(time) of Cooking)
  • 1/2 c. semolina flour
  • 1/2 c. AP flour (or white whole wheat - I used KAF)
  • pinch of salt
  • 1 t. olive oil (eyeball it)
  • 6-8 T. water, to feel
In a medium sized bowl, mix the flours and salt. Add the olive oil, then 4 T. of the water, while stirring the forming dough with your fingers. Add enough water to get the dough to form into a ball. (The semolina flour, and the wheat flour, will soak up a bit more liquid than regular AP flour.) When the dough is formed into a ball, knead gently for a few strokes on a wooden board to be sure everything is incorporated well.

Let the dough rest for at least a half hour. Roll out either by hand on a well floured board, or by hand cranked or stand mixer attachment, using regular AP flour as necessary. Cut into desired shape, and let dry (or cook right away).

When cooking, bring an ample amount of salted water to boil and add the pasta. Watch it carefully, it takes just a few minutes to cook. I start testing it when I see it boil up to the surface, usually around the three minute mark.


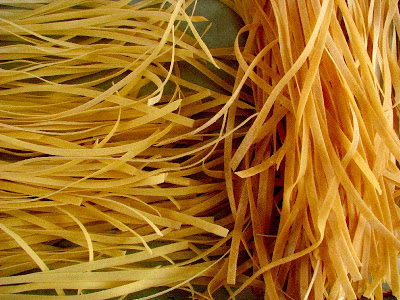
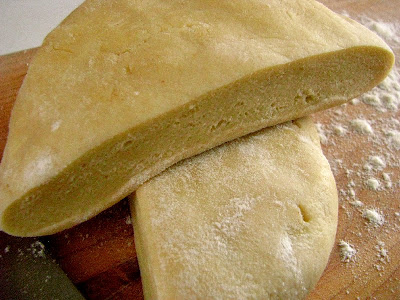
Semolina/AP flour pasta on the left, semolina/white whole wheat pasta on the right.

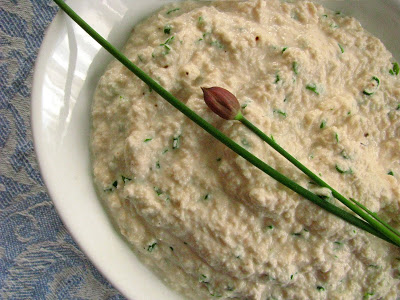
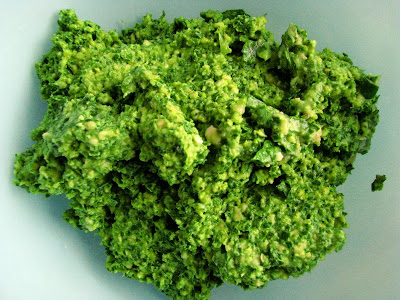
Of course, since I went through the trouble of making eggless pasta, I made a vegan pesto as well - from another winning recipe from Dreena Burton's Eat Drink & Be Vegan. I found the recipe printed for you here, from an interview that Dreena did for Vegan Freak Radio, and let me tell you - you may never find yourself buying a pine nut ever again. It was so creamy, fresh, and when I first tasted it, the bite of raw garlic perfectly complemented the other ingredients. (The only thing I did differently, other than not really measuring anything, was to omit the dried mustard. Why oh why do I always remember that I don't have this spice stocked until the last second? The amount needed was too little to be processed out of mustard seeds in my coffee mill/spice mill... so I just left it out.) I'm looking forward to having some of the leftovers on a pizza tomorrow...


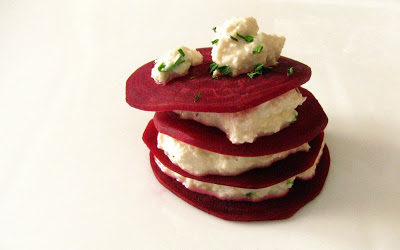
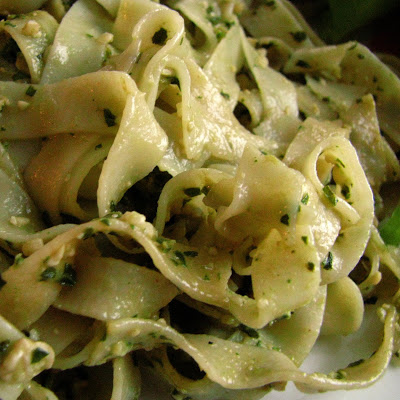
While the final dish left something photographically to be desired, the taste did not. The pasta had perfect bite, just a tad more toothsomeness in the whole wheat version, and because I remembered to save some of the pasta's cooking water, I had a nicely thickened pesto sauce that gently coated the noodles. You could go all out and load up on the sauce, like Dreena does, but I have hopes for my leftovers tomorrow, so I restrained.


I'm sure I'll be back to my cooking self this week, and already I'm behind on my weekly fermenting/culturing duties. I actually have to start my next kombucha batch now before I hit the hay...

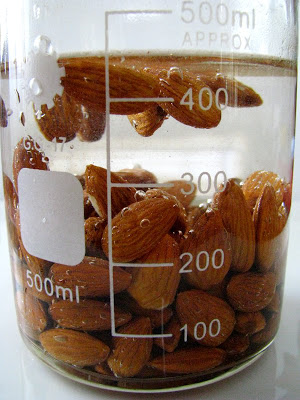
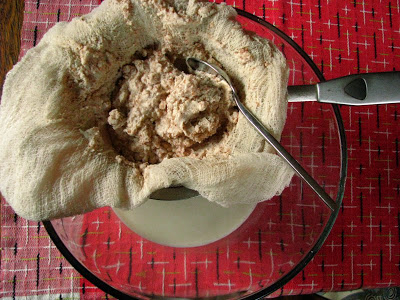
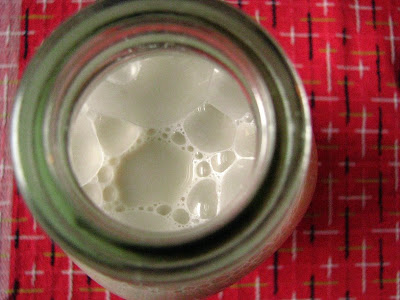
But before I do go: A non-vegan bit of information I must pass on! I got the best tip ever from my reading of Wild Fermentation for all of you yogurt makers out there: for every quart of milk you are inoculating with the yogurt culture from a previous batch, only use 1 Tablespoon of culture. 1 Tablespoon! I always use much more, but thanks to Sandor (and The Joy of Cooking) - who explained that less culture gives the bacillus room to move and creates a thicker, creamier result. I did this today, and in just 7 hours had beautifully thickened yogurt, with no separation!

So how is THAT to end a Vegan Monday post! From what I've read, you can make a soy or alternative milk yogurt from a culture, but the culture will not perpetuate. Also, I do not believe that the cultures can be dairy free to start... so now I'm curious, and have some label reading to do on my next Outpost trip. Maybe I know what direction I'm heading for next week's vegan post...

Homemade: Raw Almond Milk

Yesterday, I got it in my head to make almond milk. I know I have serious problems with experimentation when a mere mention in a conversation with my Mom had me thinking that I could make it at home. In fact, most of today was consumed with kitchen experiments, some of which will have to wait until another day to be told.

It all began bright an early, or kind of dark and stormy, at 6:30, since that is what time my self has decided to wake up every single day regardless of what time I go to bed. Before bed I soaked my raw almonds, in filtered water under refrigeration, so I didn't even need my first cup of coffee fully ingested before beginning this project.

Almond milk is of course raw vegan, and really is another thing so easy to make that you will wonder why you would ever buy it again. One cup of almonds and 4 cups of water will produce nearly a quart, so very little effort produces a stellar result, and not to mention a more economical (and environmental, since you have no packaging) choice, and you can use a 1:4 ratio to make as much or as little as you like. I also like that I have complete control over the sweetness. I used a base recipe from Choosing Raw, but a number of others that Google turned up were similar if not exactly the same. You can also use just about any nut you feel like, if almonds are really your thing.


My very scientific looking soaking almonds.

Vanilla Almond Milk (from Choosing Raw)

1 cup raw almonds, soaked in cool water overnight (8 hours) under refrigeration
4 cups spring or filtered water
6 dates
1 t. vanilla (the extract I used technically renders this un-raw I think, but you can use vanilla pod seeds, scraped out as flavoring if you like)

Drain the almonds, and then in a blender (or a VitaMix for you lucky owners), blend all ingredients until finely blended. I saved out the extract until the milk was done, but you can add it in right away if you like. I drained it through several layers of cheesecloth (see picture below), and when enough of the liquid seeped through, I twisted the cheesecloth into a bag-like shape and squeezed out as much liquid as I could. I added a sieve underneath to catch any stray particulate, but it probably would not have been necessary. I saved the almond "pulp" for another experiment, below. Milk will keep 3 days or a little more according to Choosing Raw, but I have a feeling it will be long gone by then.


I should take a moment to lament my lack of a "Real" blender. The blender I currently have, I bought when I was still in high school. Why I decided to buy a blender one day like 15 years ago, when I had no real use for a blender I'm not sure, but the thing just will not die. I wish it would, so I would have an excuse to buy a new one, but it is still hanging on. Tenacious as it may be, it is not very strong. The only thing it really has going for it is a glass pitcher. If the mixture I am trying to blend has the slightest semblance of a thick sauce, I use my food pro instead to save myself the frustration, but I know if I had tried to make this in a food processor, I would have had an even bigger frustration. Trust me, I know from experience. I really am considering a VitaMix savings fund to be placed on my counter in a Mason Jar. Maybe I'll do that today, and each time I am frustrated by lack of horsepower, I'll add some dough to the jar. Sounds like a good plan to me.


Real blender or not, my nut milk turned out perfect.

That said, I tried to take the almond pulp and process it into a raw nut butter. Besides making a crumbly mess for me to clean up, I learned that this, my friends, is a task that I don't think can be done in a food pro. It just does not have the horsepower to emulsify nuts into creaminess. That's okay, since I decided to alter a recipe from Dreena Burton's book Eat, Drink and Be Vegan.

When I was with my Mom last week, we stopped in at the Viroqua Food Co-Op, a cousin to our Outpost here in Milwaukee. I usually am not in the habit of buying sweets when I shop... but when I'm with my Mom we like to try things just for fun. I saw this cookie, which happened to be gluten-free, and we had to try it.


It was kind of the same feeling I had when I first had Outpost's Little Oatie sandwich cookie. I NEED to find a way to make this now! Our Wisconsin food co-ops are on to something not always providing a recipe (I did find the Midnight Madness cookies, another complete addiction, on the Outpost website one time, but last I checked, it was no longer there.) If I had the access to a recipe like this I'd probably never leave the home and become a complete hermit in the ways of new foodstuffs. Not having something exact to follow, I figured I could at least come close using Dreena's recipe and my new almond pulp...


And, I did pretty well. Well, maybe better than well, since I couldn't stop eating them. I think this is a work in progress, since they didn't taste exactly like the Viroqua Food Co-Op's, but maybe that's a good thing. They would probably all be gone if they did.


Since these had additional moisture from the almond pulp, I had to add quite a bit of extra grain. Next time, I will most likely try using less oil. I still have another portion of almond pulp leftover, so I will be sure to update the recipe at the end of this post when I try again.

Jam Thumbprint Cookies (adapted from Dreena Burton)
  • 1/3 c. oat flour (rolled oats blended in a spice mill works great)
  • 2/3 c. steel cut oats
  • 3/4 c. barley flour
  • 1/2 c. almond pulp, leftover from making almond milk
  • 3 T. brown sugar
  • 1 t. baking powder
  • 1/4 t. cinnamon
  • 1/4 t. salt
  • 1/4 c. maple syrup
  • 2 T. brown rice syrup
  • 1 t. vanilla extract
  • 1/2 t. almond extract
  • 1/4 c. veg oil (or olive oil)
  • jam - to fill centers
Preheat oven to 350 degrees f. In a large bowl, combine flours, oats, almond pulp, sugar, baking powder, cinnamon, and salt and stir until combined. In a separate smaller bowl, combine maple syrup, brown rice syrup, extracts, and oil and stir well to combine. Add the wet ingredients to the dry ingredients and blend until just combined. (I used a hand mixer. Remember that if you let it sit for a few minutes, the oats will naturally absorb some of the moisture. If it still seems too moist, add a little additional oat flour - and if it is too dry, add a bit of oil.)

Using a small scoop or a spoon, scoop little mounds out onto a parchment lined sheet. Using a wooden spoon handle (or like me, my rolling pin handle) dipped in flour, make an indentation in the center. (Dreena spoons the jam into the indentations here prior to baking, but I cooked them 3/4 of the way and then removed them from the oven and added the jam. Since I had to increase the baking time quite a bit due to my extra moisture, I'm glad I did it this way!) Bake for 14-20 minutes, until the edges begin to turn brown. Let them cool on the sheets for a minute or two before moving them to a rack to cool completely.


Marisa at Food in Jars is having a give-away for a Ball Blue Book and asked her participants to note what jam is their favorite. I love pretty much any type of jam, jelly, preserve, conserve or marmalade... but, hands down, my favorite is her recipe for Sour Cherry Jam. I have 3 little jars left on my shelf that I've been saving, why I do that I don't know! Cherry season will be here before I know it, so I cracked one open to fill my cookies, and I'm so glad I did. If you are a jam-maker, Marisa has great recipes for you to try, and top on your list should be this Sour Cherry one. Sour Cherry Jam may even make it's way into a vanilla almond milk smoothie of some sort...

If you are a kitchen experimenter like I am, and make this cookie recipe, please let me know how it turns out for you! I'll be playing around with it, since I am beguiled by it's toothsome earthiness, and I don't feel guilty eating a half dozen of them, either. I also know that if you are a nut milk drinker, you will be hooked on the simplicity of making it yourself. The only bad news is that it takes longer to clean up the kitchen afterward than it does to concoct. But, you can enjoy a glass of milk when you're doing it.

Excitement: Somehow it always includes Beets.

So in my recent obsessions with all things vegan, I got the book The Conscious Cook by Tal Ronnen from the library last week. It, of course, is now in my Amazon cart. In addition to lovely recipes, it has great photography and great layout, and is full of inspiring fresh recipes. In reading it cover to cover, I discovered that I was so curious about his "cheese" made from cashews, that I could think of nothing else. In his book, Tal makes Cashew Creams (you can find the recipe on his website) and also cheeses made from nuts that are kind of related to the Cashew Creams. His recipe for Beet Ravioli with Balsamic Pickled Figs and Green Garlic Oil was the one to really pique my interest, and a couple of days ago I decided to embark into the world of vegan "cheese".

His approach is to soak cashews overnight, then blend them together with probiotic powder and let them culture at warm room temperature for 12-14 hours. Now, dear readers, you know that I have a serious addiction to obsessions, when I was so curious about this, that I had to drop $26 at Outpost for the New Chapter Probiotic All-Flora capsules that this culturing project required. I wavered in how much I wanted to try this just a little bit, before giving in and just buying it. After all, I feel like I haven't been buying so many groceries lately, and giving $26 extra of my grocery fund to Outpost is not really a bad cause. I wasn't disappointed in my decision.


I am absolutely glad I parted with my USD's, since the result of this cashew "ricotta" as I'm calling it, was wonderful. I used my immersion blender to puree the cashews and water, and was not able to achieve absolute smoothness, but the flavor of plain, soaked and blended cashews was nice enough that the bit of grainy texture didn't bother me at all. In fact, I thought it tasted exactly like the texture of ricotta, and could see the finished product taking on all of the "cheese-ness" of cheese, sans cheese of course.

The state of the plain blended cashews prior to culturing wasn't all that different either, so if you feel that you can't part with $26, I'd say to go ahead and make it (skipping the long culturing time) anyway! Meanwhile, I used my savvy kitchen math to realize that my 6 capsules that went to inoculation purposes cost me $2.60, and that is affordable for the sake of experimentation! If nothing else, I can pop 80 cents worth of probiotics down my gullet every day for the next month and be proud of my healthfulness - but I'm sure I'll use more of my capsules to try some others of Tal's cheeses. I also didn't measure any of the added spices, I added to taste. No wonder why I love vegan cooking so much!

Tal Ronnen's Cashew Ricotta Cheese
  • 2 cups raw cashews
  • 1 t. probiotic powder (from 6 capsules of All-Flora, or another comparable quality powder) dissolved in 1 cup of warm water.
  • 2 T. nutritional yeast flakes
  • 1 1/2 t. onion powder (I used granulated onion)
  • 1 1/2 T. minced chives
  • 2 T. minced parsley
  • 1 t. sea salt
  • black pepper
Put cashews in a bowl, add cold water to cover them, and refrigerate 12-14 hours. Drain and rinse them under warm water.

Place nuts in a blender with the probiotic powder and water mixture (I used an immersion blender), and blend until very smooth. Transfer to a clean, glass bowl, and let sit at warm room temperature (I leave the oven light on in the closed oven) for 14-16 hours to culture.

Transfer to a medium bowl, and stir in remaining ingredients. Cheese will keep for a week under refrigeration.


This morning, after a night of chilling, I took to doctoring up that cultured cashew cheese into a proper "ricotta" filling. Onion granules, nutritional yeast flakes, some fresh chives and parsley from my yard, and a bit of salt and pepper, and I was completely fooled at how delicious the taste of this was, and that it did indeed taste like ricotta cheese. (Before mixing up the savory version, I saved out a cup portion to play around later with some sweet applications... I have it in my mind that I can make a cupcake frosting out of it!)

I departed from Tal's original recipe here, since I did not make the green garlic oil, and forgot to buy figs during the Probiotic Powder shopping trip. But I was glad, since my result was so good, I was nearly jumping up and down. So many times if you spend a lot of time and effort (and those USD's) on something, the result is not up to your expectation. What a happy surprise to know that I will make this again and again!


I still had my borrowed mandoline (that I have to return), so I sliced a peeled beet very thinly. I ate a slice of raw beet, and then got out my steamer. This is no Raw Vegan recipe, now... but I'm so glad I steamed them, since they got tender enough to resemble pasta, and were easy enough to cut with a fork and gobble down. Boy-O and I spent the morning at the library, and because he was so consumed with a book on Stingrays, I got to peruse my cookbook aisle. I fortuitously plucked Eat, Drink & Be Vegan by Dreena Burton from the shelves, and found a dressing that I decided would be good for the top of my creation, a vinaigrette made from balsamic and maple syrup. Dreena's book has many great recipes, and I'm looking forward to looking over it more completely later today. I also noted that she is a blogger at eat, drink & be vegan, so I'll be adding her to my feedly, no doubt!


I have no idea why I never thought of combining balsamic vinegar and maple syrup, but I'm more than excited that I did. I used equal proportions of each, and it was almost candy-like. I made a very small amount, but it is so easy to double or triple that you'll hardly need to use any of your kitchen math!

Balsamic Maple Syrup Vinaigrette (adapted from Drena Burton)
  • 2 T. balsamic vinegar
  • 2 T. maple syrup, preferably dark
  • splash of extra virgin olive oil
  • salt
  • pepper
That's it. Blend it up.

Assemble the little stacks or "raviolis" however you wish, obsessively try to get a good photo, and then eat them up! Next time, I will make this more of a meal and have a pretty green salad underneath, but for my lunch for one, a whole steamed beet, and maybe a healthy 1/4 cup of this ricotta cheese was really satisfying.


I know I shouldn't be surprised at how contented I am eating simple whole foods that have little or no cooking. I guess, it doesn't surprise me at all that I'm so excited about my new vegan obsessions, since I do know that often it only takes a little push in any given food direction to send me off and reading about something different to me.

innBrooklyn is hosting another installment of Veg of the Month Club, due on June 10th, and the veg for this go around is beets. I have more beets in the fridge, and I didn't consider using this recipe for the Club submission, but I just may, since I loved it so much! Nothing says "excitement" to me, like beets, so I'm looking forward to seeing some good inspirations there.