CakeWalk

bread

Sourdough Surprises: Flatbreads (Sourdough Pita)

Flatbreads were the item of the month for the Sourdough Surprises bake along... and I couldn't have been happier since I've been meaning to convert one of my favorite pita bread recipes into a true sourdough version for quite a while.

sourdough pita

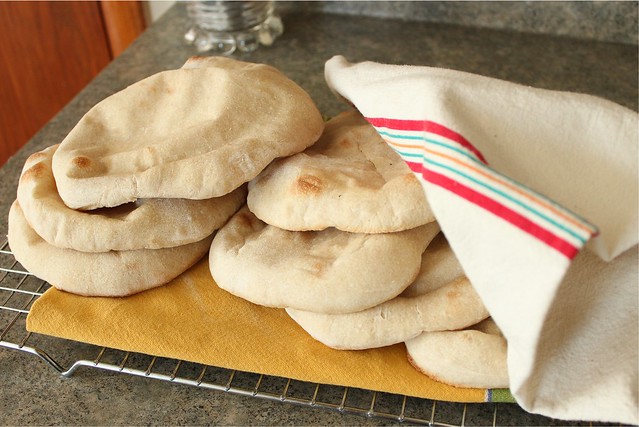
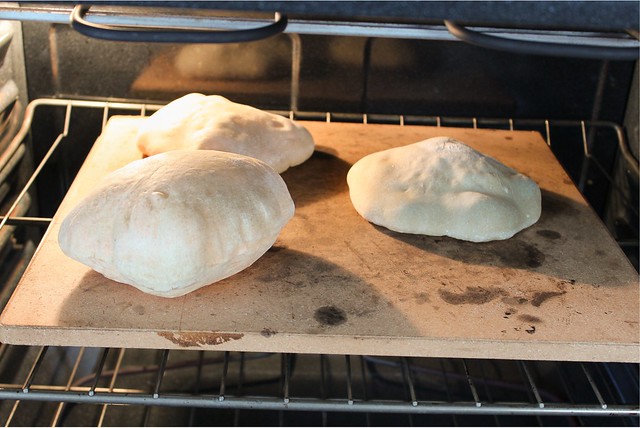
Long before I ever baked a loaf of bread, I had started playing with flatbreads.  Something about them is much less intimidating than traditional loaf baking; they are smaller things that don't require as much time or effort, and usually they can be baked in mere minutes.  Part of this infatuation with pita in particular likely came from the bread-genius Mom of one of my friends.  I clearly remember standing in her kitchen as she rolled out small discs about the size of your palm, telling me that "you want the dough to be the same thickness as your earlobe, that's how you can be sure they'll puff in the oven."  Her oven was perpetually lined with blackened quarry tile (or maybe it was brick), and she'd deftly slap the pitas on there and we'd peer through the oven door as they rose.  I did the same thing with these, my growing belly all of a sudden requiring me to grab a step stool to sit on instead of crouching or sitting on the floor for the several minutes of baking time.

I think this could also be the first sourdough recipe that I've made up entirely myself, basing the proportions loosely on a fast, favorite food processor version of pita that Cook's Illustrated published more than a decade ago.  I used some pointers on Sourdough Home on how to go about converting, but instead of letting the dough ferment at room temperature, I let mine linger in the fridge until I was ready for it.  My result was a sturdy pocket bread with a good, not-too-sour sourdough flavor.  It's a keeper of a recipe for those times when sandwiches packed in bread need to travel well.

sourdough pita ('batter')

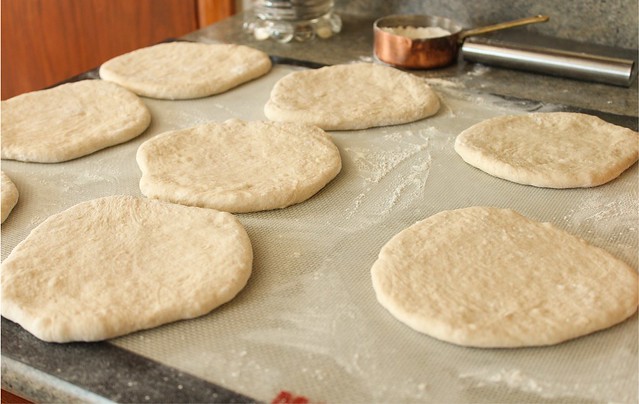
Part of the reason my bread was a bit more stable was that I recently read about pita on a Food52 post.  The baker suggested rolling out the dough and letting it sit for a while until puffy, resulting in a pocket that was more uniform on both sides.  Prior to this revelation, my pita was always thinner on one side, leading to leakage when the bread was stuffed.  Let them hang out only the length of time it takes the oven to heat, and you'll be surprised at how "professional" your breads turn out!

sourdough pita

sourdough pita

I divide this dough into 8 pieces, making pita that is pretty substantial in size - about 7-8 inces across.  Of course you can divide them into smaller portions to make more petite breads - just follow the rule of the earlobe thickness.  It really works!  Ordinarily I scale all ingredients for breads, but this one is casual enough (and you kind of know how soft and pliable a pita dough should be, right?) that I used conventional, non-weight measurements.  Be sure to start the bread 12-18 hours before you want to bake the pitas.

Sourdough Pita Bread
yields 8 breads

For the sourdough "poolish":
  • 1 c. 100% hydration starter, well fed
  • 2 c. bread flour
  • 1/2 c. whole wheat flour
  • 1 c. water
To finish the pitas: 
  •  1 T. olive oil
  • 2 t. granulated sugar
  • 1/4 c. plain yogurt
  • 1 1/2 t. kosher salt
  • 1/2 c. bread flour (plus 1/2 cup additional, likely)
Start the poolish at least 12 hours before baking.  Mix all ingredients together well.  The dough will be more like a batter than a stiff dough.  Cover tightly, and put into the refrigerator to rest.

When ready to continue (12-18 hours later), take the sourdough poolish out of the fridge and add it to the bowl of a stand mixer.  Add the olive oil, sugar, yogurt, salt and 1/2 cup of flour and mix well.  (You can do this by hand if you like, but it's easier in a stand mixer.)  The dough will be quite sticky, and will likely need another 1/2 cup of flour as it is being kneaded.  Knead for about 5-7 minutes until you can feel the dough turn soft and pliable. Turn the dough out onto a lightly floured surface and knead for a minute or two adding just enough flour to bring together a soft dough.  The dough may still be a little tacky, and this is ok.  (Try not to add too much flour so the dough feels soft rather than tight and dry.)  Put into a clean container (I didn't bother to grease it), cover well with cling film, and let it rise at room temperature until doubled in size, about 3 hours depending on room temperature.

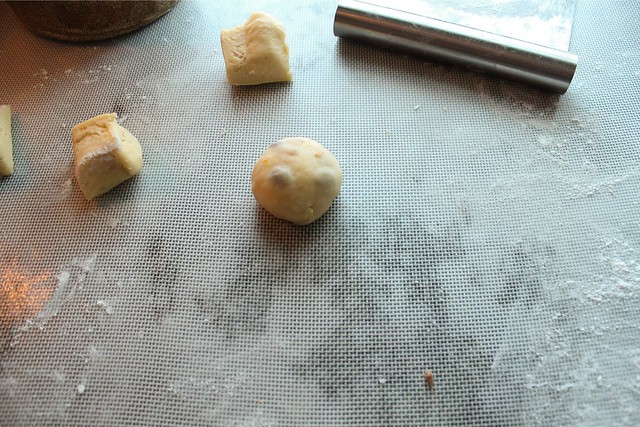
Turn dough out onto a lightly floured surface, and divide into 8 equal portions.  Roll each portion into a ball, trying not to add too much additional flour.  One at a time, use a rolling pin to roll each ball into a disc about 6-7 inches across.  Aim for even thickness across the disc, that is about the same thickness as your earlobe.  Let the discs rest on a lightly floured surface, covered by a clean, lint free cloth.  Preheat the oven to 500 degrees with a pizza stone or unglazed tiles (a plain sheet pan in a pinch) in the center of the oven.

After the stone has fully heated, about 30 minutes, take a disc of pita and gently stretch it out slightly as it probably sprang back a little bit.  The discs might feel a little tacky again as they rested, and that's ok; it's easier to take the side that feels driest and make that the bottom of the bread.  You can bake as many pitas at once as your stone will allow - 3 or 4 for me - but I recommend baking one first to observe about how long it will take.  It should be fully puffed and lightly browned within 5-6 minutes.  After baking, transfer to a stack of towels.  You may have to help the steam come back out of the middles - just let them rest for a few minutes, then gently and carefully (to avoid burning yourself) press down on them  to flatten.

sourdough pita

These breads are not quite as tender as the non-sourdough version, but I really enjoyed them.  In fact, I had too much bread going around here this past week, and plan on turning the last few into pita chips today - which I figure will be a very good use for aged and sturdy pita breads.

Be sure to check out sourdough flatbreads from the many other Sourdough Surprises participants.  There's sure to be plenty of inspiration!

A good, old-fashioned bread post...

NW sourdough

I mentioned recently that I was actually disgusted by bread for a good many weeks.  I couldn't think about it, or even have it in my line of sight.  I purchased the first bread I've bought in years just to get my boys through, and I had to make sure it was hidden in a cabinet.  I swear, I could smell it through the plastic packaging.  Fortunately, that wave of nausea and bread phobia has passed, and I have felt like I'm making up for lost time: reading new-to-me bread books with vigor and back with a vengeance for playing with dough.

Halfway through the levain recipe section of Ken Forkish's Flour, Water, Salt, Yeast, it dawned on me just how much I have to learn about bread.  Going to bed each night now, calculating mentally (which is difficult for a math-challenged person like me) how to convert my "liquid levain" 100% hydration starter successfully into a 80% hydration starter so I can start on his formulas, wondering if keeping two separate starters is smart or economical, wondering if instead I can figure out the formulas to convert his 80% recipes to fit my 100% lifestyle.

In a way, I wish I was 20 again and could just enroll heart and soul in a baking program - but that time for me has passed.  I'm at the mercy of baking once or twice a week, learning as much from those few loaves as possible and hopefully snowballing it into future successes.  The comforting thing is that I learn best from experimenting, and even without notes I seem to have a preternatural ability to remember every single baking experience, as if they are all children birthed to me in a unique way.

As good as the bread is around here, I have serious envy of those serious bread bloggers, Susan over at Wild Yeast, and Teresa at Northwest Sourdough for example.  Loaves that seems to always work with their careful calculations.  This past week and a half, I've been obsessed with the Northwest Sourdough "Blond Wig" bread.  It's a bread that Teresa developed for a friend with cancer, and it's not totally unlike the Peter Reinhart bread I used to have such great success with.  Just after my bread obsession returned, I tried a "Wisconsin Sourdough" for old time's sake and had terrible results.  Not inedible, but a bread that was lacking in the character of my previous successes.  When Teresa's version popped up on Facebook, I could think of nothing else.

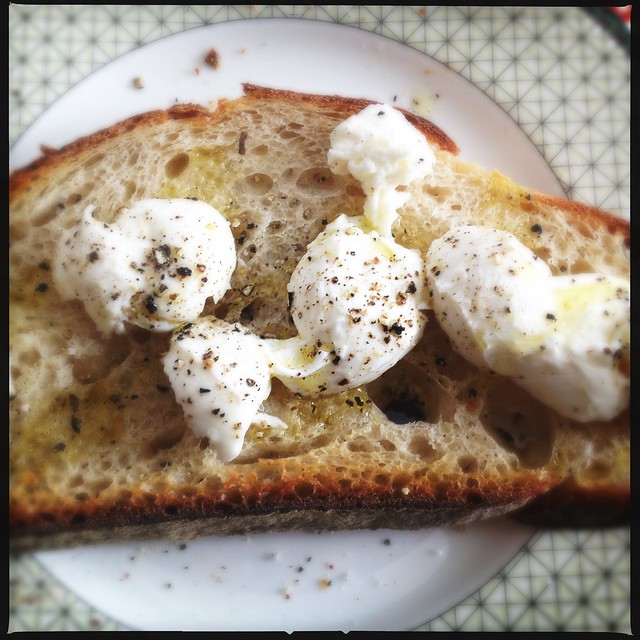
Varying slightly from the flour, water, salt, yeast basic sourdough, this bread also has a touch of dairy.  I think it makes the finished bread stale slightly quicker, but we've eaten every morsel so I can't count that much as a negative.  As always, the true test of a good bread (in my opinion) is how good is the toast on days 2, 3, and if I'm lucky, day 4.  It is exceptional toast.  So good, that I was almost tempted to buy a little bunch of overpriced fresh basil and some imported Mexican tomatoes and pretend I was basking in the heat of Summer.  Instead I started a Winter-hearty minestrone soup, anticipating toasted bread in the bottoms of the bowls.

lunch.

I had kind of settled into a rhythm with the Tartine bread method, higher hydration bread that is folded every 30 minutes for 4 hours or so, not requiring the use of my (sometimes compromised) stand mixer or my sensitively skinned hands.  I can now make that bread in my sleep, and sometimes I do, when I start too late in the day and then pull myself groggy from deep, REM sleep to attend to it in the middle of the night.

But this Blond Wig bread has me beguiled.  I mix it in my stand mixer for several minutes and then it lazes about on the counter for 6 hours, only being folded 3 times before bench resting.  I've autolysed and not autolysed with similar results, I wouldn't say the extra time spent on the autolyse is even worth it.  I've made the motherdough (60% hydration firm starter) and let it cure at room temperature for 4 hours before putting it into the fridge, and I've made it and popped it right into the cold.  Both methods seem fine to me depending on my time frame.  Without refreshing, the motherdough holds for at least 3 days in the fridge.  I made my breads when it was 2 days old, and when my 100% hydration starter was well fed (and floated in water like Chad Robertson recommends), in the morning before I mix.

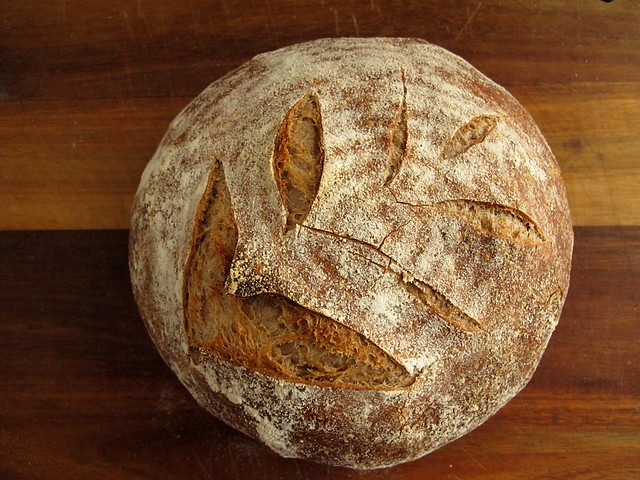
Ken Forkish wrote somewhere in that book I'm reading that when the proportion of already fermented dough is high, autolyse isn't really necessary, and I'm suspecting that the small addition of milk makes the gluten break down in a really labor-free way for a home baker.  At any rate, this loaf of bread has a sweet tang that comes from the refrigerated motherdough, a creamy texture and a cracking, brittle crust since I bake in a pot... all with the benefit of not so much work.

NW sourdough

I'll let you pull up the recipe from Northwest Sourdough, but I'll give you my notes for my last loaves, which I had the foresight to scribble on a scrap of paper:

12:45  Mixed dough, no autolyse, using stand mixer.  I let it mix with the dough hook until it pulled away from the sides of the bowl and formed a ball.
13:00  Covered the mixing bowl with a towel and then a stainless lid.  Bulk rise until 19:00, with folds at 15:45, 17:00, and 18:00.
19:00  Preform dough into loaf and bench rest.  I didn't mean for it to rest for a whole hour but it was before-bed reading time.
20:00  Form into loaves.  I only have one brotform but need another, so one went into the basket and another into flour dusted cloth tucked into a colander.  (The bread that rises in the cane basket always looks nicer, and seems to rise better.)  I covered each of the baskets with a plastic bag and put them immediately into the fridge.
06:30  Took loaves out of the fridge.
06:45  Jury rigged my oven into a proofing box (boiling water in a bowl on the lowest shelf, breads still wrapped in plastic, on the shelf above) and let the loaves proof for 3 hours.
09:45  Breads out of the proofer and onto the counter.  Took off the plastic bags and let them sit open to the air while the oven preheated to 500 f.

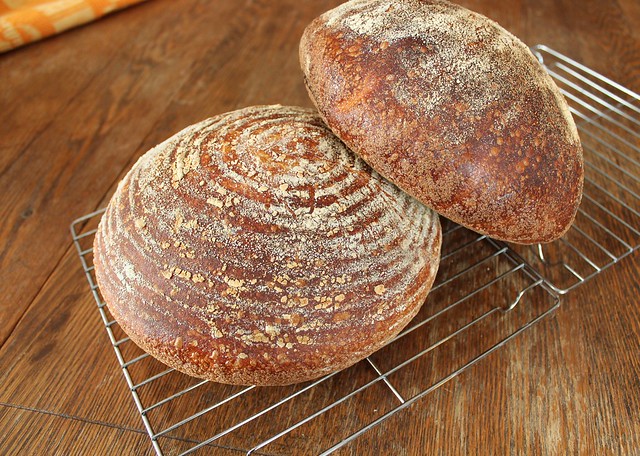
I baked the loaves in cast iron pots at 450 f. (reduce heat as soon as the breads are put into the oven), for 30 minutes with the lids on.  After removing the lids, let them bake until deep brown, another 10-15 minutes or so.

 NW sourdough

Last week, I let the loaves rise at room temperature for about 4 hours before refrigerating, then put them into the cold for 6 hours before letting them proof for only 1 hour in my oven.  I feel like the loaves last week had slightly better oven spring, but it could be that I should have left today's loaves to proof a little longer.  Truth be told, I was aiming for a loaf that would be cool enough to slice by lunchtime...  I need continual reminding that rushing the bread is never a good idea.

I also didn't slash today's bread, thinking that it would break apart naturally, like the Forkish (and Lahey) bread, at the seams that I placed into the bottoms of the proofing baskets.  It didn't rise enough in the oven to split, another clue that I should have let it proof longer.  I knew I should have gotten up earlier to attend to it...

NW sourdough

But alone with some cheese, it was the perfect lunch, an extra half hour a proofing time hard to imagine being much of an improvement. 

Today is a day of Spring-like warmth, before we wake tomorrow to tackle a cold and desolate Winter once again.  When sitting in my dining room with the windows open to properly enjoy such wintertime luck, this bread is my companion, a reminder of birth and rebirth, and living, breathing dough.  It's enough reason for me to never want to leave my kitchen, to come close to perfection, or at least perfection for now.  I know better than anyone that there is always a new bread to be obsessed with.

It feels so good to be back to my old self.

Sourdough Surprises: Babka

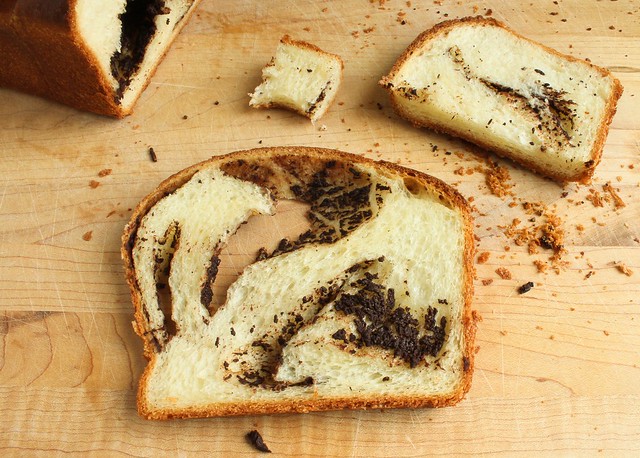
 babka

The January Sourdough Surprises bake along was babka, and I felt particularly excited to experiment since I am finally feeling more like myself.  I can't tell you how disappointed I was for so many weeks to have my stomach turn at the mention or sight of bread!  It was like my lifeblood was replaced with someone else entirely and while my brain knew that it was likely to be temporary, my heart worried that I would never return to my old self.

Well, the carbohydrates look appealing once again - and not a moment too soon, since this fortified bread is one of the lovliest I've ever made.  There is something about working with large amounts of eggs and butter and coaxing it into a durable dough that is so satisfying.  The bread seems to take on a life of its own too, changing ever so slightly as the days wear on but still wonderfully tasty in new ways.

I have never eaten a babka.  Not once.  Until recent years, I left all heavy duty, enriched breads to my imagination, never making the excuse to play around with them.  But no more.  Like for most people I'm assuming, babka conjures images of 90's television, when Jerry Seinfeld and Elane Benes are disheartened at the prospects of bringing an inferior offering to a dinner party.  Even though I'd never had one, I knew that my sourdough babka would need two things:  to be based on a recipe by Nancy Silverton (a native Los Angelean who no doubt knows her bread) and to have both chocolate and cinnamon twisted into the middles.  Both turned out to be good requirements.

rising babka

babka risen

I based the bread dough on Silverton's brioche recipe, using my 100% hydration starter that had been recently fed.  In her book Breads from the La Brea Bakery, she writes the recipes by days.  This bread for example takes 3 days, and I will follow her writing format since it is a good way to keep track of what you are doing.  While I usually prefer bread weights in metric, her book is written with conventional measurements.  I will keep them as she had them.

Her recipe yielded almost 4 pounds of dough for me, and I got 3 loaves from it (each about 1 lb, 5oz. prior to baking).  I recommend using a wider, shallower pan rather than a longer, deeper one - and I also recommend using melted butter to coat them.  The parchment test wasn't such a success.  It "sliced" into the sides of the bread as it baked and made for an unattractive loaf.

Sourdough Babka with Chocolate and Cinnamon (inspired and adapted from Nancy Silverton and Peter Reinhart)

First Day (best to start in the morning)

  • 6 oz. (about) 3/4 c.) cool water
  • 1 t. active dry yeast
  • 6 1/2 oz. (about 3/4 c.) 100% hydration sourdough starter
  • 4 oz. (about 1/2 c.) milk
  • 10 oz. (about 2 1/4 c.) bread flour
Make a sponge by combining everything in a large mixing bowl and stirring well to combine.  Cover tightly with plastic wrap, and leave it at room temperature for 10-12 hours.  The dough should have bubbles across the top.  Transfer to the refrigerator for another 10-12 hours.

Second Day
  • 5 eggs, room temperature
  • all of the sponge from the first day (above)
  • 1 pound (about 4 cups) bread flour, plus extra for dusting
  • 3 oz. sugar (about 1/3 c.)
  • 1 T. Kosher salt
  • 9 oz. (2 sticks, plus 2 T.) unsalted butter, cut into tablespoon sized pieces and at room temperature
Beat the eggs gently in a small bowl just to break them apart and set aside.

Remove the sponge from the refrigerator and take off the plastic wrap.  Place sponge, half of the eggs, flour, and sugar in the bowl of a stand mixer fitted with a dough hook.  Mix for about 2 minutes.  (Dough should be kind of wet and sticky, but may not be depending on how much of the eggs were added.)

Add the salt, and continue mixing for 2 minutes, scraping down the sides of the bowl if needed.  With the mixer still running, add the rest of the eggs a little at a time, making sure they are incorporated into the dough each time before adding more.  Once all of the eggs are in, increase the mixer speed to medium high (Silverton recommends holding on to the mixer - and I had to!) and continue mixing until the dough is smooth and satiny and begins to "climb" up the dough hook, about 8 minutes.  (The dough will also clean itself from the sides of the bowl.)

Turn the mixer speed back down to medium, and begin adding the butter one piece at a time.  Make sure each piece is incorporated before adding the next.  After adding all the butter, increase the mixer speed again to medium high and mix the dough until "smooth and shiny (but not greasy)", about 4 minutes.  Silverton notes that the internal temp of the dough should be 76 degrees, mine didn't make it quite that high.  (You may have to add a bit of flour to encourage the dough to wrap around the hook, but I found that after the mixer stopped, the dough seemed more slack than it did as it was mixing.  I added more flour as I had it out on the counter.)

On a lightly floured work surface, turn out the dough and knead by hand for a few minutes.  Use a bench scraper to help you, the dough will be quite sticky.  Try to avoid adding too much extra flour. Coat a clean, large mixing bowl (or clean the mixer bowl you just used) with oil, and place the dough in it.  Put it in the refrigerator, to let it continue fermenting 12-24 hours.

Third Day

Mix up chocolate cinnamon filling as described in the recipe below.  Melt a little extra butter to coat the loaf pans, and brush the melted butter on them until they are well covered.  (My pans were 9"x5"x3".)

Remove the dough from the refrigerator.  It should be noticeably risen to a twice the starting size.  (If it isn't, let it rise at room temperature about an hour to continue rising.)  Turn the dough out onto a lightly floured surface.  The dough is easier to work with cold, and it may be somewhat sticky as the coldness leaves it.  Weigh the bulk of the dough, and then divide into 3 equal loaves.  Put the portions of dough you aren't working with back into the fridge to keep cool.

On a very lightly floured surface, or not floured at all, roll out the dough until it is about twice the length of the loaf pan you are using.  (The width is not as important as the length - I watched this video, and you can see about the size around 2:06.)  Don't aim for dough that is too thin, about 1/8 of an inch is what mine was.

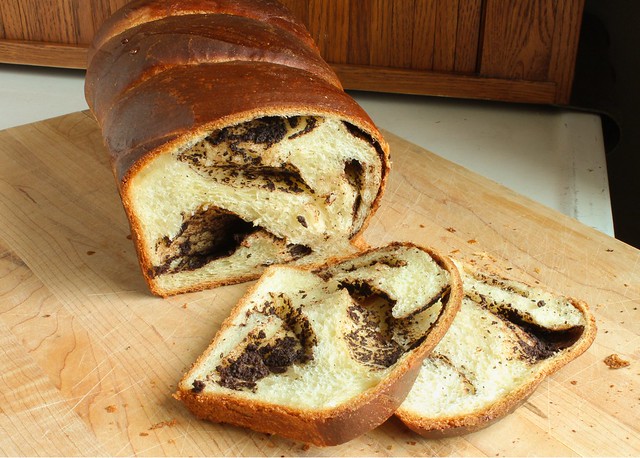
Spread 1/3 of the chocolate mixture evenly over the dough, leaving a bit of a border so that the dough will seal.  Starting with the long edge nearest you, begin to roll the dough up until you have a long snake.  Find the mid-point, and slice through it so that you have two equal sized pieces.  Place the pieces side by side, seam down, so that the cut edges are opposite (about 5:10 in the video above), and then gently twist from the center out so you have a nice, even twist throughout the bread.  Tuck it carefully into the buttered loaf pan, and set aside while you complete the others.

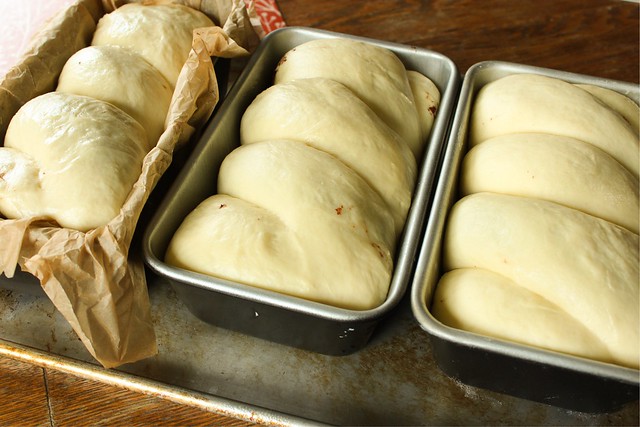
When all three loaves are completed, put them on a sheet pan and cover with a clean cloth.  The best way to proof the breads is by this setup:  Arrange the oven racks so that there is one on the bottom and one in the second position from the bottom.  Put an empty cake pan on the bottom rack, boil some water, and fill it.  As soon as it's filled, put the tray of breads on the rack above it and close the door.  Leave to rise until the dough is cresting the top of the pans, about 2 hours.

Just before the dough is about done rising, remove them from the makeshift proofer, remove the cake pan full of water, and preheat the oven to 500 degrees.  (The oven racks can stay in the same position.)  Let the oven heat for a good half an hour to ensure it is hot enough.  When ready to bake, beat an egg with a teaspoon of water and brush the tops of the breads.  Open the oven, and place the tray of three breads on the second to the bottom rack of the oven.  Immediately reduce the heat to 450.  Set the timer for 20 minutes.  After 20 minutes, the breads should already been a deep golden brown, but they still need to bake for an additional 15-20 more minutes.  Cover them with a sheet of aluminum foil if they are in danger of getting too dark.

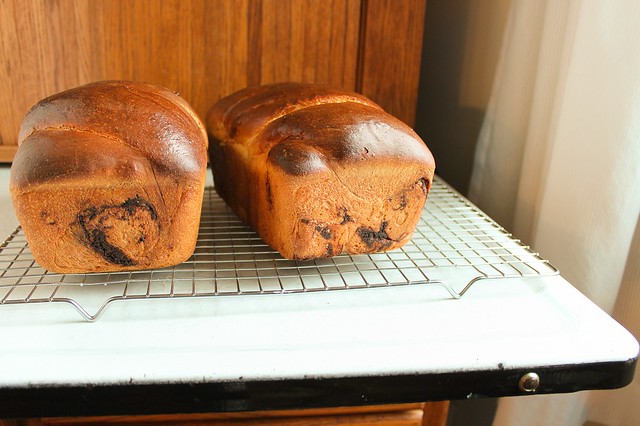
After the breads have baked a total of 40-45 minutes, remove the tray from the oven.  One at a time, immediately remove the breads from the pans to a wire rack.  (If you buttered well, they should come out easily.)  If the sides of the breads feel firm, the breads are done - if they have some give, they will cave in as they cool... so return to the loaf pan and pop them back in the oven.  As with all breads, let them cool before slicing, but since there are three loaves, you can be impatient with one and slice into it after 20 minutes if you can't wait.

Chocolate - Cinnamon Mixture (adapted from Peter Reinhart via the Purple Foodie)
  • 225 g. dark chocolate (about 1 1/2 cups), grated (I used Callebaut bittersweet)
  • 1 heaping t. cinnamon
  • 1 heaping t. espresso powder
  • pinch of Kosher salt
  • 55 g. butter (about 1/4 cup), melted
Grate the chocolate over a medium sized bowl, then add the cinnamon.  Melt the butter and pour over the chocolate.  If it doesn't melt completely, use a microwave to carefully melt it fully or put the bowl over a saucepan of simmering water.   If the mixture cools as you are working with it, just heat it again and stir until smooth.

babka

Is this bread worth three days of waiting?  Yes.  And aside from just eating it still warm from the oven, it makes marvelous toast or French toast.

I hope I'm back to stay in this baking group!  I sure was happy with the experimenting this month - and I can't wait to see what's up next!

(This post has also been Yeastspotted.)

babka

babka

Daring Baker Challenge December 2012: Panettone

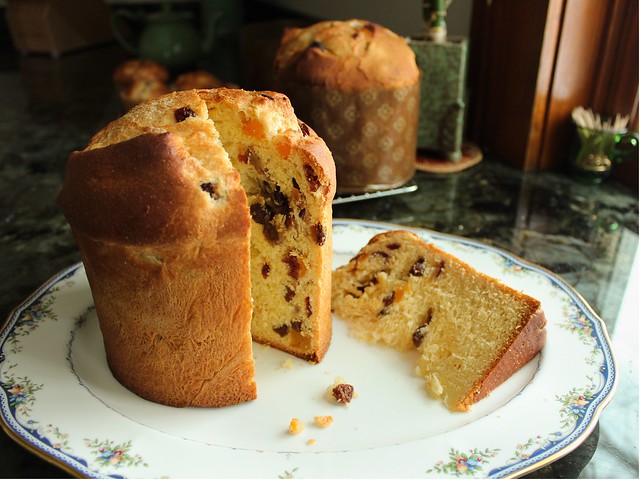
panettone

The December 2012 Daring Bakers’ challenge was hosted by the talented Marcellina of Marcellina in Cucina. Marcellina challenged us to create our own custom Panettone, a traditional Italian holiday bread!

After a two month break from the Daring Baker Challenge, I finally felt up to participating.  It helped that the challenge host, a blogger I've followed for years who is quite an accomplished baker, chose a bread that I've always wanted to make: panettone.

I can tell I'm not quite back to my normal levels of crazy experimenter, because had I been, I'd have chased all over town checking Asian markets for elusive citron and candying them myself.  Traditional panettone contains ample amounts of candied citrus peels and the candy peel of the citron fruit, which is pith-heavy and floral citrus variety with roots in the Middle East and Asia.  Had I more gusto and time, I would do a bit more digging and find out how this unusual fruit happened to become the most important ingredient in an Italian delicacy - but I'll save that curiosity for another time.

panettone, unbaked

This heavily fortified bread reminded me of pan de muerto.  With so much butter, you could hardly expect it to be tender and light, but it is.  Despite the fortification, it also "stales gracefully", with a changing texture and deepening flavor complexity as the days wear on.  I made the breads at my parents' farm, where I have spent the entire week catching up on relaxing and enjoying heavy dustings of picturesque snowfall, which always seem to miss us so close to Lake Michigan lately.  My Mom graciously bought me some candied citron and fruitcake mix to use in my panettone, but after smelling and tasting the rising dough we both agreed that we couldn't ruin it with grocery store standard (and quite chemically tasting) fake peel. 

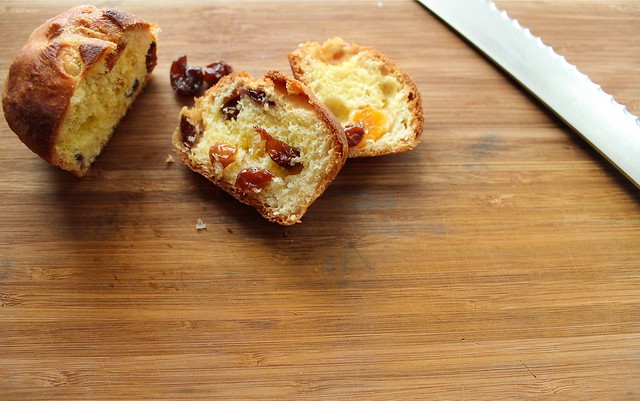
Instead, I used the remainder of a little packet of wonderfully delicious candied Meyer lemon and sour orange peels that Julia sent me in a Christmas card (and I didn't send out a single card this year, either...).  I chopped it very small, and added it to a mixture of real dried fruits my Mom had on hand: some dates, cranberries, dark raisins, and apricots - all soaked in boiling water to soften them.  Combined with the small amount of candied peel and the zest from both a lemon and an orange, my panettone may no longer be truly Italian in nature, but it was more than delicious.  I couldn't be more thankful I didn't use the fake, supermarket peel in them!

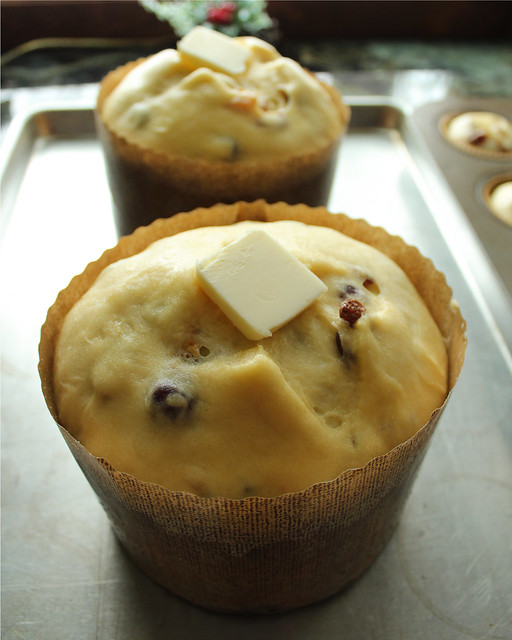
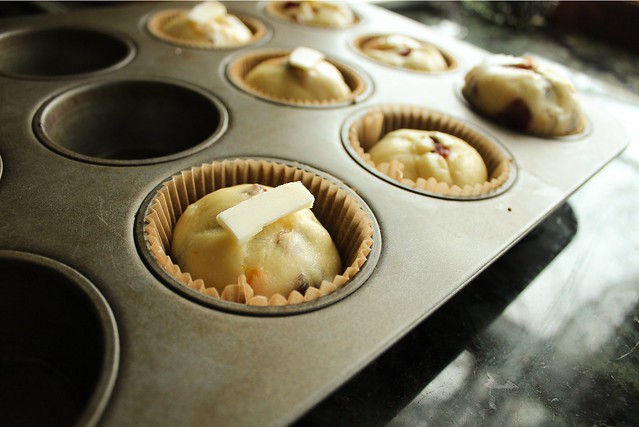
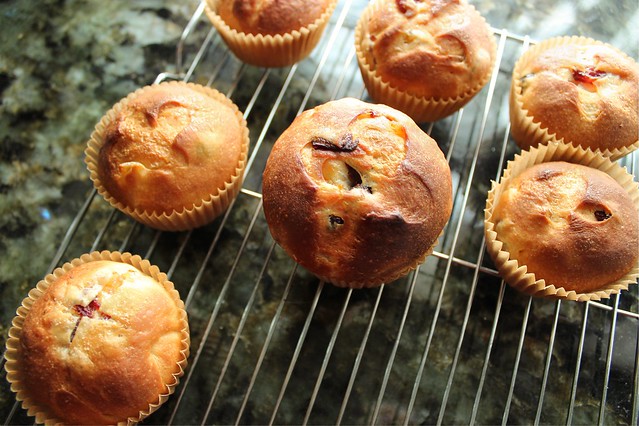
mini panettone

panettone, mini

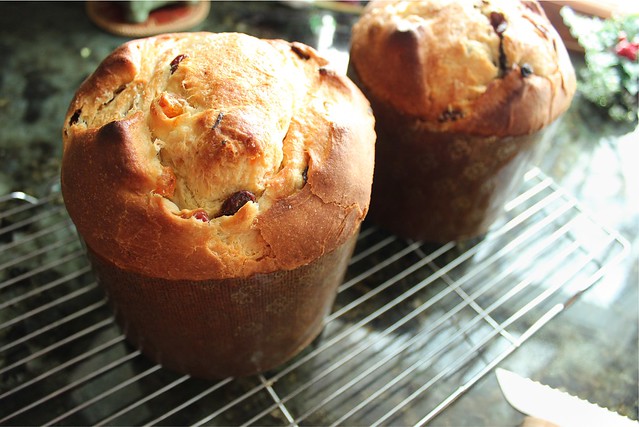
Last year, I had intended to babysit my starter for a week and feed it multiple times per day (while maintaining it at a specific temperature as specified over at Wild Yeast to make sourdough panettone.  My neighbor had two paper molds that she gave me, and I've stored them for a year.  This was definitely the year that I had to make the panettone.  I made some slightly smaller in muffin liners to compensate for the 1/2 inch I was lacking in diameter.  In general I think portion control is a good thing, and I would definitely make the muffin-sized breads again.  As a note, I'll remember that filling the tins nearly to the top with a ball of panettone dough made a prettier and slightly heftier miniature bread.

mini panettone

sliced panettone

Otherwise, I made the breads just as Marcellina outlined in the recipe.  I let the 1st rise dough raise for about 2 hours on the counter, then popped it into the refrigerator overnight.  My Mom has a fancy oven with a proofing mode, so I was able to proof the breads at 90 degrees the next day.  Filling the cold dough with fruit and rolling it was easier with a soft dough just from the fridge, and the formed breads raised in about 21/2 hours in the proofing oven.  (Another note:  that the muffin tin panettone baked much faster than the deep, molded ones.  I baked them the same way, 10 minutes at 400, 10 minutes at 350, and maybe about 5 minutes at 325.)

panettone

I hope I continue to feel well enough to continue with the DB Challenge again next month.  I forgot how excited I get when I try something and it meets all of my expectations (not that it happens every time with the Daring Challenge...).  A huge thank you to Marcellina for choosing such a wonderful recipe!  I'm certain that I'll be making this again next year!

On Rye. (Notes, not Recipes...)

I haven't given much thought to rye.  As a cereal grain, I suppose I like it well enough, but I'm fairly certain this was my first time baking it into a loaf - and it was a naturally leavened loaf at that.  The only rye product I had in the house to turn into rye flour for this recently baked experiment was rolled rye flakes I had gotten some time ago at my co-op, and I'm not sure if my finished bread was a direct result of less than optimum rye flour or not.  Either way, this bread was most delicious, and it piques my interest to work with this grain a bit more.

This is just an account of my first rye bread, baked with instruction from Peter Reinhart (who I'm sure will appreciate that I'm not writing down every one of his recipes from Crust and Crumb into my blog).  I did follow his ratios, and I built a rye starter in a single afternoon from my standard resident starter.  This added a day to the bread with an overnight rest in the fridge, but it was all just in wait time, not really active work time.  On his recommendation, I also added a tablespoon of cocoa powder and two teaspoons of instant espresso powder hoping for a deeper external coloring.  An exceptional tongue may be able to detect it, but I can't say I could.

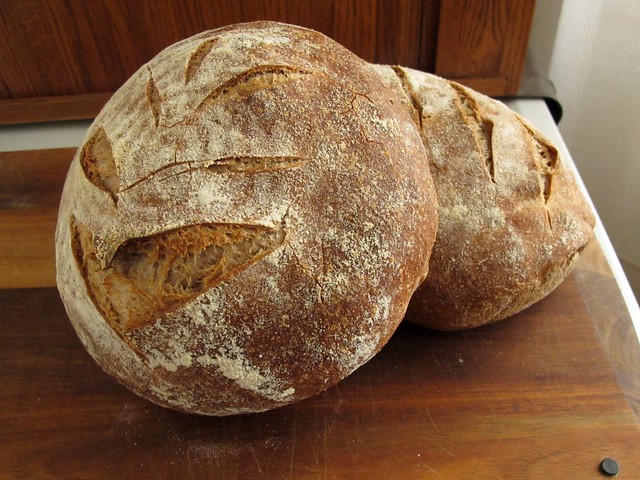
pain au méteil

Pliny the Elder, the ancient Roman philosopher and naturalist who had a penchant for cookery, said that rye is "a very poor food and only serves to avert starvation" and spelt is mixed into it "to mitigate its bitter taste, and even then is most unpleasant to the stomach."  The three day building of this rye bread most definitely served to break down those parts of the rye plant destined to be indigestible.  And the greater wheat flour content tempers any would-be-overwhelming bitterness as well.

The French term this type of rye bread with more wheat than rye "pain au méteil", and the instruction in Peter Reinhart's Crust and Crumb called to bake it deep as possible without burning... but I couldn't bring myself to go much darker than this.  I am going to go on a rye mission, grinding coarse rye flour from rye berries and not rolled flakes of rye - and I'll bake the pain au seigle as well, which is the version that contains more rye than wheat.  I'm also going to try to bake on a stone, and burnish the crusts out with longer baking times.

ka back in action

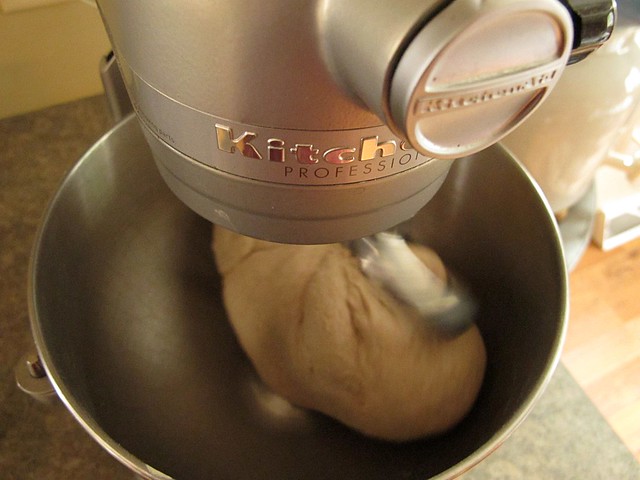
I've happily been able to return to machine-kneaded doughs; my loving Dad fixed my not-so-old stand mixer by replacing gears and grease, when I was certain that my mixer was heading for a landfill .  I've had it back for two months already, and have been afraid to use it...  It works just great, and I hope that it will now withstand some workouts.  (Though, I'm overly careful, and unlikely to be baking any bagels any time soon.)

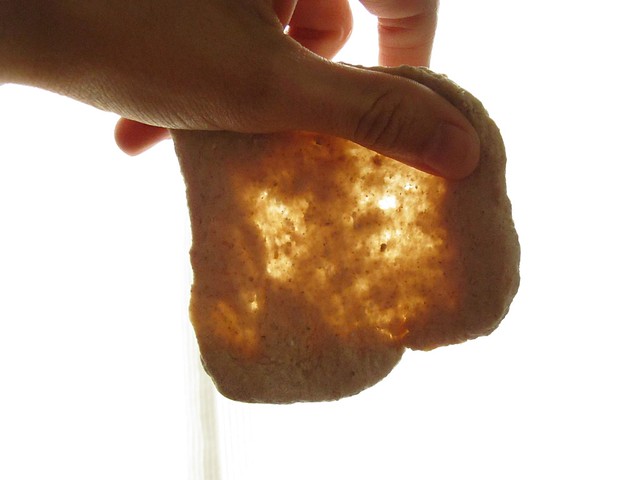
windowpaning

Rye flour contains far less gluten than wheat, but yet the dough seemed to reach the "windowpaning stage" faster than traditional, all-wheat breads I've made.  From the photo, you can see that the gluten hasn't quite developed at this stage.  Two minutes later, it stretched thin and without breaking into holes.  It was a lovely dough, and it felt good to have a traditionally kneaded dough in my kitchen after so many months of merely "folding" high-hydration doughs.  Even though (with kneaded doughs) I let my mixer do the bulk of the work to save my hands where I can, I never resist the pleasure of a minute or two of quality "counter time" with a dough!

I formed the dough into two loaves:  one round and one oblong.  I have a proper brotform for the round loaf, but improvised another small basket for use as an oval support.  The breads rose much more than I anticipated after they were formed, risen, and then retarded overnight.  The round loaf must have been better formed, since it didn't appear overproofed when I scored it.  The oblong loaf deflated and had an almost tough "skin" that made pretty patterns impossible.  I used Chad Robertson's 50-50 mix of rice and wheat flours to dust the bread cloths thoroughly, though I might not have needed a cloth at all in my brotform that is well-seasoned.

I brought them out of the fridge, and let them sit at room temp for about a half hour as the oven heated.  Unlike Reinhart, I baked them both in covered iron pots - the oblong one just barely squeaking in, thus its rather homely looking appearance.  I heated them to 500, then dropped the heat to 450 just after popping them in.  I uncovered them after 15 minutes, and baked about 20 minutes longer.

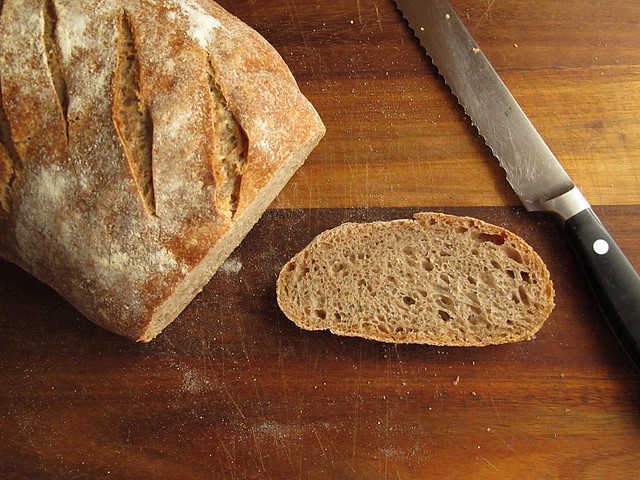
pain au méteil

But like their related Human Beings, no matter what they looked like, it was what was inside that mattered.  Gentle, small holes, with a slightly more regular pattern than the breads I've been used making lately.  The crust was thin, brittle, and easy to chew; the texture of a slice had enough resistance to be interesting without being boring.  I ate the heel, plain without adornment, amazed that wild yeast produces such amazements with such a little help from me.

pain au méteil

Returning to a well-loved bread book after so many months away felt unnaturally calming.  I remembered immediately why it is one of my favorites, and one that produces excellent results, even if my results are most definitely different than those described in black and white.

I ate this bread for lunch today, it's second day, sliced very thin and toasted, topped with super ripe avocado, fresh sliced San Marzano tomatoes, coarse salt and pepper and some arbequina olive oil I decided I had to try (and it was so good I'm glad I did).  I actually can't wait to taste this bread as it ages a few more days, I have a feeling that the flavor will only continue to develop.

I'm also very excited to get rye berries for flour.  While I'm at it, I may pick up some hard wheat berries and grind that for flour too - it may make for a denser loaf, but perhaps an appreciation for heavier Winter loaves in on the horizon...