I think it's curious that you can make almost anything from scratch, but nothing impresses people more than to tell them you made the crackers. It may be a preconceived notion that cracker origins are inexplicable: mystical, crisp things that elves or independent hippies in Vermont are lovingly packing into cardboard boxes. Maybe people consider that such things are not able to be made by human hands, but making preservative free, healthy snacks can become a rhythm backbone of the kitchen. Nothing is better than to open the pantry door and see a few jars of homemade crackers, fully deserving of your homemade dips, spreads, jams or jellies - things you can just pop out onto a plate when unexpected company arrives.

I really do enjoy making crackers, in fact I forgot how many different types I have tried and even posted about here until I searched 'crackers' in my blog search box on the right side of the page. I have some serious favorites, like the Gluten Free Multigrain Crackers or Alton Brown's Seedy Crisps - both of which are in regular rotation. Just as the school year began and I felt a lonely hole in my first few days of new solitary independence, my friend Deena emailed me and asked if I'd be interested in testing recipes, and if so if she might give my name to a friend of hers who was writing a cookbook all about crackers. I excitedly told her yes! Shortly after, I was acquainted with Ivy Manning, a cookbook author, recipe developer, and former Wisconsinite living now in Portland, Oregon.
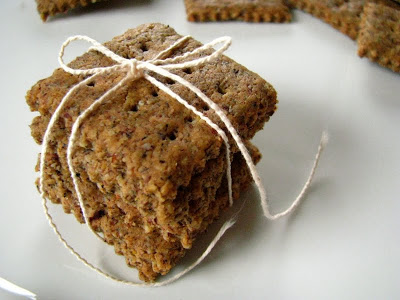
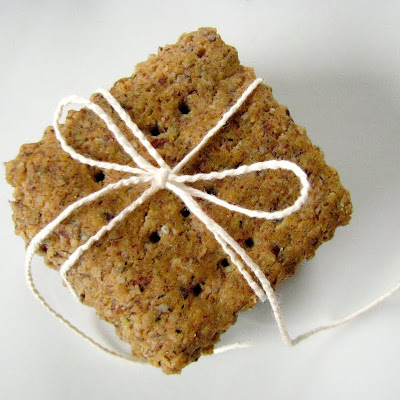
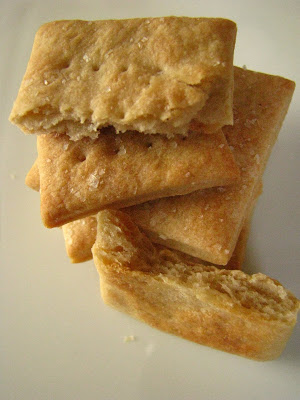
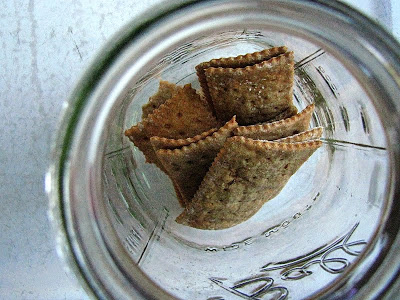
Our first exchanges made me even more excited to be able to help. Ivy seemed oddly like me, living with a husband who is a "picky eater", fully passionate about food, and very busy. She began emailing me her recipes a few at a time, which I double checked for weights and volumes as I baked, and I tried to give her honest feedback about them. One of the first recipes I tested was for these slightly time consuming Swedish Rye Crackers - some that at the time I thought were good, but now they have grown on me so much I think I'll likely keep a batch around for emergencies on most occasions. They are very crisp, hard in fact, and they store like a dream. I've had the same batch in a half gallon canning jar for about a month and they only seem to improve. This week I ate them with a little of this incredible Walnut Lentil Pate, which I know I have mentioned before. As I ate them, I realized this cracker was the perfect pre-dinner munch, and they cemented my already warm feelings of rye flour.
Ivy decided not to use this version of Swedish Rye Crackers in her book, and granted me permission to post about them here, since I feel they deserve to have a special place in a cracker-maker's repertoire.
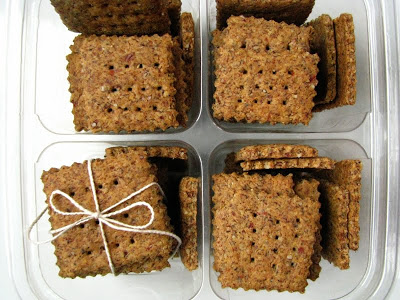
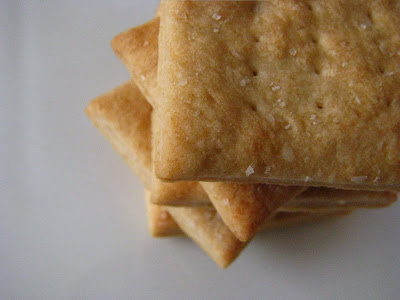
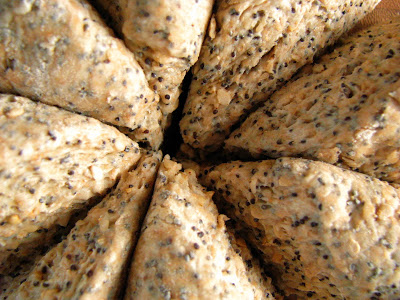
These are hard, crunchy crackers. If you are a fan of Rykrisp crackers or anything super crunchy, you will love them. Even though they have a good amount of rye flour, I feel like they are also distinctly wheaty in flavor. They are great for mopping up soup or mashed potatoes if you've forgotten the bread, and are good with jelly and peanut butter too - though personally I'd probably nix the caraway seeds if you plan on serving with something sweet.
Swedish Rye Crackers (Ivy Manning)
about 3 1/2 dozen crackers
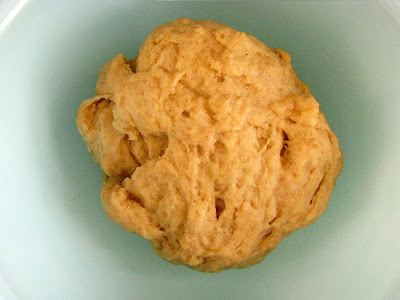
Stir in salt, and gradually add the rye flour. Beat on medium low speed for 4 minutes. If kneading by hand, transfer the dough to a large ziptop bag, squeeze out the air, seal bag, and knead for 6 minutes. Do not add additional flour. Turn the bag inside out to free the dough from the bag, it will be sticky.
Coat a large bowl with oil and add the dough. Cover with plastic wrap, and let the dough rise for 90 minutes in a warm place.
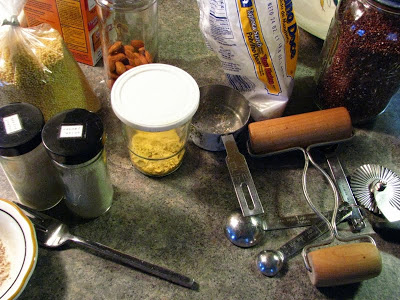
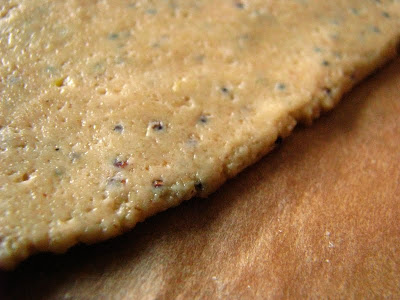
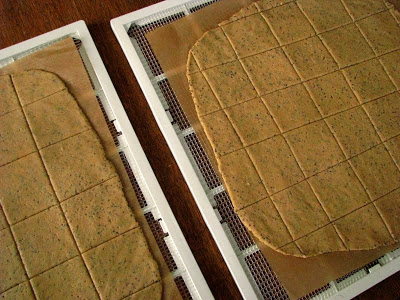
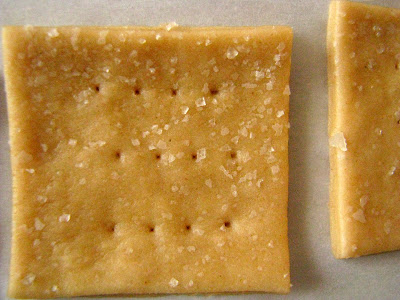
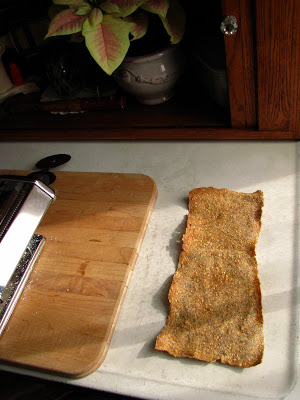
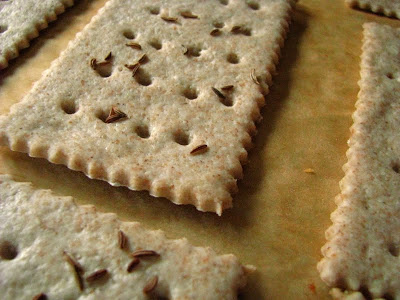
Preheat the oven to 375. Turn the dough out onto a lightly flour dusted surface and divide into three pieces. Gently pat the pieces into rectangles about 1/2 inch thick. Roll one piece of dough out until it's about 1/8 inch thick, picking up the dough and rotating it frequently to make sure it isn't sticking. using a pastry or pizza wheel, trim the irregular edges and cut the dough into 4x2 inch rectangles. Place them on a baking sheet lined with parchment paper. Repeat with remaining dough to fill a second baking sheet. Prick the crackers all over with a chopstick, then spray them lightly with water, sprinkle with caraway seeds (if using) and press them in lightly so they will adhere. Cover loosely with plastic wrap, and set aside for 30 minutes. (You can re-roll the scraps once.)
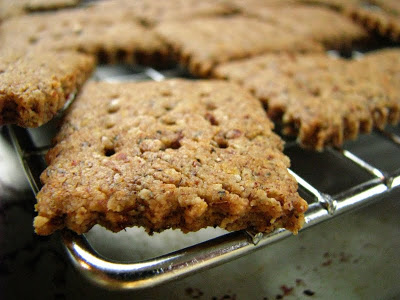
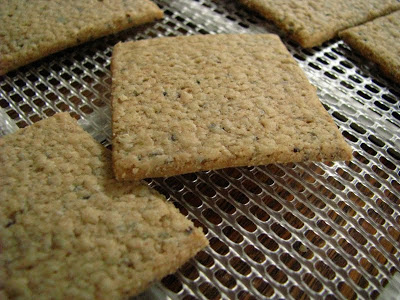
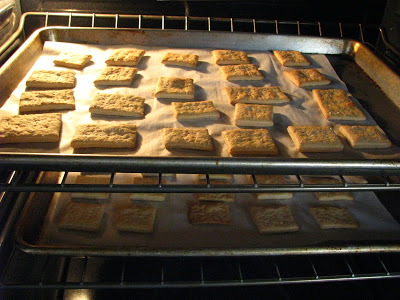
Uncover the crackers and bake, rotating the sheets from top to bottom and front to back once during baking. Baking will take 25-35 minutes depending on the thinness of your cracker. (You can always take them out, and then re-bake them if you think they need to go longer.) The crackers should be browned around the edges, smell toasty, and be dry to the touch. Transfer to a cooling rack to cool completely, about 1 hour. Store in an airtight container for 2 weeks or longer...
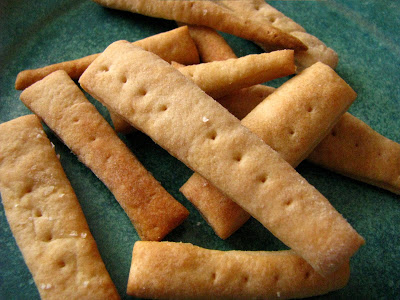
(I baked a couple of 1/2 inch by 4 inch pieces of re-rolled dough scrap, and they puffed up hollow. Next time I make them, I may try cutting a whole tray full this way...)
about 3 1/2 dozen crackers
- 2 1/2 t. active dry yeast
- 1 1/2 c. warm water
- 1 1/3 c. bread flour, plus additional for rolling
- 1 t. fine sea salt
- 2 1/3 c. rye flour
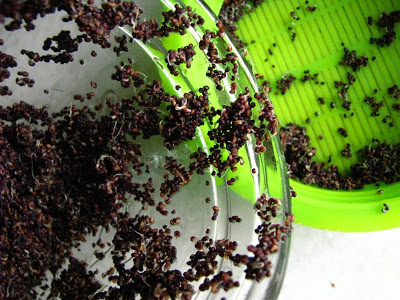
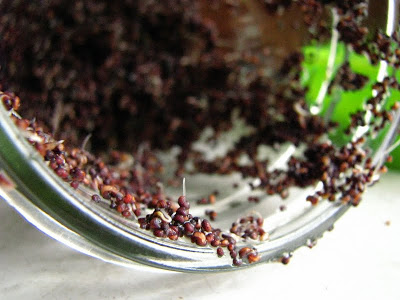
- 2 t. caraway seeds (I only put seeds on about half the batch, they are good with or without as you prefer)
- Kosher salt, for topping crackers
Stir in salt, and gradually add the rye flour. Beat on medium low speed for 4 minutes. If kneading by hand, transfer the dough to a large ziptop bag, squeeze out the air, seal bag, and knead for 6 minutes. Do not add additional flour. Turn the bag inside out to free the dough from the bag, it will be sticky.
Coat a large bowl with oil and add the dough. Cover with plastic wrap, and let the dough rise for 90 minutes in a warm place.
Preheat the oven to 375. Turn the dough out onto a lightly flour dusted surface and divide into three pieces. Gently pat the pieces into rectangles about 1/2 inch thick. Roll one piece of dough out until it's about 1/8 inch thick, picking up the dough and rotating it frequently to make sure it isn't sticking. using a pastry or pizza wheel, trim the irregular edges and cut the dough into 4x2 inch rectangles. Place them on a baking sheet lined with parchment paper. Repeat with remaining dough to fill a second baking sheet. Prick the crackers all over with a chopstick, then spray them lightly with water, sprinkle with caraway seeds (if using) and press them in lightly so they will adhere. Cover loosely with plastic wrap, and set aside for 30 minutes. (You can re-roll the scraps once.)
Uncover the crackers and bake, rotating the sheets from top to bottom and front to back once during baking. Baking will take 25-35 minutes depending on the thinness of your cracker. (You can always take them out, and then re-bake them if you think they need to go longer.) The crackers should be browned around the edges, smell toasty, and be dry to the touch. Transfer to a cooling rack to cool completely, about 1 hour. Store in an airtight container for 2 weeks or longer...
(I baked a couple of 1/2 inch by 4 inch pieces of re-rolled dough scrap, and they puffed up hollow. Next time I make them, I may try cutting a whole tray full this way...)

So many times I wonder what I should be doing with myself. I really am content to be a homemaker, chronicling my adventures every so often so I can share some of my excitement with others. But sometimes I do get frustrated, I think I should be "gainfully employed", and then wonder what it is that I should be really be doing so that I can continue to enjoy myself as much as I have since I became a mother 5 years ago.
I know I'm not going to be the next Martha Stewart, but maybe I've found a niche in the behind the scenes of cookbook writing. This may be my first foray into this field, but it's one I hope I can figure out how to grow into more. It feels so good to see the the other side of the cookbook writing process, the amazing work that goes into it by an author, and the trials, successes and failures, and evolution of recipes. I have been reveling in cracker testing in part because it is a subject matter that is really appealing to me, but more because I feel good to be a bit unseen, a stealth baker who may just show up at your door with a little overflow of delicious kitchen bounty.
I know I'm not going to be the next Martha Stewart, but maybe I've found a niche in the behind the scenes of cookbook writing. This may be my first foray into this field, but it's one I hope I can figure out how to grow into more. It feels so good to see the the other side of the cookbook writing process, the amazing work that goes into it by an author, and the trials, successes and failures, and evolution of recipes. I have been reveling in cracker testing in part because it is a subject matter that is really appealing to me, but more because I feel good to be a bit unseen, a stealth baker who may just show up at your door with a little overflow of delicious kitchen bounty.
Now that Winter is on his way I feel I'll have so much more time to read, and I'm looking forward to reading more of Ivy's cookbooks: The Farm to Table Cookbook and The Adaptable Feast. Her book on crackers is scheduled for Spring 2013, but meanwhile you can find Ivy at her website. It's going to be a great book, just judging from my sneak peak testing... One recipe in particular I've made 3 times already, just because it was so delicious.
I look forward to the emails with little attachments, and like an archeologist who patiently brushes the sand away from stone bones, I have remember to discipline myself to follow instructions and be methodical. It's all a great lesson and learning experience, and I feel so thankful to have had it drop in my lap.
I look forward to the emails with little attachments, and like an archeologist who patiently brushes the sand away from stone bones, I have remember to discipline myself to follow instructions and be methodical. It's all a great lesson and learning experience, and I feel so thankful to have had it drop in my lap.