cake

Cake Made from Crumbs... and Parsnips.

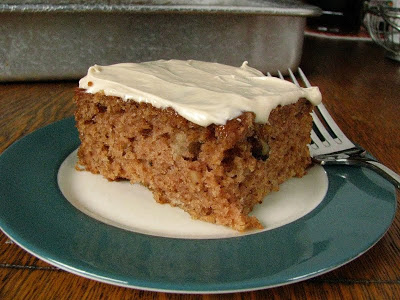
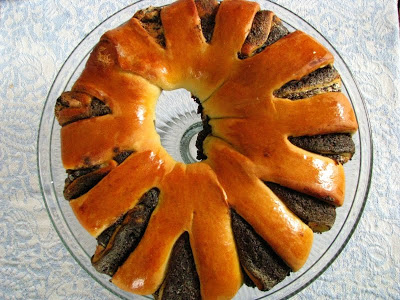
I love to be able to make something from nothing, and when the something turns out to be a cake, I like it even more. Of course, this cake isn't really made from nothing, but it is a clever form of recycling since it uses dried sourdough bread crumbs instead of flour. It has a few other staple ingredients too, but the premise of making flour out of flour is just plain genius.

It's not my idea, but rather it belongs to Susan at Wild Yeast. This cake was originally a carrot cake, and the first time I made it I told nearly everyone I knew about it. It had loads of cardamom, it kept well for a week, it was the most exotic thing to bake something out of nothing. These were the talking points that kept me fascinated with a more healthful version of dessert, a cake that was unusual enough to stand out amongst its more refined relatives.

shredded parsnips

Over the weekend, I planned a dinner around more of the Volger veggie burgers that I'm still so obsessed with. I had decided that I wanted to showcase this bread crumb cake, but that I already had too many carrots in my dinner plan. Enter the parsnip: earthy, slightly vegetal, kind of sweet, and plays well with spices. I did some minor swapping, pineapple for pears, cardamom for ginger and suddenly a new version of bread crumb confection was done. The best thing is, I'm now dreaming of vegetable cakes in rainbow colors, bread crumb cakes made with earthy beets or sunny sweet potato. Maybe even a celery root cake. That will really get them talking...

parsnip cake batter

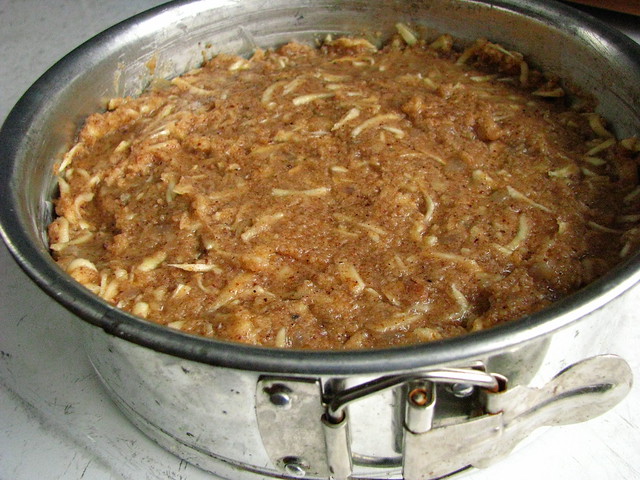
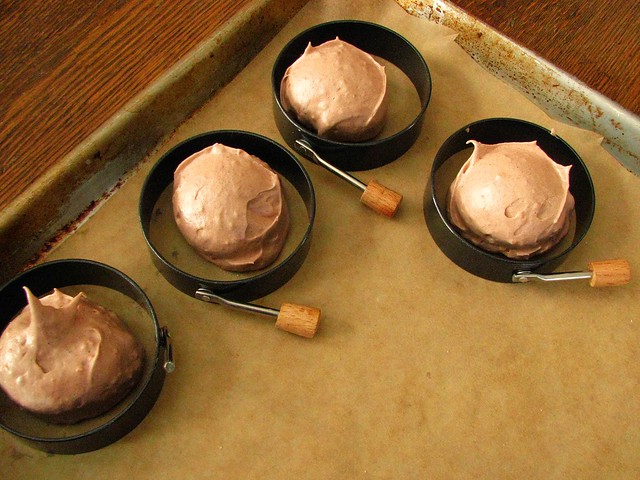
I'd imagine you could use any grate-able root vegetable in this cake, and then choose spices to complement. I used an 8 inch springform pan, since you really do need to be sure the cake tin you use is at least 2 inches tall. Next time, I'll use some fresh ginger in this as well, the spiciness seemed to wear off after a day or two using the powdered spice. If keeping the cake longer than 2-3 days, I'd recommend putting it in the refrigerator - it's very moist in the center. I bake this cake by metric weigh measure, a good conversion tool can be found here.

Sourdough Bread Crumb Parsnip Cake (adapted from Wild Yeast)
  • 172 g. fine sourdough bread crumbs (about 1 c.) (I grind to nearly a powder in my VitaMix)
  • 1 t. baking soda
  • 1/2 t. cinnamon
  • 1/2 t. nutmeg
  • 1 1/2 t. ground ginger
  • 1/4 t. cardamom
  • pinch of kosher salt
  • 87 g. butter, room temperature
  • 86 g. dark brown sugar
  • 86 g. sugar
  • 2 eggs
  • 98 g. plain yogurt (I use my homemade, which is the thickness of buttermilk, so I'd assume that would also work)
  • 2 t. vanilla extract
  • 144 g. grated parsnip
  • 131 g. pureed pear (about 1 whole canned pear, drained)
  • 100 g. walnuts, toasted and chopped

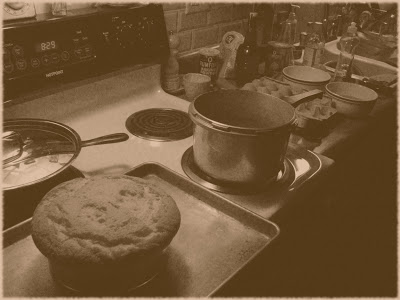
Preheat oven to 350. Butter an 8 inch cake pan that is at least 2 inches deep.

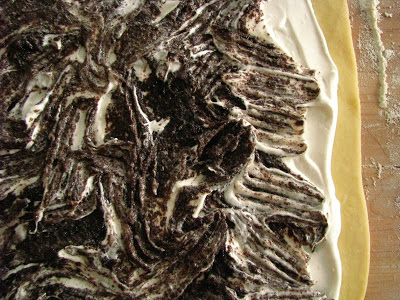
In a small bowl, sift bread crumbs together with dried spices and salt. In another small bowl, combine yogurt with vanilla.

In the bowl of a stand mixer fitted with a paddle attachment (or in large bowl if working by hand), beat butter with sugar for several minutes until lightened. Add the eggs, one at a time, beating one minute after each addition. (Scrape down sides of the bowl as necessary.) Add the dry ingredients alternately with the yogurt/vanilla mixture, beginning and ending with the dry ingredients. (The mixture will look "curdled".)

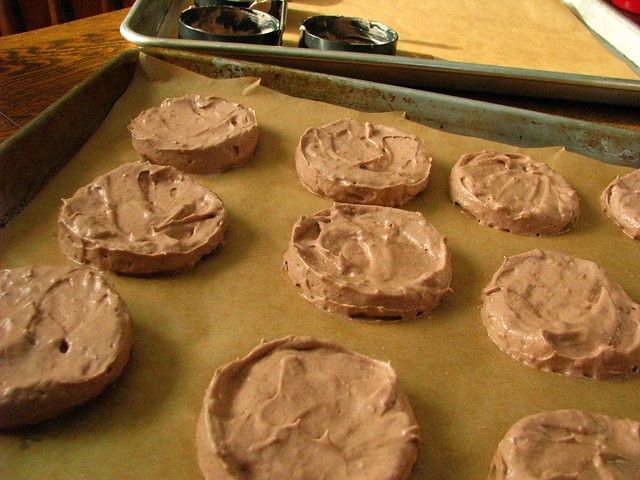
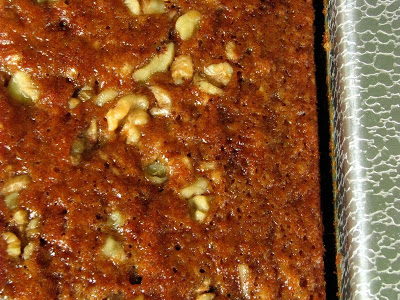
Spread the batter into the prepared pan, smooth down the top and bake for about 50 minutes until a tester inserted near the center comes out nearly clean, and the cake begins to pull away from the sides of the pan.

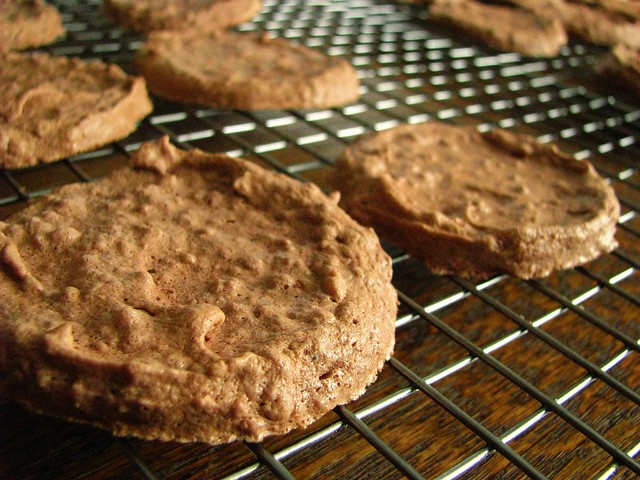
Remove from oven to a wire rack and cool 15 minutes before removing from pan.

baked parsnip bread crumb cake

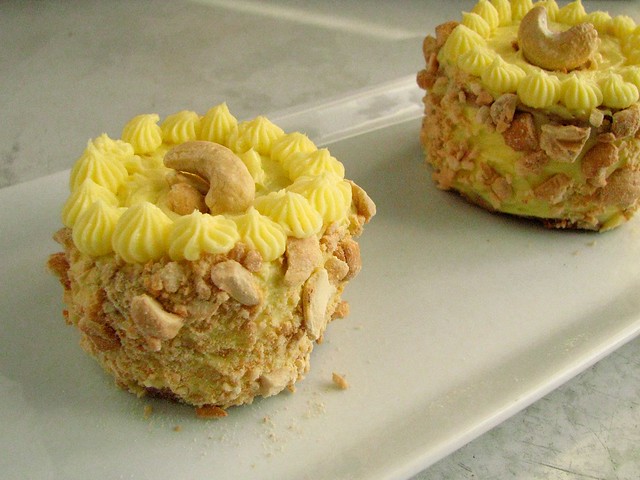
A little care is needed in dealing with this baked cake, after all it is essentially flourless, and the gluten present is converted. This cake is very good the day it is made, but seems to improve and taste even better in the following days. Moisture soaks into the dried bread crumbs, and the shredded vegetable also seems to tenderize. It really is just a cake you need to try to be able to understand, to taste this something made from nothing is almost like eating stone soup.

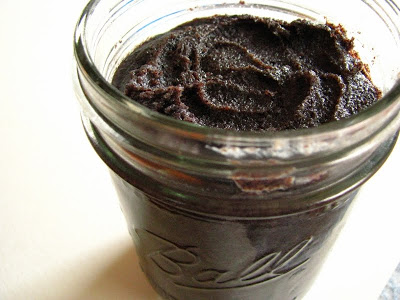
However you arrive at them, breadcrumbs are a worthwhile, homemade food as well. I used to have them in more ample supply before I started turning out better loaves of bread, but now I specifically dry out the heels so I can grind them into powder. Their keeping power is almost surreal; I store them in glass jars my dark spice pantry and they last very well for several months.

After this last cake, I found my supply to be running quite low on breadcrumbs, so I sliced the last 1/3 of my current loaf of bread and popped it into my already-running dehydrator to dry. I had never done that before, and the texture of the dried bread surprised me! It seems worth experimenting to make dehydrated croutons, or crostini...

parsnip cake

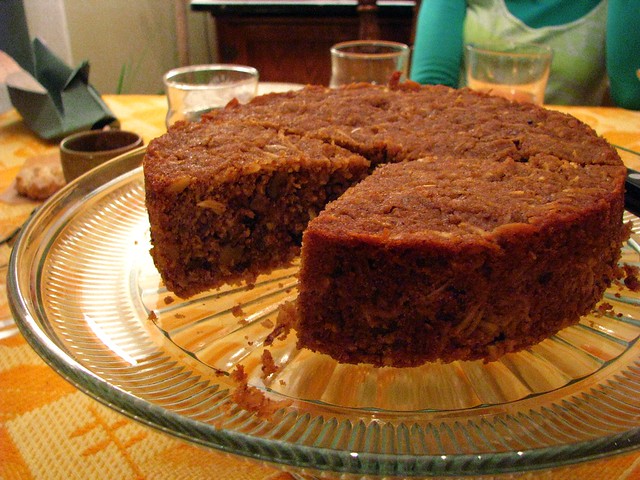
If you happen to be looking for a new cake to experiment with, look no further than this one. It is a miracle of cake, and a delicious alternative for vegetables. It's just sweet enough to not need frosting, but perfectly at home if you desire to make some (I'd have gone with a ginger cream cheese frosting if pressed.) It's also a good candidate for the "everyday cake" category, as well as refined enough for dinner party status. It's sure to win you some kitchen points for creativity and frugality as well!


This post has been Yeastspotted, appropriately, since Yeastspotting is Susan's weekly roundup of yeast-related posts from submissions. Check it out for immediate inspiration!

Daring Baker Challenge November 2011: Sans Rival Cake

Catherine of Munchie Musings was our November Daring Bakers’ host and she challenged us to make a traditional Filipino dessert – the delicious Sans Rival cake! And for those of us who wanted to try an additional Filipino dessert, Catherine also gave us a bonus recipe for Bibingka which comes from her friend Jun of Jun-blog.

sans rival cakes

You may notice that I'm 3 days late in posting my challenge this month. That is because I had planned to make this dessert when I visited my Parents over the weekend for 2nd Thanksgiving. We had pies (plural), and pecan tarts, and way too much food, so last minute we agreed that we didn't need the additional dessert.

When I got back, I thought I would just skip it. I cleaned my house, I carried in my Christmas tree. I cleaned out my refrigerator, which needed it desperately, and I attacked the laundry and did a little sewing. Then today, the last day of November, I knew I just had to give this one a go. You know you are a baker at heart when you are sitting over your morning coffee and decide on a whim to soak 10 eggs in warm water since they needed to be a room temperature to begin a project...

chocolate cashew meringue

Sans Rival cake, so called since it has no rival, is a cake made from cashew meringue layers and my old nemesis, French Buttercream. French (and Italian) buttercream and I don't seem to understand each other too well. I'm thankful for challenges that force me to practice them or I'd always choose the more cloying confectioner's sugar-based frostings.

I'm not absolutely certain that the frosting I made today was proper, after adding the boiling sugar-water it took an entire half hour in my stand mixer on high to whip it down to room temperature. I added the butter, slowly, cube by cube until it disappeared and then I tasted. I decided to flavor it with a pinch of salt and some almond extract, and then I tasted it again. I was pretty sure this is what angels dine on. I had a flashback to standing around the kitchen not too long ago with my Parents and sampling some really (really) great donuts - and one of us said "How can these be bad for you, they taste so light, and so good?" Another flashback immediately appeared to me of a high school friend who fed her little brother a stick of butter so he'd keep his pudgy fingers out of the butter dish. That kid just loved butter, so much he would eat spoonfuls of it. He would love this frosting. I could devote a lunch to it. Oh yes, I did kind of do that today.

But enough on the frosting... Cashews, being the most buttery of all nuts in my opinion, were an extravagant purchase for me and a good fit for the dessert, as well as being traditional. I had already toasted up the amount needed for the challenge, ground about half into fine powder for inclusion in the meringue itself, and reserved the rest of the pebbly fellows for the outside decoration. What took me the most time then, was making petite portions by recommissioning my egg rings as molds for smaller-sized meringues. I think I got about 44, plus a small, thin sheet that I spread on the parchment, a result of my spatula gleaning all I could from the edges of the mixer.

chocolate cashew meringue (2)

I quickly developed a good method for uniformly small portions. I put one scoop of meringue in each ring and spread evenly with an offset butter knife. Then, I ran a small paring knife around the edge to "break the seal", and removed the molds. Finally, I evened out the tops of the meringues with the knife. Baking these was a little trickier. Even though they weren't that thick, they still took upwards of 30 minutes to even get close to being dried out and crisp. In fact, I took them all out prematurely, and after making the frosting, I reheated the oven, and popped them all back in for 15 minutes to dry out some more. That did the trick; they felt light and not spongy, and had that Styrofoam sound that meringues typically do.

baked meringues

beaten egg yolks
egg yolks: after lightening them they were still a sunny yellow since they were nearly orange to begin with...

French <span class=
that goes to say that my finished frosting then looked unsurprisingly like really good butter. really good butter that angels eat.

That frosting chilled for a good hour, and maybe the butterfat in my butter is too high, but it came back to room temperature so fast that it was really hard to frost with. I did my best, and hid the rest with clever piping - but I did have to pause quite a few times and pop everything in the refrigerator. I froze one before trying to cut it in half:

sans rival cake, interior

I broke the "tray meringue" sheet into shards, and made a pretty deconstructed version:

deconstructed sans rival

I've already confessed to quite a bit of frosting consumption, but I did also have a few bites of fully finished dessert. This is rich, and I am glad I went with almond extract in the flavoring of my frosting. While the cashews have a heavy, buttery, toasty taste, they needed the freshness of astringent almond to cut through it. It also bears noting that I am positively addicted to almond extract...

If I make this cake again, I will definitely make one large cake. I think my frosting woes may have been solved if I handled it less, and one large cake would have easily enabled that. I also think I may leave out the cocoa powder which was optional (and not traditional) in the meringue. It had more of a mild "mocha" flavor than a full out chocolate one, but I suspect it did something to the texture of the meringues that I wasn't entirely pleased with.

If you reread above and find that I thought this cake was rich, buttery, sweet, texturally suspect and tedious, you would be correct - but it was also just decadent enough to capture my imagination. I'm really looking forward to trying it again tomorrow, when my taste buds have started forgetting the mouth-coating properties of that angel frosting, and I have a clean palate to discern with. I really did enjoy this challenge, which was more of a challenge than I thought it would be!

I'm not reprinting the recipe here this month, since I did follow it exactly (by metric weights), using the cocoa powder in the meringue and almond extract in the frosting. You can find the recipe here at the Daring Kitchen, as well as the blogroll guide to so many Sans Rival cakes your head will spin.

Tomorrow is a new month and a new challenge, and I'd be lying if I said that I don't get a little too excited on the eve of each new reveal. What will I learn next? Stay tuned.

sans rival cake

Sourdoughizing: Applesauce Cake

It's actually been a long time since I've made dessert with my sourdough starter. It used to be, that I felt so guilty about my excesses of starter that I was attempting to put it in everything. But, that was before the perfection of sourdough pancakes. Now, most mornings the Kiddo tiptoes into the kitchen moments after waking and asks, "Is the starter good?" If I've fed it the day before, which oftentimes I have, then I say yes - and he immediately goes to the closet to grab his footstool to help me mix up pancakes. 100% sourdough starter pancakes take less time to mix than time to heat the pan, and I couldn't be more thankful that my picky child loves them as much as I do.

Now that Fall seems finally to have arrived, the onset of apple season has me trying to use the final few jars of last years applesauce from the shelves. Yesterday I couldn't help but wonder if fermenting sourdough starter with a pint of applesauce and flour would produce an even better version of the Spanish Bar Cake that I told you all about last year. I would say that this is the finest sourdough cake I've made to date, and no one would know any different that it is in fact healthier for you due to the long fermentation time. (We'll just ignore the sugar content, ok?) This cake is so apple-y, you would swear you added fresh and not canned sauce, and the cake is so moist you would swear it had a pound of butter in it. But this is oil cake friends, and coconut oil is my miracle oil of choice for producing stellar results in baked goods. If you have a cupful of 100% hydration starter in need of using, give it a try. You will then bask in the chill of Fall with ample apple sustenance to carry you through a brisk day.


100% hydration starter is sourdough starter that you feed equal amounts of flour and water. I keep my starter well fed, since I am a habitual baker, but if you keep yours in the fridge, I'd recommend giving it a feeding or two before baking with it. I let my cake ferment for about 8 hours before continuing, but you probably would have a bit of play on either side of that time frame. If you mixed it after supper, you could easily continue with the baking after breakfast - or if you allow a few minutes in the morning, you could bake it in the evening as I did.

Sourdough Applesauce Cake (adapted from this Spanish Bar Cake I posted last year)
1 9x13 cake

For the ferment:
  • 1 c. 100% hydration starter
  • 1 pint applesauce (about 2 c.)
  • 2 1/4 c. AP flour
To continue the cake:
  • 2 c. sugar
  • scant 1/2 c. coconut oil, melted and cooled slightly (or same amount of any cooking oil)
  • 2 eggs
  • 1/4 t. baking powder
  • 1 1/2 t. baking soda
  • 3/4 t. cinnamon (I use Cassia)
  • 1/2 t. ground cloves
  • 1/2 t. ground allspice
  • pinch salt
  • 1 c. raisins, optional
  • 1/2 chopped walnuts, optional
Combine the starter and applesauce in a large bowl and mix well. Add the flour, stir well to mix, cover and leave at room temperature to ferment at least 7 hours before continuing.

When ready to bake, preheat the oven to 350 and butter a 9x13 pan.

Combine the remaining ingredients, except the raisins and walnuts if using, and mix well. Add to the fermented applesauce mixture, which should have risen considerably. Mix well by hand with a sturdy wooden spoon or a dough whisk until well blended. Stir in optional raisins and walnuts and stir just enough to disperse in the batter.

Pour into the prepared pan, and bake for 35-45 minutes until brown and a tester comes out clean from the center. Cool completely before frosting with maple cream cheese frosting if desired.


I will likely keep playing with this recipe. It's really one of my favorite things, since it is so deliciously reminiscent of Fall, but it also because it reminds me of my Gram. It is as good with the morning coffee as it is with a scoop of vanilla ice cream in the evening. Even die-hard chocolate cake fans like this simple spice cake, and being successfully sourdoughized makes me more happy than I can relate. Does this mean that cake season is upon me? I think so. I'd better go brew another pot of coffee, since it looks like rain for the next few days...


This post has been Yeastspotted.

Daring Baker Challenge July 2011: Fraisier.

Jana of Cherry Tea Cakes was our July Daring Bakers’ host and she challenges us to make Fresh Frasiers inspired by recipes written by Elisabeth M. Prueitt and Chad Robertson in the beautiful cookbook Tartine.


I was excited for this challenge because I had a cause to share my dessert. If I'm honest, the Daring Baker Challenges are starting to wear on me if only because I don't know enough people to share them with. On occasions like last month's baklava, I had no trouble polishing up most of the dessert myself in a full week's time, but this month's choice of fraisier is not what I'd call a "good keeper". Depending on next month's challenge choice, I may put a declaration on my Facebook page for any Milwaukee area readers to come share the dessert, like a pie social for the 21st century. If that sounds right up your alley, keep an eye out!

I had never heard of a fraisier before. Essentially, it is sponge cake soaked with simple syrup, layered with fruit and a gelatinized pastry cream. It was supposed to be topped with a final layer of rolled almond paste, but I spread a thin layer of orange spiked whipped cream instead.

My whole flavor scheme this month was really inspired by the success of my strawberry guajillo jam. Just after making it earlier in the week, I made a thin sauce of strawberry, guajillo peppers, and a touch of cayenne powder. Then I flavored the other components along the way with little whispers of my orange liqueur. The finished dessert was light, and not at all too sweet, the perfect thing for a hot summer evening spent with friends.


The sauce wasn't a true simple syrup, but did sink into the layers pretty well and lent that little bit of heat that I was looking for. I also brought along a little bottle to use on top for those who wanted a little more strawberry heat. I think it would also be an excellent component to drinks, to drizzle on ice cream (basil ice cream perhaps?), to add to milk and stir - enjoying far more than you did as an 8-year-old pigtailed girl slurping slowly (quickly?) out of a Nesquik Rabbit cup...

Stawberry Guajillo Cayenne "Sauce"
  • 3/4 c. crushed strawberries
  • scant 3/4 c. raw sugar
  • 1 dried guajillo pepper, stemmed and finely chopped (I used the seeds as well)
  • 1/4 - 1/2 t. cayenne pepper powder (to taste)
Combine strawberries, sugar and guajillo pepper, and let sit at room temperature for 6-8 hours (I did this in a non-reactive pot seen above, then used the same pot to bring it up to a boil). Bring the mixture to a boil, let simmer one minute, then remove from heat. Transfer to a blender and blend until completely smooth. Pass it through a fine sieve, saving any pulp to use as jam. Add cayenne to taste.


unbaked, the batter reached the top of the tin...

When I first read over the recipes for the challenge, two things caught my eye straight away. The first were the implicit instruction that this dessert should be a free-standing cake and not a trifle. The second was that the pastry cream recipe had only a single egg.

The sponge cake, a true chiffon, was supposed to be baked in an ungreased 8 inch springform tin, which I dutifully did after confirming several times that it was an 8 inch pan. I figured if the cake stuck miserably and I would break instruction and just make a trifle since judging from the batter I could tell the cake was delicious. The chiffon cake needs no pan greasing because the batter needs to "climb" the sides. Once completely cool, a knife run between the cake and the sides of the pan breaks the seal, and the cake pops out. Even though the cake mushroomed out over the top of the pan, once cooled it did remove easily. I was quickly able to remove the domed top with a serrated knife.

(There was no height on the pan size, and since my pan was 2 1/2 inches high, I can only assume that the cake tin size should be taller or that the cake should be baked in a 9 inch tin and be slightly less high when finished. Next time I make this cake, I will either use a taller 8 inch springform, or maybe 2 8 inch cake pans and divide the batter. To make a quicker version, I'd also be unopposed to making it as a sheet pan cake.)

I used the metric weigh measurements, and frozen egg whites. I also found (probably due to the height of the cake) that my cake baked almost 20 minutes longer that the suggested baking time. I covered the top lightly with aluminum foil for the last 20 minutes so that the top didn't continue browning and it baked perfectly. Just make sure a long skewer inserted into the center of the cake comes out clean. The only other addition I made to the recipe was to add the zest of one orange, and substitute 2 t. of orange liqueur for the vanilla extract.

Chiffon Cake (Elisabeth M. Prueitt and Chad Robertson, Tartine cookbook via The Daring Kitchen)
  • 1 cup + 2 tablespoons (270 ml) (5½ oz/155 gm) all-purpose flour
  • 1 teaspoon (5 ml) (4 gm) baking powder
  • 3/4 cups (180 ml) (6 oz /170 gm) sugar
  • 1/2 teaspoon (2½ ml) (1½ gm) salt, preferably kosher
  • 1/4 cup (2 fl oz/60 ml) vegetable oil
  • 3 large egg yolks
  • ⅓ cup + 1 tablespoon (3.17 fl oz/95 ml) water
  • 2 t. orange liqueur
  • zest of one orange, grated
  • 5 large egg whites
  • ¼ teaspoon (1¼ ml) (1 gm) cream of tartar
Preheat the oven to 325°F (160°C/gas mark 3). Line the bottom of an 8-inch (20 cm) spring form pan with parchment paper, and do not grease the sides of the pan.

In a large mixing bowl, stir together the flour and baking powder. Add in all but 3 tablespoons (45 ml.) of sugar, and all of the salt. Stir to combine.

In a small bowl combine the oil, egg yolks, water, vanilla and zest. Whisk thoroughly. Combine with the dry ingredients and mix thoroughly for about one minute, or until very smooth.

Put the egg whites into a stand mixer, and beat on medium speed using a whisk attachment on a medium speed, until frothy. Add cream of tartar and beat on a medium speed until the whites hold soft peaks. Slowly add the remaining sugar and beat on a medium-high speed until the whites hold firm and form shiny peaks. Using a grease free rubber spatula, scoop about ⅓ of the whites into the yolk mixture and fold in gently. Gently fold in the remaining whites just until combined.

Pour the batter into the prepared pan. Bake for 45 to 55 minutes or until toothpick inserted into the center comes out clean. Removed the cake from the oven and allow to cool in the pan on a wire rack.

To unmold, run a knife around the sides to loosen the cake from the pan and remove the spring form sides. Invert the cake and peel off the parchment paper. Refrigerate for up to four days.


mushroom?

My next battle was the pastry cream filling, which I made when the chiffon cake was cooling. I have never seen a recipe for a pastry cream that has a single whole egg in it. I suspect I didn't cook it long enough, and it never did set past the "slightly beaten whipped cream" stage. I saved it to make into ice cream, and made a second, more reliable batch of Dorie Greenspan's pastry cream which uses 6 egg yolks. (I froze the remaining egg whites, (6, plus the 3 from the earlier cake) and I'm well on my way to making an angel food cake!) Because I made Dorie's recipe for the pastry cream, I had to approximate the amount to mix with the gelatinized whipped cream to make the filling as written. I just eyeballed it, but it worked well and was fairly stable when assembled. You can find the pastry cream recipe on The Daring Kitchen website, but I made this version:

Dorie Greenspan's Pastry Cream (plus gelatinized whipped cream for Frasier Filling from Elisabeth M. Prueitt tand Chad Robertson, Tartine cookbook via The Daring Kitchen)

for the Pastry Cream:

  • 2 c. milk (Dorie says whole milk, I used 2 %)
  • 6 large egg yolks
  • 1/2 c. sugar
  • 1/3 c. cornstarch, sifted
  • 2 t. orange liqueur (originally 1 1/2 t. vanilla)
  • 3 1/2 T. unsalted butter at room temperature, cut into small pieces
Bring milk to a boil in a small saucepan.

Meanwhile in a heavy-bottomed saucepan, whisk egg yolks with sugar and cornstarch until thick, and lightened yellow in color. When still whisking, slowly add about 1/4 c. of the hot milk to temper. While continuing to whisk, add in the rest of the hot milk.

Put the pan over medium heat and whisk "constantly and thoroughly", bring the mixture to boiling. Boil for 1-2 minutes, whisking all the while, until thick. Remove the pan from heat.

Whisk in orange liqueur, and let cool for 4 minutes. Whisk in small bits of butter, stirring until they are fully incorporated and pastry cream is smooth.

Transfer to a clean, glass bowl and press a piece of plastic wrap on the surface to prevent a skin from forming. Transfer to the fridge until chilled. (Finished pastry cream will last 3 days.)

to make the Pastry Cream into Fraisier Filling:
(from the source listed above)
  • 3/4 teaspoon (3¾ ml) (4 gm) gelatin
  • 1/2 tablespoon (7½ ml) water
  • 1 cup (8 fl oz/250 ml) heavy cream
In a small dish, sprinkle the gelatin over the water and let stand for a few minutes to soften.

Put two inches (55 mm) of water into a small sauce pan and bring to a simmer over a medium heat.

Measure 1/4 cup (2 oz/60 ml) of the chilled pastry cream into a small stainless steel bowl that will sit across the sauce pan with the simmering water, without touching the water. Heat the pastry cream until it is 120 F (48.8 C). Add the gelatin and whisk until smooth.

Remove from the water bath, and whisk the remaining cold pastry cream in to incorporate in two batches (because I made another recipe for the pastry cream, I approximated the amount of pastry cream to use, about 2/3 of the whole recipe of Dorie's).

In a stand mixer, fitted with the whisk attachment (I used a hand mixer to blend the whipping cream since is was a small amount), whip the cream until it holds medium-stiff peaks. Immediately fold the whipped cream into the pastry cream with a rubber spatula. Refrigerate until fully chilled.


To Assemble:

Since the components can be made over the course of a day or two, the cake is actually easy to assemble, the sponge is a dream to cut hardly losing any crumbs at all. Line the sides, but not the bottom of the 8 inch springform pan with plastic wrap. The easiest way I found to do that was to fit the bottom on top of the wrap, then cut off the excess from underneath. I used tape to fix the bottom of the pan to a glass serving platter.

Place one half of the sponge into the bottom of the pan, and brush heavily with the syrup (sauce). Fit the strawberries decoratively around the sides of the pan. Help keep them in place by piping the pastry cream in around them, and then piping a thin layer of pastry cream across the bottom. Smooth, and fill with a layer of sliced strawberry and then top with the remaining pastry cream filling. (This should bring you to the top of the springform pan.) Top with the remaining sponge cake layer, and brush heavily with syrup (sauce). See pictures below.

Just before leaving with my cake, I whipped another half cup of heavy cream with just a tablespoon of confectioner's sugar and 2 t. more orange liqueur. I spread it across the top in a thin layer and garnished with a strawberry. I cut off additional plastic wrap from the top of the springform pan, so all I'd have to do to unmold it is open the springform and peel away the sides. Even though my layers were not perfectly even, the cake was neat in appearance and stayed together well. I refrigerated it as recommended, at least 4 hours before transporting it. It cut much easier than I expected, and the slices held their shape.


Even though my finished recipe wasn't quite as pretty as our host's, I was still happy with the result. It really is an elegant cake for Summer, which could be easily adapted to any fruit and liqueur combination. I look forward to having an excuse to make it again! Even though it seems a touch time consuming, the work can be split over a day or two and the finished cake assembly time is nominal - a half hour at best.

Thank you to Jana for an interesting challenge!


**Note to Self:

I did make the failed pastry cream and the leftover Dorie Greenspan pastry cream into strawberry ice cream. I blended the pastry creams with a cup of yogurt and 1/4 c. of leftover strawberry jam/syrup runover in a blender and got it nice and cold. It tasted exactly like frozen strawberry cheesecake, I think because the yogurt added a bit of a sour tang. I'd make it again, actually - and definitely won't be too sad if I ever have failed pastry cream again.

Daring Baker Challenge March 2011: Yeasted Meringue Coffee Cake

The March 2011 Daring Baker’s Challenge was hosted by Ria of Ria’s Collection and Jamie of Life’s a Feast. Ria and Jamie challenged The Daring Bakers to bake a yeasted Meringue Coffee Cake.


I am no stranger to coffee cake. In fact, I'm no stranger to poppy seed filled coffee cake since it probably ranks as my favorite dessert of all time. So, when I saw the challenge this month, I knew immediately I would make a version of poppy seed coffee cake - only I would challenge myself to make poppy seed filling from scratch as well.


The recipe that this month's challenge was based on was found by Jamie in her Dad's recipe collection. It is fairly similar to the yeasted dough that my family uses to make coffee cakes, just slight variations in quantities of milk and eggs, and the use of butter instead of oil. I was a tad overzealous in my filling - and my result was maybe not quite as photogenic as it could have been, but it sure tasted great. It's possible that I will never buy a can of poppy seed filling ever again.


In my small amount of research on poppy seed fillings, I found that most eastern European countries have their own version of bread or rolls (or cookies) made with a filling of these ancient seeds, as do far east countries like India and Iran. It's comforting to know that I am not alone in my passion for the poppy seed. My Croatian friend, Sasa, tried the finished bread and said that her Grandmother made something similar just without the almond. That is something that I just can't help adding; I prefer heavy doses of almond extract with my poppy seeds.

I visited the Spice House twice for poppy seeds this month, once earlier when I got some fresh seeds to try sprouting, and again when I discovered I needed a full half pound to make paste. Poppy seeds can be hard to grind, and the Spice House actually has an antique mill they use to grind your poppy seed to order if you desire. (Only the downtown location has the mill, and they recommend calling ahead since it is a slow process. The ground seeds are also available online.) I decided to get the whole seeds, and in a no-guts-no-glory fashion dumped them straight into my Vita-Mix to see if I could do it myself. I could, and in about 30 seconds, I had pure poppy seed paste.


homemade poppy seed filling.

I promise you that if you can't get enough poppy seed, this is the filling for you. It's pure poppy: slightly bitter, slightly nutty, and with the addition of almond extract, dare I say perfect.

Poppy Seed Filling (adapted slightly from Hepzibah)

(my yield was 1 pint plus a generous cup)
  • 8 oz. poppy seeds
  • 1 c. milk
  • 1/4 c. butter
  • 3/4 c. white sugar (I used sucanat)
  • 1 pinch salt
  • 2 eggs, beaten
  • 2 t. almond extract
First, grind the poppy seeds (processing them in the Vita-Mix for under a minute on variable speed 5 did the trick) in a mill or coffee grinder.

Combine the milk, butter, and sugar in a small saucepan. Cook on low heat, stirring often, until the sugar dissolves. Gradually pour a little hot milk into the beaten eggs, whisking constantly. Return the egg and milk mixture to the saucepan.

Continue to cook, stirring constantly, until the mixture begins to thicken and coats the back of a metal spoon. (Custard should coat a spoon, and a should not run into a line drawn by your finger.) Add the poppy seeds and stir well to blend.

Remove from heat and add almond extract. Cool to room temperature before using or storing in the refrigerator for up to five days. I assume that it would freeze well, which I will try after I make some into Hammentashen.


When it came time to fill the coffee cake, I decided that the filling wasn't as much like the Solo Poppy Seed Filling that I was accustomed to. It tasted great, but lacked the whole poppy seeds. (I have to say, I was shocked that the Vita-Mix ground those minute things up so well!) I decided to add another 1/2 t. of almond extract and a heaping 2 tablespoons of whole seeds to the paste along with another little pinch of salt. Then, I was satisfied with it's toothsomeness. Next time, I may choose to grind only half of the poppy seeds for the filling.

My family's coffee cake does not have a layer of meringue in the filling, and I liked this addition a lot. If I can ever break away from poppy seed filling, I would like to try this method again using some of the suggested fillings from our Daring Baker hosts: Ria's was an Indian version with cashews, chocolate and garam masala and Jamie's was chocolate with cinnamon sugar and walnuts or pecans.


I used a fork to spread the filling on top of the meringue, but it ended up mixing together.


I made a half recipe of the coffee cake dough (enough for one large coffee cake), and used 2 egg whites for the filling. I also cut the other meringue ingredients in half, and everything turned out fine. The only problem I ran into was using too much filling.

Meringue Filling for Coffee Cake (Daring Baker Hosts)
  • 3 large egg whites at room temperature
  • 1/4 t. salt
  • 1/2 t. vanilla
  • 1/2 c. (110 g / 4 oz.) sugar (I used sucanat)
In a medium mixing bowl, beat the egg whites with the salt, first on low speed for 30 seconds, then increase to high and continue beating until foamy and opaque.

Add the vanilla, and then start adding the sugar, a little at a time as you beat, until very stiff, glossy peaks form.


The finished cake bakes at 350 for about a half hour, until it is golden brown. You can, of course, shape it any way you like. Had I not filled it so full, I would have liked to twist the edges over like this. It makes a pretty pinwheel design. I think part of the reason I loved this cake was that it wasn't so sweet. When the cake was completely cooled, I drizzled it with simple icing made with confectioner's sugar, a bit more almond extract - since I can't help myself - and a touch of milk.

It really is a bread-like cake that pairs well with coffee: so mission accomplished! It also bears noting that most fortified doughs lose a lot of their charm by the second day. This cake stayed a bit "fresher" I felt, and was still soft when covered overnight with aluminum foil. It was also on the less-sweet side of dessertdom, I think in part since I used sucanat for the first time. Sucanat is an unrefined evaporated sugar cane juice that is granulated like sugar. It tastes less sweet than sugar to me, and I liked the way it worked with this recipe. Who knows, maybe I'll try this recipe again using some sourdough starter for the leavener, transforming it completely into a whole food.


You can find the dough recipe along with all of the variations for yeasted meringue coffee cake at the Daring Kitchen website. Also, be sure to take a look at Ria's and Jamie's sites - they are both beautiful and filled with inspiration. Thanks to them both for a great challenge!


The little bites don't count, right?