Alton Brown

Chocolate Syrup: Corn Syrup and Plastic-Free...

Friday night before bed, I clicked on the Food Network for a few minutes while I enjoyed the last few bites of my February Daring Baker's Challenge dessert. I actually wanted to veg out in front of a movie, but don't you know 50 channels and a bit of free time (I was trying to rest my hands from knitting...) and not one thing to watch. Fortunately, Alton's episode "The Art of Darkness" was airing. Though I've seen it before, I love cocoa powder, and didn't mind my refresher course. I know Alton uses a tablespoon or so of corn syrup in many boiling sugar recipes, since it prevents crystallization of the sugar... but when he was mixing a saucier of molten black chocolate syrup, a seed of inspiration was planted.

You can see Alton stirring the goods around minute 3:15 on the YouTube video above. I drifted off to sleep thinking about that thick syrup, and about just how long it's been since I've had chocolate syrup. I didn't really even plan on making it, but the next morning, it was complete by 9:30. I can't say that I'm sorry either.

I had forgotten about the pure bliss of chocolate syrup, and probably have overindulged in the 24 hours since its creation, trying it in many ways. My coffee was first off, only since it was still hot and right in front of me. I don't like much in my coffee, just a bit of cream in the first cup, and black for the second, and certainly no sweetener. But chocolate syrup in coffee? Sasa, you're on to something... I could almost make a habit this! I ended my day with a scoop of vanilla ice cream, chocolate syrup and some coarsely chopped peanuts. This morning, I had it mixed into my homemade yogurt, an even better version of the Wallaby Organic chocolate yogurt that I splurge on once in a while.

I thought the corn syrup was probably not a requisite ingredient, especially if a few pesky sugar crystals were all it was going to prevent. I perused the Google results for recipes and found basically Alton's recipe with corn-syrup omission at Fake Plastic Fish. The website is dedicated to the reduction of plastics in everyday life, something I completely agree with. While perusing it for awhile, I'm reminded of how shocking the widespread use of plastic truly is.

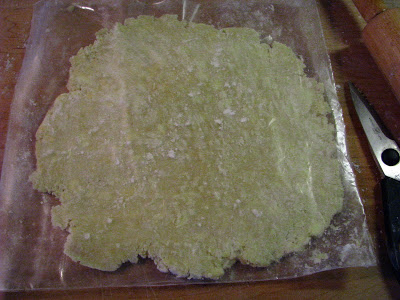
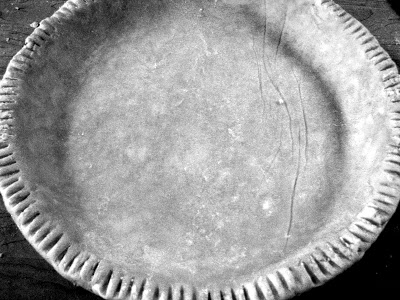
With all of this talk about BPA and toxic effects from heating foods in "microwaveable-safe" plastic containers, I genuinely feel no panic. Most of our canned or tinned food, is home canned in glass and I store almost everything in glass. I even use the plastic wrap sparingly. Granted, for some uses like wrapping up a pastry dough, I can't really find a suitable substitute, but more and more I find myself going plastic free as it relates (especially) to food storage. I have a sensitive nose, and just the smell of plastic bags turns me off, not to mention the taste I swear transfers to the foods stored in them.

OK, I'm off my soap box now...

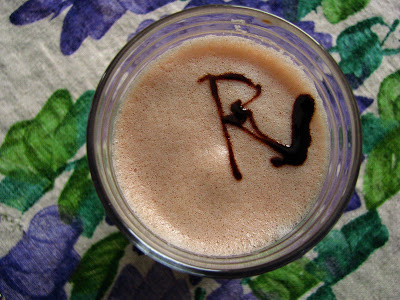
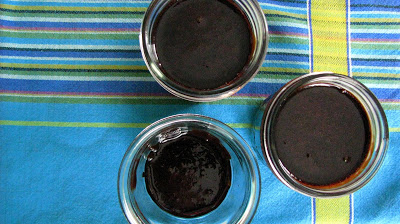
I sterilized the jars by boiling them in water for 10 minutes and soon after was rewarded with "The Art of Darkness" in my very own kitchen: and yet another thing for the list of things I'll never buy again.

Homemade Chocolate Syrup adapted from Alton Brown and Fake Plastic Fish

  • 1 c. granulated sugar
  • 1 c. dark brown sugar
  • 1/4 t. (a pinch) Kosher salt
  • 1 c. cocoa powder (Organic Dutch process)
  • 1 c. water
  • 1 T. vanilla extract

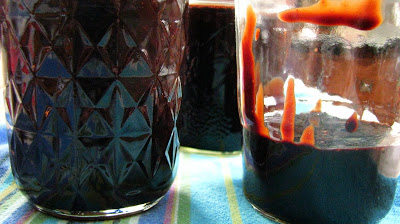
In a large saucepan, combine sugars, salt and cocoa and whisk to combine. Add water, and heat over medium heat until mixture comes to a boil, stirring constantly (to avoid boiling over). Boil several minutes, until the mixture thickens - and remember that it will thicken more as it cools. Remove from heat, stir in vanilla extract, and store in glass jars. Makes 2 8 oz. jars, with just enough left over to take you through a day of experimenting with the ultimate "Art of Darkness".

My syrup cooled into a supreme and inky thickness, and I got the Boy-O seal of approval in a lunchtime chocolate milk. Yes, it has a boatload of sugar, but yes, it is worth it. You can comfort yourself by using all Organic ingredients if you like, and only needing a teaspoon or so for a 8 oz. glass of milk since it's so rich. That was all it took for me, anyway.

Seedy Crisps and Cheese (Balls), or In Which I am the only person in America not making Super Bowl foods.

I guess you could say that I really dislike most sports. I never enjoyed playing organized sports, grew up in a family who never paid any mind to what sport was in season, and generally was never interested at all in using my free time to watch them either in person or on television. I embarrassed myself terribly each fall Friday when guessing the high school football team's final score in one of the Coach-taught classes I took, since my number combinations were never actual possibilities. I forget why I even took part in this, I think a reward was involved for the winner.

My view of sports changed somewhat when I met my Husband. I watched more baseball in the summer of 2004 than I did in my entire life to date, and to tell the truth, it did seep into my blood a bit. But baseball is not where the sporting events my Husband follows ends - in fact it is just one of many sports that interest him. If I made a list of sports I could watch that he does enjoy in order of my relative enjoyment (and I'll limit it to 10 items here...) it would be as follows (number 10 being most tolerable):

10. Baseball
9. Wrestling
8. Boxing
7. Hockey
6. Soccer
5. Golf
4. Basketball
3. Tennis
2. Mixed Martial Arts (MMA or UFC)
1. Football

I'm not sure why I hate football more than any other American alive, but I think it has something to do with the fact that I can not understand the rules at all. Can't and don't want to, if I am being honest. This past week or so, I've read a lot about what food bloggers will be having for their Super Bowl parties, or have had at parties in the past. I now have a whopping 5 Super Bowl parties under my belt - and kind of feel bad that I can't really identify to the most American of sports and food spectacles.

As a kid, Super Bowl Sunday was just another Sunday to us. I honestly do not recall my Dad or brothers ever being interested it it. And it wasn't until 1999, that I asked R1's husband and he tried explaining the rules to me a little. It was usually on Packer-football Sundays that she and I would either go for a walk or go shopping in pleasantly dead stores instead of me practicing how to understand a spectator sport. (If I am being fully honest, I will say that in 2001, I did watch the entire Super Bowl for the first time in my apartment in Wilton, armed with some now-forgotten knowledge. I was more interested in the commercials, and I think my little brother came and brought a bag of chips with him - so that was kind of a party...)

When I checked my computer this morning, George Gaston, of A nod is as good as a wink to a blind horse, had commented on one of my posts. I sometimes don't get to reading as many other food blogs as I'd like, just since I don't spend too large a portion of time in front of the computer. I clicked over to see what he was up to and read the most wonderful description of his love for spreadable cheese balls and parties when he was a child. He was chided for his love of the Cheese Ball, but he came up with a recipe for one that I knew I had to make. Since I had a free day today with dinner already complete (and a Super Bowl party to attend tomorrow with nothing to bring), I thought I'd give it a go.

But in my mental preparations, I knew that I couldn't make a Cheese Ball without first having some kind of cracker to spread it on, so this is where I began:

Alton Brown's Seedy Crisps. I love this recipe, and that it really isn't a messy dough to work with. It's fairly forgiving, has a great flavor, and even keeps well stored in glass for a couple of weeks. Whenever I think of crackers, I think of Alton, since he "doesn't trust his cracker making to elves in trees" and insists in weight measurements for accuracy in baking. I printed out his recipe from Food Network, though it was also featured in one of his books, and usually weigh the water but not the dry ingredients with fine results. You can roll them with a pasta roller as I did, or by hand. Your thickness directly determines the cooking times, so watch carefully.

Seedy Crisps (adapted (but really only the weights) from Alton Brown)

  • 5 oz. whole wheat flour (I use 1 c.)
  • 4 3/4 oz. AP flour (I use 1 c.)
  • 1/3 c. poppy seeds
  • 1/3 c. sesame seeds
  • 1 1/2 t. table salt (they are a bit salty, you could use 1 t. and be just fine I think)
  • 1 1/2 t. baking powder
  • 3 T. olive oil
  • 6 1/2 fl. oz. water (this is less than a cup, but more than 3/4 c.)

Mix all of the dry ingredients in a medium bowl and then add the olive oil. Stir with a spatula until well mixed. Then add water, and stir/mix/fold until a dough appears. Turn it out onto a lightly floured surface and knead it 4 or 5 times until it feels like a proper dough. Try not to overwork it. Cover with a towel and let it rest 15 minutes.

Heat oven to 450 degrees, and use the center and above center positions in your oven for the racks. Cut dough into 8 pieces (like a pizza, is the way I do it), and roll with the pasta machine to the thinnest setting without tearing the dough (5 on my Pasta Queen), or roll by hand as thin or thick as you like. (For thin crackers, aim for 1/16 of an inch thick, and for thick 1/8 of an inch.

Alton likes to transfer the large sheet of dough to a parchment lined sheet and bake it whole, breaking it apart when it cools. I did a couple that way, but then cut the rest into strips with a pizza cutter and transferred them to parchment lined sheets with a spatula. It's slightly more work, but less mess in the long run.

Thin crackers will bake about 4 minutes on the first side, then 2-3 more on the other (but I did mine 5 minutes, then flipped and let them bake another 3-4 until they were nice and brown). Thick crackers (according to the recipe) will bake about 6 minutes on the first side, then 4-6 minutes on the second.


The large sheets looked like rustic sheet music, and when I broke off a piece I ate it immediately with a spreading of whipped Novia Scotia blueberry honey that my Parents brought me from their last vacation. I though if I had some prosciutto with the honey, that would have been really perfect. Then I thought, an aged Swiss cheese and that spicy mustard would be really perfect, too. I imagined the possibilities as I took advantage of my hot oven to bake my sweet potato for George's recipe. It was a huge sweet potato, and took almost an hour.

Wait a minute, a Cheese Ball and I'm baking a sweet potato? Go ahead and click over now, since I know you are so curious, and I'll wait for you.

You can see why I was so intrigued by this recipe. It was actually mostly good for you, and so pleasantly absent of that port wine veining, that you know has got to be a FD&C color of some sort. I hardly altered it, too! I did use more jalapenos, and actually didn't add the nuts because I forgot, but that was it. Then, I just left it "dip shaped" instead of classically "Cheese Ball shaped", since I didn't want to fuss.

I made a half recipe since I thought I'd be snacking on it for a week by myself. I even had mental planning to make some bagels for the other 4 oz. of cream cheese, and even the Cheese Ball spread that I knew I would like. Then, I asked my Husband if he wanted to try some "dip", since I knew he already liked the crackers. Success! Am I going to divulge the secret and orange ingredient? Not unless he asks. Now I'm *almost* wishing I was having a Super Bowl party to serve it for.

Please take the time to check out the many amazing recipes and great writing on George's site. you may find a few surprises that you are now glad you won't live without! I know I'm going to be keeping closer tabs on it, too.

Slow Cooked: The Art of Crockpottery

I got my first CrockPot for Christmas this year. Any slow cooking prior to yesterday, I've done in my trusty (and still favorite) LeCruset French oven. I have been interested in playing around with "crockpottery", however, and did find the perfect initiation for the inaugural use of this small kitchen electric: pulled pork.

I know I keep mentioning that huge amount of frozen beef and pork in my basement, and I think the reasoning is two-fold. First, that I am still amazed that it is actually there and I alone have to decide what to do with it all. Second, is that my nicely wrapped cuts are fairly vague when it comes to what they are. I took out an about 2 lb. "pork roast", and left it to thaw under refrigeration for several days. When I unwrapped it yesterday morning (not the optimum time for looking at raw meat in my book... fortunately, I at least had my coffee in before beginning), I confess that I have no earthly idea what kind of cut I was looking at. It had a small amount of fat, mostly on the edges, and a good size bone running through it. You can view it on the left of the below photo.

From what I know of slow cooking meat, the first step is always to brown it first on all sides. I had quite an amount of other food to cook yesterday, so I neglected this intentionally. I did, however, slather the entire roast in the remaining spice rub from the tofu last weekend. After a good 8 hours on low, I could have sworn that I did sear it, since it had such a nice spice crust.

The recipe for the sauce was ridiculously easy, just mix up everything in the slow cooker pottery, and lay the meat on top. I got this recipe from my Brother and Sister-in-Law, which was originally from Good Housekeeping. I made it my own by adding some hoisin sauce and garlic cloves to the mix, and of course by using that spice rub. I used half of all the ingredients for my two pound roast, but use the full amounts for the suggested 4 lb.

Slow-Cooked Pulled Pork

  • 1 medium onion, frenched. (I love this method of slicing onions, and use it frequently after learning about it from Alton Brown. This post from Simply Recipes explains it well, and also has a nice looking caramelized onion quiche for you to practice on!)
  • 1/2 c. ketchup
  • 1/3 c. cider vinegar
  • 1/4 c. hoisin sauce (optional)
  • 1/4 c. dark brown sugar
  • 1/4 c. tomato paste
  • 2 T. sweet paprika
  • 2 T. Worcestershire sauce
  • 2 T. yellow mustard
  • 2 to 4 peeled garlic cloves, each cut into 4 pieces
  • 4 lb. boneless pork shoulder blade roast, cut into 4 pieces (Obviously, I used a two pound roast with a bone, and it was just fine... It also fit perfectly into my oval CrockPot, so I didn't need to cut it!)
  • 1 1/2 t. each salt and pepper - which you may omit if using the spice rub like I did...

This recipe was written for a 4 1/2 - 6 quart slow cooker, and should yield at least 8 cups of pulled pork. Stir everything in the slow-cooker pot until combined, add pork and turn to coat.

Cook on low setting for 8-10 hours. At the 8 hour mark, I turned it off, and let the meat cool to reasonable handling temperature. I shredded the now amazingly tender meat with two forks, judiciously leaving out conspicuous bits of fat, and added it back to the pot. I mashed up any visible garlic pieces, too. You could boil down the juices a bit to reduce if it looks like it will be too watery, but I found that it was the perfect amount for the pork I used. Also, since I knew I wouldn't be eating it for a day, I figured it would marinate and absorb a bit as it sat.

I'm lucky that if for some reason I don't feel like making bread or rolls, we have a great Italian bakery moments from my house. Canfora Bakery has the best "Dutchie Crust" rolls, that even if I tried I doubt I'd be able to mimic. I also love the camaraderie that exists when I stop in with the rest of the after-church-traffic to take a ticket and wait in line... They always have a pot of coffee on, and samples of coffee cake or other baked goods for those who are waiting patiently without a 3 year old.

Back in my airport-working days, I'd see grocery bags of hard rolls being consumed with butter and cups of coffee on breaks. Since we had a number of ex-factory workers on our early A.M. shifts, I was schooled that this was a typical breakfast for the over 50 set. If you want the true Milwaukee experience of Coffee and Hard Rolls, these are the ones to go and seek out.

When I tasted my pork today at lunch, I couldn't help thinking something was missing. A quick addition of some of my candied jalapenos solved that. I even drizzled some of the vinegary, sweet-hot canning liquid on there as well. Perfection achieved.

Fields of Meatballs and Flax Raisin Muffins

I love that my life now is unpredictable enough that at the end of the day, I am even surprised at what I've made. I had no idea what I'd make when I woke up this morning, but I now know, and have an overwhelmingly happy sense of accomplishment.

Boy-O and I decided to go to the Discovery World Museum for the first half of the day, since we had the luxury of a vehicle at our disposal. When we got home, just after Noon, I figured I should plan something for supper. Now that I'm fortunate to have the deep freeze full of brick-hard meats at my disposal, I took out a pound of ground beef. I immediately heard echos of Alton, since there are, according to him, only 2 safe methods of food defrost methods for the modern cook: A.) Under Refrigeration and B.) Immersed in Cold Water. I opted for method B., and began my cold water soak around 12:30. I figured I'd add a little bit of pork to the meat mix, and added 3 of the pork "breakfast" sausage links to the cold bath (in a separate plastic bag, of course) closer to 4 p.m.

Meanwhile, I sauteed the Holy Grail of Italian meatball ingredients - well, in my mind anyway. Onions, red and green pepper and plenty of garlic happily cooking down when I waited patiently for the meat to thaw.

Now would be a good time to mention that I absolutely love portioning things. I love my scoops, one large that I use for muffins and cupcakes, and one small that I use for meatballing and other bite sized confections such as rum balls. There is a zen-like quality to standing still and measuring, cautiously making sure that all things look equal. The methods of my madness are always rewarded in even baking as well.

I like to bake meatballs at 375 degrees f. for about 30 minutes, until they are nicely browned. I tossed them with some marinara sauce (laden with hidden vegetables for my veg challenged boys) that I had in the freezer as well, and let them simmer together when the pasta cooked. This meat is so nice and lean, I didn't even bother baking them on a wire rack.

Not bad for not knowing what would be on the table for supper tonight.

During the defrost time, I took time to peruse The Allergen-Free Baker's Handbook by Cybele Pascal, a recent library rental. I have no food allergy problems in our family, but that won't stop me from reading a cookbook devoted to helping bakers who are. Most of the recipes look amazing, and I'm thinking to either stock up on gluten-free baking supplies, or maybe trying my hand at conversion back to gluten formulas. If you click the link above, it will take you to her amazing website, packed with info and more recipes.

On second thought, an exception to that food allergy statement would be that on my birthday last September, Sasa, GOP and I had raw oysters and my upper lip started to swell after supper. I don't think I was panicking about it, but I do think it really started to swell after I was conscious of it. My friends politely didn't mention anything until I did, and then I think I may have really started to panic when they agreed that it was indeed swelling. I do like to dismiss that event, since I finally started to love oysters and can't really be bothered with the fact that I may be forever unable to eat them. I'm going to give it another 6 months, and see if I can't give them another shot. My Mother does warn me to stick close to a hospital if I should give it another go... since I suppose it could be possible that I would go into anaphylatic shock.

That said, I am always intrigued by food allergy and substitutions therefore. Since we aren't gluten intolerant here, I modified a recipe for Flax Raisin Muffins, since they had seriously small amounts of fat and sugar. My picky Boy-O will eat anything in muffin form, and it's my new plan of attack to pack as much nutrition into a single muffin as humanly possible. These have no eggs, no refined sugar and boast a whole 3/4 cup of flax meal! Not only that, they look fab and the Boy-O ate a whole one after eating his dinner of pasta and peas (the first time he's eaten non-cereal for supper in about 3 weeks!)! Imagine my excitement!

I was even more excited to see these restaurant worthy muffin tops when I pulled the tray from the oven...

Banana Flax Raisin Muffins

Adapted from their gluten-free form...

  • 1/4 c. canola oil
  • 1 c. agave nectar
  • 1 1/2 c. mashed banana (this was 4 medium size)
  • 1 1/2 t. cinnamon
  • 1/4 t. nutmeg
  • 3/4 c. flaxseed meal
  • 1 c. white whole wheat flour (I used King Arthur)
  • 1 1/2 c. AP flour
  • 1 1/2 t. baking soda
  • 1/2 t. kosher salt
  • 1 c. raisins

Preheat oven to 350 degrees f. and line a muffin pan with 12 liners.

combine canola oil and agave nectar, mixing until emulsified, about 20 seconds. You can use a stand mixer with paddle attachment as Pascal recommends, or a hand mixer as I did.

Add mashed banana, cinnamon and nutmeg and mix another 20 seconds. Then add flax meal and mix until combined.

Combine dry ingredients in a separate bowl, and add them to the wet. Mix on low until just combined, then fold in raisins by hand.

Fill the liners to the rim with batter. It's a stiff batter, but if you heap them up over the top, they turn out wonderful!

Bake in center of oven for 25-30 minutes until golden brown on top and tester comes out clean.


I am so glad I tried a recipe from this book! Not only would it be a great help to someone who actually needs the allergen advice, but the base recipes are great. I truly think that I'll make up some gluten-free flour mix and try some of these as written. You can be sure I'll let you know the results.

I suppose I would be remiss in not offering up a humongous Thank You to my Husband who is the reason I am able to stay home and get excited about such things as muffin making and bathroom cleaning. I love every second of being a Stay at Home Mami, and truly consider this the best job I've ever had... and there have been quite a few. I know he's not as apt to excitement over the little things I do, but deep down, I know he appreciates it. I appreciate that he lets me get excited over the details, and doesn't mind my food photography at meal times. I'm sure it doesn't hurt that I let him traipse around in the fields of meatballs either.

One day until Pie Day, or Thanksgiving as it is also known.

First off, these photos will not be as clear or artful as normal. It's hard to snap photos when your hands are covered in butter and flour. I am truly amazed that I've never dropped my camera thus far due to "kitchen hands", but I'm sure that now I've mentioned it, it will fall gracelessly from my grasp later this afternoon...

I decided to waiver from the Vodka Pie Crust I was planning to make for my Thanksgiving pies, and opted for the Alton Brown method since I've had nothing but success from his recipes in the past, and they used slightly less fat than the Vodka Dough. I was also in the mood for weights, and so out of the cupboard came my digital scale, and all the ingredients were assembled nice and neat in the food pro.

Check it out if you have 10 minutes:


Now, I did not use a brick of lard, mind you. I did use 2 T. of organic, non-hydrogenated shortening, and the resulting pie dough was beautiful and easy to work with. The most novel thing about this pie dough making method is that after food pro assembly, you simply toss the dough into a zipper top bag, and then gently knead it into a disk through the plastic. Mess free! I am the messiest pie dough maker ever, and nary a stray crumb catapulted from the counter during my whole process.

I mixed up the doughs yesterday, and pulled them from the icebox to roll this morning. Another amazing thing is Alton tells you to cut two sides off the zip top bag (one of my sides was the ziptop part), and then use the plastic to roll out the dough. This is genius, since I barely needed any additional flour to roll, and absolutely nothing sticks to the board.

When I got to this point, I did slice off the other two sides of the plastic bag, and then repositioned the plastic as needed. I think I've found a way to have pie more often! Usually, I stick to cake, since I do love it, often it only requires one bowl, and I can manage relative neatness while assembling.

Finished pie photos will most definitely accompany my Thanksgiving dinner post, sometime after the fete tomorrow or Friday...


But look at my work area! Not messy at all, and now I'm on to assembly of the Potato and Pumpkin Bake that Marisa at Foodinjars.com told me (and all of her readers) I had to make. Meanwhile, if you haven't made a pie yet, or just needed some encouragement to go ahead and make one, give Alton's Recipe a try. You won't be sorry, and neither will your clean kitchen.